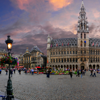
Prague Tutorial
Make this icon coloring. Involves Selective Coloring and Curves. Photoshop CS3.

to
00. Prepare your base (Sharpen, crop, etc.)
01. Duplicate your base layer and set it Screen. I put mine on 100%, but it depends on your image. If it's too bright, lower the opacity.
02. Create another layer(Ctrl+Shft+N) and pour the color #2f0c3e into it. Set that layer to Exclusion 100%.
03. Now for Selective Coloring. (Go to Layers>New Adjustment Layer>Selective Coloring
REDS: -87, +46, +64, +8
YELLOWS: 0, 0, +27, 0
GREENS: +27, +93, 0, 0
BLUES: +23, +24, +72, 0
NEUTRALS: -11, +11, +9, 0
04. Create a Brightness/Contrast Layer (Layers>New Adjustment Layer>Brightness/Contrast)
BRIGHTNESS: +2
CONTRAST: +11
05. Next make Color Balance Layer. (Layers>New Adjustment Layer>Color Balance).
MIDTONES: +4, -2, +11
HIGHLIGHTS: +8, +17, +2
06. Create a Fill Layer (Layer>New Fill Layer>Solid Color..) and fill it with #162a5e. Set it to Exclusion at 17%.
07. Go down and duplicate your base layer and drag it to the top. Set it to Luminosity 44%. The opacity can differ on how you want it or what image you're using.
08. Selective Coloring again. (Go to Layers>New Adjustment Layer>Selective Coloring)
REDS: -100, 0, +44, -25
YELLOWS: -100, -100, -100, 0
WHITES: +54, 0, 0, 0
NEUTRALS: +31, 0, +12, -19
09. Create a Curves Layer (Layers>New Adjustment Layer>Curves).
RGB: Input: 120; Output: 142
BLUE: Input: 82; Output: 75
You're done!
Some examples with similar methods.


.PSD DOWNLOAD
to
00. Prepare your base (Sharpen, crop, etc.)
01. Duplicate your base layer and set it Screen. I put mine on 100%, but it depends on your image. If it's too bright, lower the opacity.
02. Create another layer(Ctrl+Shft+N) and pour the color #2f0c3e into it. Set that layer to Exclusion 100%.
03. Now for Selective Coloring. (Go to Layers>New Adjustment Layer>Selective Coloring
REDS: -87, +46, +64, +8
YELLOWS: 0, 0, +27, 0
GREENS: +27, +93, 0, 0
BLUES: +23, +24, +72, 0
NEUTRALS: -11, +11, +9, 0
04. Create a Brightness/Contrast Layer (Layers>New Adjustment Layer>Brightness/Contrast)
BRIGHTNESS: +2
CONTRAST: +11
05. Next make Color Balance Layer. (Layers>New Adjustment Layer>Color Balance).
MIDTONES: +4, -2, +11
HIGHLIGHTS: +8, +17, +2
06. Create a Fill Layer (Layer>New Fill Layer>Solid Color..) and fill it with #162a5e. Set it to Exclusion at 17%.
07. Go down and duplicate your base layer and drag it to the top. Set it to Luminosity 44%. The opacity can differ on how you want it or what image you're using.
08. Selective Coloring again. (Go to Layers>New Adjustment Layer>Selective Coloring)
REDS: -100, 0, +44, -25
YELLOWS: -100, -100, -100, 0
WHITES: +54, 0, 0, 0
NEUTRALS: +31, 0, +12, -19
09. Create a Curves Layer (Layers>New Adjustment Layer>Curves).
RGB: Input: 120; Output: 142
BLUE: Input: 82; Output: 75
You're done!
Some examples with similar methods.
.PSD DOWNLOAD