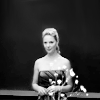
#23 Creating space guide no.1
I don't normally write tutorials, but I get asked about this a lot and I was kinda bored so...
CREATING ICONS WITH SMOOTH BACKGROUNDS
in PS CS3 (but completely translatable to lower versions.)
We'll be making this ->
from this cap.
First off, three things that I (and this tutorial) couldn't exist without:
- HQ CAPS
- THE SMUDGE TOOL
- PATIENCE AND PRACTICE
Seriously, using the smudge tool effectively is not easy unless you practice it.
When I started using it there was A LOT of head-desking and hair-pulling involved...
With caps like this one it is relatively easy cause it already has a very even background to begin with. :)
I usually start with the coloring on the original cap first and after that copy the whole thing onto a new canvas. Like this
(If you're interested in the coloring method you can download the psd here (; )
I don't re-size my cap until the very last step, so depending on the cap size I'd use a square canvas somewhere in the range of 250px-1500px.
Then I put the love of my life aka the smudge tool to use. In this case I use a soft round brush. It's perfect to create smooth, soft space.
I start to smudge the background to fill the blank space. (Normally I wouldn't to this on the original image layer but I just forgot here). Like this.
For the areas close to Dean I use a smaller brush and the solid round brush for more accuracy.
This is what I end up with. Obviously it's still pretty uneven.
I use the lighten tool (soft round brush, with 30-60% exposure) to even out the darker areas. I'm also still making some touch-ups with the smudge tool.
Now I get this. Almost finished!
I re-size the whole thing to 100px.
It looks alright, but I decide I want more negative space, so I open a new 110px canvas, drag everything on it and re-size to 100px again.
I get this.
I smudge the edges again until the layer is completely filled.
Almost there!
Now I just tweak the coloring and slightly increase the contrast.
Also, I create a new layer and use a cream-colored soft round brush to create a subtle light effect. I set it to soft light and lower the opacity until it looks natural.

Done! :)
Now I could either leave it as it is or add text, brushes, textures and so on. :)
Other examples made with this method:


This is of course not the only method to do this and I do use other ones as well, but it's definitely the one I use most frequently.
New icon post comes soon(-ish).
Enjoy!
:)
CREATING ICONS WITH SMOOTH BACKGROUNDS
in PS CS3 (but completely translatable to lower versions.)
We'll be making this ->

from this cap.
First off, three things that I (and this tutorial) couldn't exist without:
- HQ CAPS
- THE SMUDGE TOOL
- PATIENCE AND PRACTICE
Seriously, using the smudge tool effectively is not easy unless you practice it.
When I started using it there was A LOT of head-desking and hair-pulling involved...
With caps like this one it is relatively easy cause it already has a very even background to begin with. :)
I usually start with the coloring on the original cap first and after that copy the whole thing onto a new canvas. Like this
(If you're interested in the coloring method you can download the psd here (; )
I don't re-size my cap until the very last step, so depending on the cap size I'd use a square canvas somewhere in the range of 250px-1500px.
Then I put the love of my life aka the smudge tool to use. In this case I use a soft round brush. It's perfect to create smooth, soft space.
I start to smudge the background to fill the blank space. (Normally I wouldn't to this on the original image layer but I just forgot here). Like this.
For the areas close to Dean I use a smaller brush and the solid round brush for more accuracy.
This is what I end up with. Obviously it's still pretty uneven.
I use the lighten tool (soft round brush, with 30-60% exposure) to even out the darker areas. I'm also still making some touch-ups with the smudge tool.
Now I get this. Almost finished!
I re-size the whole thing to 100px.
It looks alright, but I decide I want more negative space, so I open a new 110px canvas, drag everything on it and re-size to 100px again.
I get this.
I smudge the edges again until the layer is completely filled.
Almost there!
Now I just tweak the coloring and slightly increase the contrast.
Also, I create a new layer and use a cream-colored soft round brush to create a subtle light effect. I set it to soft light and lower the opacity until it looks natural.

Done! :)
Now I could either leave it as it is or add text, brushes, textures and so on. :)
Other examples made with this method:


This is of course not the only method to do this and I do use other ones as well, but it's definitely the one I use most frequently.
New icon post comes soon(-ish).
Enjoy!
:)