(no subject)
Icon tutorial for:

Made in Photoshop CS2.
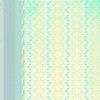
I picked a base by gender for the background.

click on your polygonnal lasso tool [make sure that "anti-alias" is selected] & make a funky selection of a base by colorfilter and paste it onto the other base.
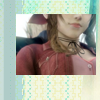
Choose your picture, crop it, prep it, size it, etc. Copy the picture onto base.
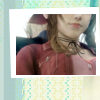
Create a new layer. Use your selection tool to make a rectangle behind the picture & fill it with white. Hit Ctrl+T & tilt it at an angle.
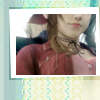
Create another layer behind the white fill with black. set to soft light and have a little of it peek out at the sides.
Pasted this light texture
[Can't remember who it's by. Tell me if you know!] and set it at screen 100%
Next, I duplicated my cropped picture of Aeris & Cloud. I desaturated the layer [Ctrl+U] and set it to soft light 100%. Make sure this is above the last light texture.

Now, I used this gradient by firaga
. I duplicated it twice and set both layers to vivid light. Made sure to position these behind my white box layer from before.

Click on your selection tool. Make another white rectangle towards the bottom of the icon. Hit ctrl+T. Tilt it a little.

New Layer. Selection tool again. Black rectangle this time. Set it to soft light and have a little of it peek out at the sides again.

Now, add a white arrow on the white box layer.

It's looking kinda boring, so I'm going to add text. I used Dr. Eve L font at 4pt in #846cb7. The text is "kiss from a rose" Added a bit of tiny text in #846cb7 as well.

Duplicated "kiss from a rose". Moved it over to the left and down a little so it would have a little bit of a glow at 24% opacity.

Finally I added this gradient
I created from copying a piece of my icon so far & set to lighten. Position it so that the corner is only over the text and you're done!

Layers should look like this. Or similar to it.

Made in Photoshop CS2.

I picked a base by gender for the background.

click on your polygonnal lasso tool [make sure that "anti-alias" is selected] & make a funky selection of a base by colorfilter and paste it onto the other base.

Choose your picture, crop it, prep it, size it, etc. Copy the picture onto base.

Create a new layer. Use your selection tool to make a rectangle behind the picture & fill it with white. Hit Ctrl+T & tilt it at an angle.

Create another layer behind the white fill with black. set to soft light and have a little of it peek out at the sides.

Pasted this light texture

[Can't remember who it's by. Tell me if you know!] and set it at screen 100%

Next, I duplicated my cropped picture of Aeris & Cloud. I desaturated the layer [Ctrl+U] and set it to soft light 100%. Make sure this is above the last light texture.

Now, I used this gradient by firaga

. I duplicated it twice and set both layers to vivid light. Made sure to position these behind my white box layer from before.

Click on your selection tool. Make another white rectangle towards the bottom of the icon. Hit ctrl+T. Tilt it a little.

New Layer. Selection tool again. Black rectangle this time. Set it to soft light and have a little of it peek out at the sides again.

Now, add a white arrow on the white box layer.

It's looking kinda boring, so I'm going to add text. I used Dr. Eve L font at 4pt in #846cb7. The text is "kiss from a rose" Added a bit of tiny text in #846cb7 as well.

Duplicated "kiss from a rose". Moved it over to the left and down a little so it would have a little bit of a glow at 24% opacity.

Finally I added this gradient

I created from copying a piece of my icon so far & set to lighten. Position it so that the corner is only over the text and you're done!

Layers should look like this. Or similar to it.