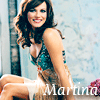
Martina McBride icon tutorial!
Ready for a new tutorial? :)
Let's make this icon:
from this base:
1. Open up your pic of choice. Crop it, and resize it to 100x100 pixels.
2. Duplicate the base once, and set the blend mode (setting) to "screen", and opacity to 32%. Depending on your base, you may need to go lighter, but in this case my icon as already on the lighter side so I set my screen layer on a lower opacity. Sharpen this layer by going to Filter+Sharpen+Sharpen. Then I took the sharpen tool and sharpened Martina's eyes and lips using a small brush at 50% opacity.
3. Make a new layer (Layer+New+Layer), and fill it with this color: 8ff2fe (bright turquoise). Again, adjust to your icon. I wanted to enhance the top of Martina's dress so I chose that bright color. Set your blend mode to color burn and opacity to 100%.
4. Make a new color balance adjustment layer (Layer+New Adjustment Layer+Color Balance), and in the MIDTONES, I used these settings: 51, 7, -8. Again, adjust to your own icon, and make sure the preserve luminosity button is checked!
5. It's coming along, but I want tomake Martina's skin look more natural. I make a hue/saturation adjustment layer (same step as above but you'll clic on hue/saturation instead of color balance), and adjust your saturation to +39 (I wanted the colors to stand out so I made my saturation a little higher than you might do).
6. Last step! Martina looks a little too orangey, so I decided to tone it down a little bit. I make a levels adjustment layer (Layers+New Adjustment Layer+ Levels), and these were my levels, but adjust according to your icon:
RGB 0, 0.96, 249
Red: 0, 1.14, 251
Green: 0, 0.96, 255
Blue: 0, 1.15, 255
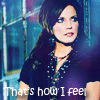
That's it! :) It's so easy and the coloring turns out beautifully! Feel free to add brushes or textures or text! Other examples:


Questions? Comments? Suggestions? I'd love to read them! :) I'd also love to see your results if you use this tutorial! :)
Let's make this icon:
from this base:
1. Open up your pic of choice. Crop it, and resize it to 100x100 pixels.
2. Duplicate the base once, and set the blend mode (setting) to "screen", and opacity to 32%. Depending on your base, you may need to go lighter, but in this case my icon as already on the lighter side so I set my screen layer on a lower opacity. Sharpen this layer by going to Filter+Sharpen+Sharpen. Then I took the sharpen tool and sharpened Martina's eyes and lips using a small brush at 50% opacity.
3. Make a new layer (Layer+New+Layer), and fill it with this color: 8ff2fe (bright turquoise). Again, adjust to your icon. I wanted to enhance the top of Martina's dress so I chose that bright color. Set your blend mode to color burn and opacity to 100%.
4. Make a new color balance adjustment layer (Layer+New Adjustment Layer+Color Balance), and in the MIDTONES, I used these settings: 51, 7, -8. Again, adjust to your own icon, and make sure the preserve luminosity button is checked!
5. It's coming along, but I want tomake Martina's skin look more natural. I make a hue/saturation adjustment layer (same step as above but you'll clic on hue/saturation instead of color balance), and adjust your saturation to +39 (I wanted the colors to stand out so I made my saturation a little higher than you might do).
6. Last step! Martina looks a little too orangey, so I decided to tone it down a little bit. I make a levels adjustment layer (Layers+New Adjustment Layer+ Levels), and these were my levels, but adjust according to your icon:
RGB 0, 0.96, 249
Red: 0, 1.14, 251
Green: 0, 0.96, 255
Blue: 0, 1.15, 255
That's it! :) It's so easy and the coloring turns out beautifully! Feel free to add brushes or textures or text! Other examples:
Questions? Comments? Suggestions? I'd love to read them! :) I'd also love to see your results if you use this tutorial! :)