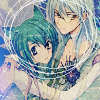
Tutorial # 06 - Loveless (PSP7+)
It's been forever and a day since I wrote a tutorial. Since I'm so in love with this icon, I thought I'd write one for it. Even though I've given a step-by-step guide, try not to copy it like that. Add in something I didn't use; use this to inspire your own thing.
Before
After


STEP 01: Find your image and crop however you want.

STEP 02: Apply this blue as an exclusion layer.

~~~~~>
STEP 03: Apply this texture at screen 100% or whichever opacity works for you. This is really two textures, one made by jougen_no_tsuki, the other by indienotebook.

~~~~~>
STEP 04: Create a new hue/saturation adjustment layer and set saturation to -100. Blend mode overlay @ 100% or w/e you want.

STEP 05: Apply this texture by onlyabreath on multiply 100%.

~~~~~>
STEP 06: Set this scratch texture by ink_swirls to screen. I set mine at 100%.

~~~~~>
STEP 07: Copy the backround and bring it all the way to the stop and set it to soft light.

STEP 08: Next is this texture by alterna666 @ deviantart on screen. I duplicated it three times to make it more visible.

~~~~~>
STEP 09: Last is this light texture by millepetit, set at lighten.

~~~~~>
After that add whatever text you might want. Or don't add text. Up to you.
Again, please don't follow this exactly. Definitely experiment, and show me your creations!
Before
After


STEP 01: Find your image and crop however you want.

STEP 02: Apply this blue as an exclusion layer.

~~~~~>

STEP 03: Apply this texture at screen 100% or whichever opacity works for you. This is really two textures, one made by jougen_no_tsuki, the other by indienotebook.

~~~~~>

STEP 04: Create a new hue/saturation adjustment layer and set saturation to -100. Blend mode overlay @ 100% or w/e you want.

STEP 05: Apply this texture by onlyabreath on multiply 100%.

~~~~~>

STEP 06: Set this scratch texture by ink_swirls to screen. I set mine at 100%.

~~~~~>

STEP 07: Copy the backround and bring it all the way to the stop and set it to soft light.

STEP 08: Next is this texture by alterna666 @ deviantart on screen. I duplicated it three times to make it more visible.

~~~~~>

STEP 09: Last is this light texture by millepetit, set at lighten.

~~~~~>

After that add whatever text you might want. Or don't add text. Up to you.
Again, please don't follow this exactly. Definitely experiment, and show me your creations!