Resin Tutorial!! IMG HEAVY!!!
First, please don't be intimidated by this stuff!! It's super easy to use and really, once you do a few batches, you'll be a pro!!
Materials:
2 craft sticks (aka popsicle sticks, and you'll only need two if your using Pearl-Ex, to use as a scoop)
2- 1 oz measuring cups
Glitter (I prefer Martha's brand, it sets up much better, trust me on this!!) or Pearl-ex Powders (they give off amazing colors!)
1 package of 2 part epoxy resin. I use Enviro Tex, its much harder and clearer than the other kind (I've used both) and cures much faster!!
Mold made for resin (they sell these online here www.kitkraft.biz/home.php
)
A funny picture (if you are using a picture, I always wrap these in tape and make sure its sealed!), or flat letter beads (i love these!)
1 Pair nitrile (the purple or black ones, as they are pretty much impervious to chemicals) gloves to protect your hands...I don't use these, but they may help you feel more comfortable.
A couple of sheets of newspaper for your area.
Assemble your materials:
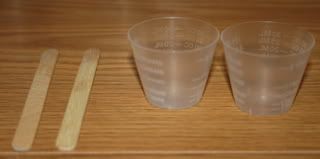
Measuring cups and "craft sticks"
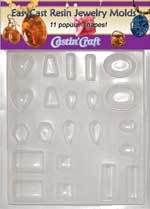
One of the types of molds..There's a whole lot of different types..
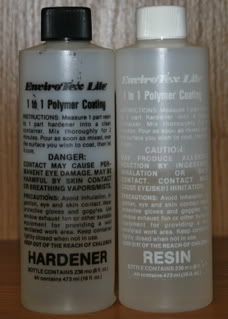
2 part epoxy resin...This is really easy to use..Hardly any smell and it gives you a longer working time than polyester resin. You don't have to be super fast, but remember you have NO MORE than 20-25 minutes before it starts to cure....I've found this out..So make sure you have everything you need within a reasonable distance.
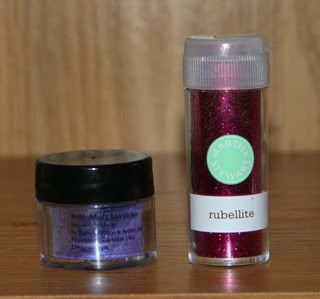
Glitter or Pearl-Ex powder
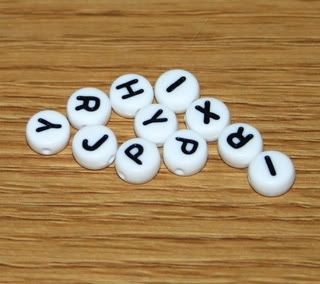
Flat round letter beads
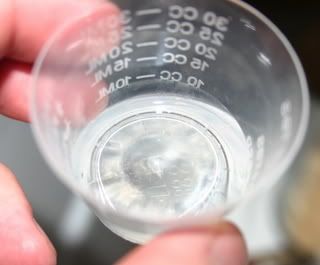
Now pour equal amounts of resin and hardner into ONE measuring cup. Start with 5mL of each so you have a total of 10mL. It should look like this:
Now take one of those "craft sticks" and stir the hell out of it. I mean, really really stir!! It doesn't matter if it has bubbles, it sets up much faster and harder the more you stir it. Scrape the sides of the cup too. After stirring it looks like this:

Notice how its cloudy? Keep stirring until it starts to become more clear. Again, don't worry about the bubbles.
Now here comes in your SECOND measuring cup. You need to pour the resin from the first cup into the second cup like this (sorry for the blurry pic!):

Keep stirring!! More! Now you'll notice that it is now VERY clear.
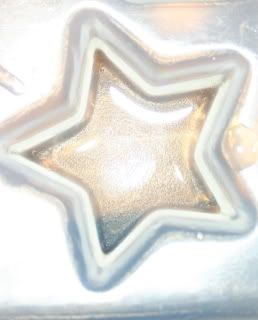
I use the "craft sticks" to kind of pick up the resin, or you can squeeze the sides of the cup together....This is where it tends to get messy....Put some of the resin into the molds. Fill the mold only 1/3 to 1/2 of the way depending on the depth of the mold. You WILL be able to pour multiple molds from one small batch of resin..Remember, don't pour a mold full!! Now you'll see bubbles in the resin. What works to get rid of them is to GENTLY exhale on the resin (like you are fogging up a mirror or window). You can also gently blow like you are blowing out a candle.
I know you can't see it, but there's really cured resin in there, lol.
REMEMBER!: If you are using a mold, like above, you are working backwards and in layers!!! You have to let this layer cure for a while (2 hours usually) until its TACKY or everything will sink to the front and your project is now dead.

This is a magnet from a mold. the layer on top is the clear layer you just poured!! The little letter beads need to be put in right to left, and backwards so they come out right...Trial and error! lol I messed up alot of cool resin being stupid and not paying attention! After I set the beads (I like to make sure the resin is tacky, so the beads sit better and the colored resin doesn't get underneath. again, trial and error!), I pour my colored layer! Also, you see those little bubbles? I don't sweat em. They give the piece character. If you're worried about them, you can dip your beads in clear resin (before you color it!) and then set them.
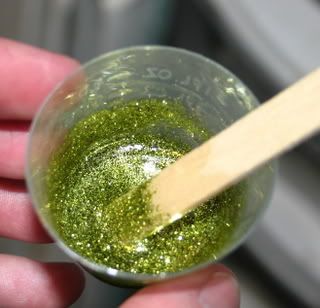
Remember that glitter?! Here it is!! I add a good amount and stir pretty good. Martha Stewart lives in my craft room apparently. lol.

This is what the glittered resin now looks like in the mold.

This is the Pearl-Ex colored resin...This stuff is so cool!
Now you wait! This is the hardest part!! I usually leave all my stuff in the molds for a MINIMUM of 24 hours from the last pour. So if you pour things in stages like I do sometimes, I just leave it all in there until the most recent piece is cured. If you pop them out too soon, they can bend etc. Also, while you're curing, you can cover your molds with a glass baking dish or similar to keep dust and pet hair in the resin to a minimum.
Once the piece is cured fully, I use a two part epoxy glue and glue a magnet or aanraku silver plated bail to the back.
Thanks for reading my tut! Please give me feedback and let me know how it was, if I need to change things or make them clearer! I love teaching and I want to make sure everyone can understand. Also, my next installment?! Resin Bottlecap Magnets!!
Materials:
2 craft sticks (aka popsicle sticks, and you'll only need two if your using Pearl-Ex, to use as a scoop)
2- 1 oz measuring cups
Glitter (I prefer Martha's brand, it sets up much better, trust me on this!!) or Pearl-ex Powders (they give off amazing colors!)
1 package of 2 part epoxy resin. I use Enviro Tex, its much harder and clearer than the other kind (I've used both) and cures much faster!!
Mold made for resin (they sell these online here www.kitkraft.biz/home.php

)
A funny picture (if you are using a picture, I always wrap these in tape and make sure its sealed!), or flat letter beads (i love these!)
1 Pair nitrile (the purple or black ones, as they are pretty much impervious to chemicals) gloves to protect your hands...I don't use these, but they may help you feel more comfortable.
A couple of sheets of newspaper for your area.
Assemble your materials:

Measuring cups and "craft sticks"

One of the types of molds..There's a whole lot of different types..

2 part epoxy resin...This is really easy to use..Hardly any smell and it gives you a longer working time than polyester resin. You don't have to be super fast, but remember you have NO MORE than 20-25 minutes before it starts to cure....I've found this out..So make sure you have everything you need within a reasonable distance.

Glitter or Pearl-Ex powder

Flat round letter beads
Now pour equal amounts of resin and hardner into ONE measuring cup. Start with 5mL of each so you have a total of 10mL. It should look like this:

Now take one of those "craft sticks" and stir the hell out of it. I mean, really really stir!! It doesn't matter if it has bubbles, it sets up much faster and harder the more you stir it. Scrape the sides of the cup too. After stirring it looks like this:

Notice how its cloudy? Keep stirring until it starts to become more clear. Again, don't worry about the bubbles.
Now here comes in your SECOND measuring cup. You need to pour the resin from the first cup into the second cup like this (sorry for the blurry pic!):

Keep stirring!! More! Now you'll notice that it is now VERY clear.

I use the "craft sticks" to kind of pick up the resin, or you can squeeze the sides of the cup together....This is where it tends to get messy....Put some of the resin into the molds. Fill the mold only 1/3 to 1/2 of the way depending on the depth of the mold. You WILL be able to pour multiple molds from one small batch of resin..Remember, don't pour a mold full!! Now you'll see bubbles in the resin. What works to get rid of them is to GENTLY exhale on the resin (like you are fogging up a mirror or window). You can also gently blow like you are blowing out a candle.
I know you can't see it, but there's really cured resin in there, lol.
REMEMBER!: If you are using a mold, like above, you are working backwards and in layers!!! You have to let this layer cure for a while (2 hours usually) until its TACKY or everything will sink to the front and your project is now dead.

This is a magnet from a mold. the layer on top is the clear layer you just poured!! The little letter beads need to be put in right to left, and backwards so they come out right...Trial and error! lol I messed up alot of cool resin being stupid and not paying attention! After I set the beads (I like to make sure the resin is tacky, so the beads sit better and the colored resin doesn't get underneath. again, trial and error!), I pour my colored layer! Also, you see those little bubbles? I don't sweat em. They give the piece character. If you're worried about them, you can dip your beads in clear resin (before you color it!) and then set them.

Remember that glitter?! Here it is!! I add a good amount and stir pretty good. Martha Stewart lives in my craft room apparently. lol.

This is what the glittered resin now looks like in the mold.

This is the Pearl-Ex colored resin...This stuff is so cool!
Now you wait! This is the hardest part!! I usually leave all my stuff in the molds for a MINIMUM of 24 hours from the last pour. So if you pour things in stages like I do sometimes, I just leave it all in there until the most recent piece is cured. If you pop them out too soon, they can bend etc. Also, while you're curing, you can cover your molds with a glass baking dish or similar to keep dust and pet hair in the resin to a minimum.
Once the piece is cured fully, I use a two part epoxy glue and glue a magnet or aanraku silver plated bail to the back.
Thanks for reading my tut! Please give me feedback and let me know how it was, if I need to change things or make them clearer! I love teaching and I want to make sure everyone can understand. Also, my next installment?! Resin Bottlecap Magnets!!