Tutorial
We'll be going from THIS to 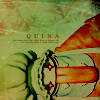
Made using PSPX but it should translate to other programs.
Prep the base:
Start by cropping Quina down to icon size (100x100)
Rotate the base 90 degrees to the left.
I then used the unsharp mask feature - Radius at 34, Strength at 30 and Clippings at 4
Duplicate the base and set to soft light at 100%

This is what we have so far...
Time for some color:
New layer: dark blue color - #03132f - and set it to difference 100%
Duplicate the difference layer and set it to 50%
New layer: light tan color - #faebbd - set to multiply 50%
Duplicate your base, drag it to the top of the pile, desaturate it and set to soft light

Take this texture by
fuzzy and set it to multiply at 100%
New layer: light tan color again (#faebbd) an set it to burn at 50%
Duplicate that layer and set it to soft light at 75%
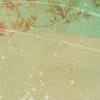
Apply this texture by
77words and set it to multply at 100% (I actually rotated 90 degrees to the left)
Text:
With the color pick tool I chose a dark brown color in the icon
In Times New Roman I wrote QUINA.
Size = 6 and with a tracking set to .6
To make the tiny text I continued with Times New Roman (don't use capital letters) and typed random nonsense.
Size = 1 (no tracking)
I thought that the text was light so I duplicated the layer with the text on it.
That's it... it doesn't look exactly like the original but its close!

=====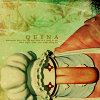
(original)
Let me know if you have any questions on the tutorial, I'll do my best to answer them. If you use the tutorial I'd love to see what you come up with.
Made using PSPX but it should translate to other programs.
Prep the base:
Start by cropping Quina down to icon size (100x100)
Rotate the base 90 degrees to the left.
I then used the unsharp mask feature - Radius at 34, Strength at 30 and Clippings at 4
Duplicate the base and set to soft light at 100%
This is what we have so far...
Time for some color:
New layer: dark blue color - #03132f - and set it to difference 100%
Duplicate the difference layer and set it to 50%
New layer: light tan color - #faebbd - set to multiply 50%
Duplicate your base, drag it to the top of the pile, desaturate it and set to soft light
Take this texture by
fuzzy and set it to multiply at 100%
New layer: light tan color again (#faebbd) an set it to burn at 50%
Duplicate that layer and set it to soft light at 75%
Apply this texture by
77words and set it to multply at 100% (I actually rotated 90 degrees to the left)
Text:
With the color pick tool I chose a dark brown color in the icon
In Times New Roman I wrote QUINA.
Size = 6 and with a tracking set to .6
To make the tiny text I continued with Times New Roman (don't use capital letters) and typed random nonsense.
Size = 1 (no tracking)
I thought that the text was light so I duplicated the layer with the text on it.
That's it... it doesn't look exactly like the original but its close!
=====
(original)
Let me know if you have any questions on the tutorial, I'll do my best to answer them. If you use the tutorial I'd love to see what you come up with.