(no subject)
Yuna "Smile" Tutorial
The icon won 2nd place over at
ff_awards
Made using PSP9
We'll be going from THIS to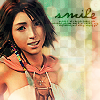
Slightly image heavy, so dial up users beware.
Get ready
Get set
Start by cropping your base
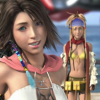
Sharpen twice
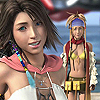
Using the "Freehand Selection" tool, set the selection type to "point to point" and select around Yuna.
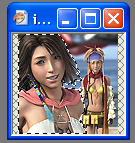
Open this texture by
gender
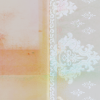
Copy and paste the selection of Yuna onto the texture
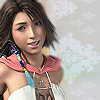
Take a dark blue color and set it to exclusion at 100%

Take a light tan color and set it to multipy at 63%

Set a light blue color to burn at 100%

Merge the layers down.
Duplicate the base and desaturate it. Set it to soft light at 100%
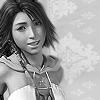
Take this texture by
colorfilter (I rotated the texture 90 degrees counter clockwise) and set it to overly at 100%

I then masked out Yuna's face using a medium grey color (#808080) giving me this (using a grey mask takes that orange glow off her face but still leaves enough of the color so she doesn't get washed out):
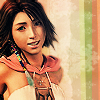
(I also masked out that ugly orange bit on the upper left side of her head using the color black. The example here doesn't show that I did that though...)
*Pause*
A quick guide to masks:
In the above example I had put a texture on the icon and set it to overly. I didn't like how the texture looked over her face so I wanted to "erase" it. I prefer using masks over the eraser tool because it's easy to fix a mistake.
To get a mask layer started select the little button that looks like a mask in the layer palette.
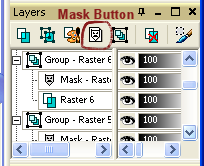
To erase the area that you don't like, simple take a brush and using the color black, paint over it.
If you mess up and want the area back, use the color white.
Using different shades of grey acts as reduced opacity.
*Play*
I took this texture and set it to darken at 100% (If you know who made the texture, please let me know so I can provide proper credit - the folder that I have the texture saved in says Bare-Grimace but there ins't anyone with that user name that I could find...)
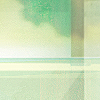
I then masked out Yuna, which gave me this:
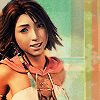
Create a new layer. I took this brush by
unmasked_icons in a moss green color (#5e6e4c) and painted it onto the icon.
I again masked out Yuna so the brush only appears in the background
I used this texture, made by
Ianthinae, and set it to screen
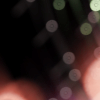
There was a light speck over on Yuna's hair that I didn't like, so again, I masked over the spot that was annoying me.
I then used this texture, also made by
Ianthinae and set it screen at 63%.
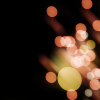
Ok... time for some text!
In black, I typed out smile in "DpScript" size 10 (you can get the font from www.dafont.com)
for the tiny text I used "Times New Roman" in size 1, set to bold, with 300 kerning, centered. (The words themselves are just a jumble of letters - alskjd;a alskdjal;skjg 'lkajsdg'ajs) ^.^

I set it to overlay at 100%
I duplicated the text layer and knocked the opacity down to 48%
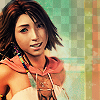
You should now have the finished product:

Congratulations, you got through the tutorial!!
If you have any questions, please feel free to ask. I'll do my best to answer them for you.
Comments and credit are lovely
Please don't hotlink the images
Thanks,

nisey3518
The icon won 2nd place over at

ff_awards
Made using PSP9
We'll be going from THIS to
Slightly image heavy, so dial up users beware.
Get ready
Get set
Start by cropping your base
Sharpen twice
Using the "Freehand Selection" tool, set the selection type to "point to point" and select around Yuna.
Open this texture by

gender
Copy and paste the selection of Yuna onto the texture
Take a dark blue color and set it to exclusion at 100%
Take a light tan color and set it to multipy at 63%
Set a light blue color to burn at 100%
Merge the layers down.
Duplicate the base and desaturate it. Set it to soft light at 100%
Take this texture by

colorfilter (I rotated the texture 90 degrees counter clockwise) and set it to overly at 100%
I then masked out Yuna's face using a medium grey color (#808080) giving me this (using a grey mask takes that orange glow off her face but still leaves enough of the color so she doesn't get washed out):
(I also masked out that ugly orange bit on the upper left side of her head using the color black. The example here doesn't show that I did that though...)
*Pause*
A quick guide to masks:
In the above example I had put a texture on the icon and set it to overly. I didn't like how the texture looked over her face so I wanted to "erase" it. I prefer using masks over the eraser tool because it's easy to fix a mistake.
To get a mask layer started select the little button that looks like a mask in the layer palette.
To erase the area that you don't like, simple take a brush and using the color black, paint over it.
If you mess up and want the area back, use the color white.
Using different shades of grey acts as reduced opacity.
*Play*
I took this texture and set it to darken at 100% (If you know who made the texture, please let me know so I can provide proper credit - the folder that I have the texture saved in says Bare-Grimace but there ins't anyone with that user name that I could find...)
I then masked out Yuna, which gave me this:
Create a new layer. I took this brush by

unmasked_icons in a moss green color (#5e6e4c) and painted it onto the icon.
I again masked out Yuna so the brush only appears in the background
I used this texture, made by

Ianthinae, and set it to screen
There was a light speck over on Yuna's hair that I didn't like, so again, I masked over the spot that was annoying me.
I then used this texture, also made by

Ianthinae and set it screen at 63%.
Ok... time for some text!
In black, I typed out smile in "DpScript" size 10 (you can get the font from www.dafont.com)
for the tiny text I used "Times New Roman" in size 1, set to bold, with 300 kerning, centered. (The words themselves are just a jumble of letters - alskjd;a alskdjal;skjg 'lkajsdg'ajs) ^.^
I set it to overlay at 100%
I duplicated the text layer and knocked the opacity down to 48%
You should now have the finished product:
Congratulations, you got through the tutorial!!
If you have any questions, please feel free to ask. I'll do my best to answer them for you.
Comments and credit are lovely
Please don't hotlink the images
Thanks,

nisey3518