Tutorial #2: Alias [Syd] icon >> coloring & sharpening [for PSP]
Tutorial for this icon from my latest set, here.
Going from.....
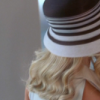
to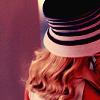
Okay, we start with this cap, by _jems_. Zoom out to 25%.

Crop to 100x100 pixels, which gives you:

.
Copy the picture, then paste it as a new raster layer. Then go to Layers -> Layer Properties, and set to Screen, which gives you:
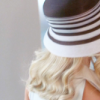
Then create a new raster layer, and fill it with #000000 (black):

Then go to Layers -> Layer Properties, and set to Overlay:
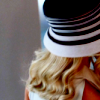
Then create a new raster layer and fill it with #eed7ac (beige):
Go to Layers -> Layer Properties, and set to Multiply, at 100% opacity.
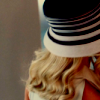
Then create a new raster layer, fill it with #e11919 (red), and set it to 24% opacity. Then go to Layers -> Layer Properties, and set it to Overlay:
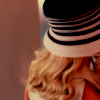
Again, create a new raster layer. Fill it with #0000ff (bright blue), and set it to 16% opacity. Then go to Layers -> Layer Properties, and set it to Burn:
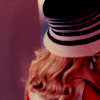
Then, we must sharpen the image. Copy the image, and paste it as a new layer. Then go to Adjust -> Sharpen. Merge the layers [Layers -> Merge -> Merge All].
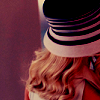
Note: If you feel that the image is too sharp, simply change the opacity of the second layer (raster 1) before merging the layers.
Right now, the image is a bit too dark. So I went to Adjust -> Brightness & Contrast, and set the Brightness to 23% and the Contrast to 13%

And you're done!
Questions, comments, and feedback are more than welcome!
Going from.....

to

Okay, we start with this cap, by _jems_. Zoom out to 25%.

Crop to 100x100 pixels, which gives you:

.
Copy the picture, then paste it as a new raster layer. Then go to Layers -> Layer Properties, and set to Screen, which gives you:

Then create a new raster layer, and fill it with #000000 (black):

Then go to Layers -> Layer Properties, and set to Overlay:

Then create a new raster layer and fill it with #eed7ac (beige):

Go to Layers -> Layer Properties, and set to Multiply, at 100% opacity.

Then create a new raster layer, fill it with #e11919 (red), and set it to 24% opacity. Then go to Layers -> Layer Properties, and set it to Overlay:

Again, create a new raster layer. Fill it with #0000ff (bright blue), and set it to 16% opacity. Then go to Layers -> Layer Properties, and set it to Burn:

Then, we must sharpen the image. Copy the image, and paste it as a new layer. Then go to Adjust -> Sharpen. Merge the layers [Layers -> Merge -> Merge All].

Note: If you feel that the image is too sharp, simply change the opacity of the second layer (raster 1) before merging the layers.
Right now, the image is a bit too dark. So I went to Adjust -> Brightness & Contrast, and set the Brightness to 23% and the Contrast to 13%

And you're done!
Questions, comments, and feedback are more than welcome!