Tutorial!
3rd tutorial here! This time, we'll be going from this to this.
I used Photoshop 6, but I'm very sure you can use this tutorial using other programs...
Step One: Take this nice picture of Inuzuka Kiba from the anime/manga series Naruto, who has no Clan loyalty here...where are those stupid Inuzuka markings on his stupid face?! Oh, right, they must have washed out when he was taking that stupid bath... and crop it 100x100!
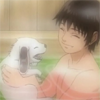
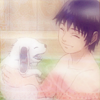
Step Two: Now that we have it cropped, we need to fix the base up. It's awfully blurry, so I duplicate the base, and set it on Soft Light 100%. One or two sharpenings can also work. In this case, I did one.
Now the base is a bit cleaner:
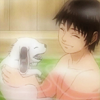
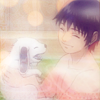
Step Three: Okay, now that the base is nice and fresh...let's do some coloring! Make a new layer and flood fill it with #191970, or in other words, a dark blue. Instead of exclusion, set the layer on Screen 100%.
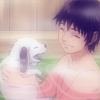
*Confuzzled with the layer order? Here ya go!
Step Four: Merge all your layers together. That'll make the further steps easier.
Step Five: Take this texture: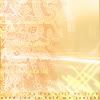
, by colorfilter, and set it on Soft Light 75%.
Step Six: Now, take this light texture:
, by fukikomu, or triedtoholdonto, and set it on Screen 100%. Since some of the orange bubbles got in the way, I erased some of it off of Kiba's smoother-than-usual hair.
Step Seven: Take this texture:
, by yet again colorfilter, and set it on Overlay 75%.
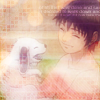
*Layer Order? Here!
Step Eight: You thought you were done! Not so fast now, because we are going to add text and brushes! Now, before we do that, merge your layers.
Step Nine: Okay, this part may be very tricky...take the Rectangular Marquee tool, and select a part of Kiba's Face (I chose his smile). This is what it'll look like.
Step 10: Now go to Edit >> Copy, and paste it! Take your Move Tool, and drag the new piece to the bottom.
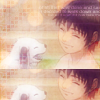
Step 11: Now, let's Stroke it. Go to Edit >> Stroke and stroke both layers. Here is what you'll see once you hit "Stroke".
Step 12: Duplicate the cutted piece's layer. Desaturate (Ctrl+Shift+U) the bottom one, and set the top on Multiply 100%. Merge ALL the layers together!
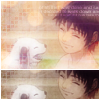
Step 13: Make a new layer. I used pure black for the brush color. I took this brush:
, by titan_girl, and put it on the icon! *Make sure you put the brush on the new layer!
Step 14: Whewt! Almost done! Now, using the font Times New Roman, at 7pt, I wrote "When we were very young". Make sure all the letters are CAPITALIZED!.

WOW! And we are DONE! Enjoy the icons that you make, and comment here with them! I'd love to see them!
Make sure that if you take this icon, that you credit either starclan_icons or me, spottedtail. You can friend either one of them if you wish. But, if you friend me, make sure to comment on my Friends Only Post!
Also, you do NOT have to follow this tutorial word-by-word. Explore, create, and have fun!
I used Photoshop 6, but I'm very sure you can use this tutorial using other programs...
Step One: Take this nice picture of Inuzuka Kiba from the anime/manga series Naruto, who has no Clan loyalty here...where are those stupid Inuzuka markings on his stupid face?! Oh, right, they must have washed out when he was taking that stupid bath... and crop it 100x100!

Step Two: Now that we have it cropped, we need to fix the base up. It's awfully blurry, so I duplicate the base, and set it on Soft Light 100%. One or two sharpenings can also work. In this case, I did one.
Now the base is a bit cleaner:

Step Three: Okay, now that the base is nice and fresh...let's do some coloring! Make a new layer and flood fill it with #191970, or in other words, a dark blue. Instead of exclusion, set the layer on Screen 100%.

*Confuzzled with the layer order? Here ya go!
Step Four: Merge all your layers together. That'll make the further steps easier.
Step Five: Take this texture:

, by colorfilter, and set it on Soft Light 75%.

Step Six: Now, take this light texture:

, by fukikomu, or triedtoholdonto, and set it on Screen 100%. Since some of the orange bubbles got in the way, I erased some of it off of Kiba's smoother-than-usual hair.

Step Seven: Take this texture:

, by yet again colorfilter, and set it on Overlay 75%.

*Layer Order? Here!
Step Eight: You thought you were done! Not so fast now, because we are going to add text and brushes! Now, before we do that, merge your layers.
Step Nine: Okay, this part may be very tricky...take the Rectangular Marquee tool, and select a part of Kiba's Face (I chose his smile). This is what it'll look like.
Step 10: Now go to Edit >> Copy, and paste it! Take your Move Tool, and drag the new piece to the bottom.

Step 11: Now, let's Stroke it. Go to Edit >> Stroke and stroke both layers. Here is what you'll see once you hit "Stroke".
Step 12: Duplicate the cutted piece's layer. Desaturate (Ctrl+Shift+U) the bottom one, and set the top on Multiply 100%. Merge ALL the layers together!

Step 13: Make a new layer. I used pure black for the brush color. I took this brush:

, by titan_girl, and put it on the icon! *Make sure you put the brush on the new layer!
Step 14: Whewt! Almost done! Now, using the font Times New Roman, at 7pt, I wrote "When we were very young". Make sure all the letters are CAPITALIZED!.

WOW! And we are DONE! Enjoy the icons that you make, and comment here with them! I'd love to see them!
Make sure that if you take this icon, that you credit either starclan_icons or me, spottedtail. You can friend either one of them if you wish. But, if you friend me, make sure to comment on my Friends Only Post!
Also, you do NOT have to follow this tutorial word-by-word. Explore, create, and have fun!