Tutorial time!
Okay, so I just posted my welcome message, and here I am, again, with another post. This time, it's a tutorial! Featuring Chibi Usa-chan of Sailor Moon!
Go from this to this, or this.
Step One: Start out with your nice, big pic of Chibi Usa, and crop it 100x100.
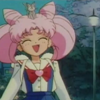
Step Two: Doesn't the quality stink? So, let's clean this base up! I duplicate the base layer two times. I set the top layer on Overlay 100%, and the middle one on Screen 50%. The result:
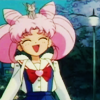
Step Three: Merge the layers together, to form one big layer (Ctrl+Shift+E, if you don't know what I'm talking about...)
Step Four: Make a new layer, and flood fill it with this dark blue color:

Set it on Exclusion 50%. Now, the icon looks a bit neater:
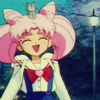
Step Five: Now, duplicate the merged base (the one you merged before the Exclusion nonsense), drag it up to the top of the layer palette, and set that on Soft Light 100%.
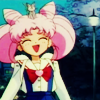
Step Six: Guess what? That whole duplication and layering nonsense was just cleaning the base! I was just warming you up! Don't worry, though, this marks the point where we get into the real deal: Textures.
Take this lovely light texture by colorfilter:
, flip it around, and set it on Screen 100%.

Step Seven: Take this:
, by yet again colorfilter, and set it on Hard Light 50%.
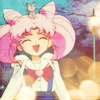
Step Eight: Okay, now, take this texture:
by colorfilter, and set it on Overlay 75%.
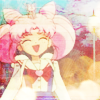
Now, you can stop here and admire your icon, but if you want text, read on.
Step Nine: I took my eyedropper tool, and took a sample of her hair, a pink color, and typed in 'So cute', Century Gothic, size 14.
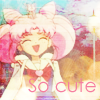
Duplicate the text layer, to make it bolder.
Step Ten: Using the same pink color, I typed in 'when you smile', Century Gothic, size 6. Duplicate the text layer...
...and you are done!!! The result:

Comment with the icons you make using this tutorial. I'll love to see them! And remember, you don't have to follor this tutorial step-by-step. Go wild! ^_^
Go from this to this, or this.
Step One: Start out with your nice, big pic of Chibi Usa, and crop it 100x100.

Step Two: Doesn't the quality stink? So, let's clean this base up! I duplicate the base layer two times. I set the top layer on Overlay 100%, and the middle one on Screen 50%. The result:

Step Three: Merge the layers together, to form one big layer (Ctrl+Shift+E, if you don't know what I'm talking about...)
Step Four: Make a new layer, and flood fill it with this dark blue color:

Set it on Exclusion 50%. Now, the icon looks a bit neater:

Step Five: Now, duplicate the merged base (the one you merged before the Exclusion nonsense), drag it up to the top of the layer palette, and set that on Soft Light 100%.

Step Six: Guess what? That whole duplication and layering nonsense was just cleaning the base! I was just warming you up! Don't worry, though, this marks the point where we get into the real deal: Textures.
Take this lovely light texture by colorfilter:

, flip it around, and set it on Screen 100%.

Step Seven: Take this:

, by yet again colorfilter, and set it on Hard Light 50%.

Step Eight: Okay, now, take this texture:

by colorfilter, and set it on Overlay 75%.

Now, you can stop here and admire your icon, but if you want text, read on.
Step Nine: I took my eyedropper tool, and took a sample of her hair, a pink color, and typed in 'So cute', Century Gothic, size 14.

Duplicate the text layer, to make it bolder.
Step Ten: Using the same pink color, I typed in 'when you smile', Century Gothic, size 6. Duplicate the text layer...
...and you are done!!! The result:
Comment with the icons you make using this tutorial. I'll love to see them! And remember, you don't have to follor this tutorial step-by-step. Go wild! ^_^