Selective Coloring Guide
This is not just for you guys, but as a reference to myself, and to show how selective coloring can be used to enhance rather than take away from an image. This is a simple coloring tutorial that you can use and please, build off of.
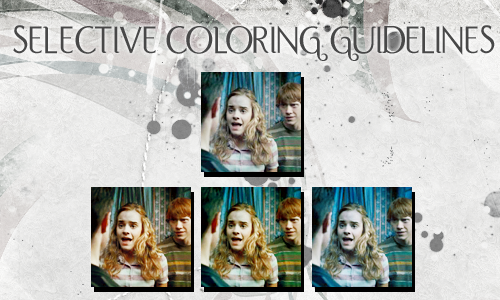
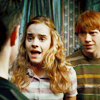
1. We're going to start out with a very simple, fairly dark base. You should be able to apply this to any number of images. I deliberately chose one with most colors in it to give you an idea.
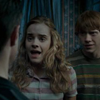
2. First and foremost, you need to screen it. You've got to give some room for the colors to bring themselves out from. This is going to depend on the original image as to how many times you do this. To screen, duplicate the layer and set it to screen. Duplicate your screened layer as many times as necessary. You'll want your image lighter than you want the final product. This one has been screened three times.
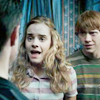
3. Now it's time to mess with the color. Because I'm not a fan of flattening images so you lose your work, you're going to create a new adjustment layer (layer >> new adjustment layer >> selective color...).
4. This is where we now part ways.
RICH WARM COOL
REDS
cyan: -100
magenta: +16
yellow: +100
black: 0
YELLOWS
cyan: -100
magenta: +20
yellow: +100
black: 0
GREENS
cyan: +34
magenta: -13
yellow: +100
black: 0
CYANS
cyan: +48
magenta: 0
yellow: -15
black: 0
BLUES
cyan: +100
magenta: 0
yellow: -34
black: 0
MAGENTAS
(in general don't
touch it but it it's
too starkly pink
add some yellow)
WHITES
cyan: 0
magenta: 0
yellow: +18
black: -19
NEUTRALS
cyan: +6
magenta: +4
yellow: +28
black: +6
BLACKS
cyan: 0
magenta: 0
yellow: 0
black: +9
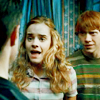
REDS
cyan: -100
magenta: +0
yellow: +100
black: 0
YELLOWS
cyan: -100
magenta: 0
yellow: +100
black: 0
GREENS
cyan: -100
magenta: +26
yellow: +100
black: 0
CYANS
cyan: -16
magenta: +30
yellow: +100
black: 0
BLUES
cyan: -21
magenta: +5
yellow: +100
black: 0
MAGENTAS
(in general don't
touch it but it it's
too starkly pink
add some yellow)
WHITES
cyan: 0
magenta: +10
yellow: +40
black: -38
NEUTRALS
cyan: -7
magenta: +11
yellow: +26
black: +9
BLACKS
cyan: 0
magenta: 0
yellow: 0
black: +5
REDS
cyan: +42
magenta: +12
yellow: +50
black: 0
YELLOWS
cyan: -49
magenta: +14
yellow: +55
black: 0
GREENS
cyan: +100
magenta: 0
yellow: -59
black: 0
CYANS
cyan: +56
magenta: 0
yellow: -44
black: 0
BLUES
cyan: +62
magenta: 0
yellow: -41
black: 0
MAGENTAS
cyan: 0
magenta: +12
yellow: -39
black: 0
WHITES
cyan: 0
magenta: 0
yellow: -33
black: -13
NEUTRALS
cyan: +23
magenta: 0
yellow: -4
black: 0
BLACKS
cyan: 0
magenta: 0
yellow: 0
black: 0
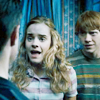
VARIATIONS
RICH + COOL
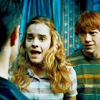
WARM + COOL
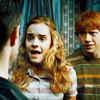
RICH + WARM (70% opacity)
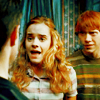
RICH layer duplicated, set to soft light
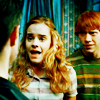
WARM layer duplicated, set to soft light

COOL layer duplicated, set to soft light
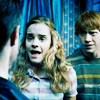
PLEASE NOTE: Selective color is not the all to end all coloring tool. Sometimes it's easier to just use variations, hue/saturation, a fill layer, or curves. It's all going to depend on what you're trying to do. Some of these colors are a little extreme. Don't be afraid to mess with the opacities and have fun and make it your own!
But, for those of you who find selective color to be a mystery, I hope this helped!

1. We're going to start out with a very simple, fairly dark base. You should be able to apply this to any number of images. I deliberately chose one with most colors in it to give you an idea.

2. First and foremost, you need to screen it. You've got to give some room for the colors to bring themselves out from. This is going to depend on the original image as to how many times you do this. To screen, duplicate the layer and set it to screen. Duplicate your screened layer as many times as necessary. You'll want your image lighter than you want the final product. This one has been screened three times.

3. Now it's time to mess with the color. Because I'm not a fan of flattening images so you lose your work, you're going to create a new adjustment layer (layer >> new adjustment layer >> selective color...).
4. This is where we now part ways.
RICH WARM COOL
REDS
cyan: -100
magenta: +16
yellow: +100
black: 0
YELLOWS
cyan: -100
magenta: +20
yellow: +100
black: 0
GREENS
cyan: +34
magenta: -13
yellow: +100
black: 0
CYANS
cyan: +48
magenta: 0
yellow: -15
black: 0
BLUES
cyan: +100
magenta: 0
yellow: -34
black: 0
MAGENTAS
(in general don't
touch it but it it's
too starkly pink
add some yellow)
WHITES
cyan: 0
magenta: 0
yellow: +18
black: -19
NEUTRALS
cyan: +6
magenta: +4
yellow: +28
black: +6
BLACKS
cyan: 0
magenta: 0
yellow: 0
black: +9

REDS
cyan: -100
magenta: +0
yellow: +100
black: 0
YELLOWS
cyan: -100
magenta: 0
yellow: +100
black: 0
GREENS
cyan: -100
magenta: +26
yellow: +100
black: 0
CYANS
cyan: -16
magenta: +30
yellow: +100
black: 0
BLUES
cyan: -21
magenta: +5
yellow: +100
black: 0
MAGENTAS
(in general don't
touch it but it it's
too starkly pink
add some yellow)
WHITES
cyan: 0
magenta: +10
yellow: +40
black: -38
NEUTRALS
cyan: -7
magenta: +11
yellow: +26
black: +9
BLACKS
cyan: 0
magenta: 0
yellow: 0
black: +5

REDS
cyan: +42
magenta: +12
yellow: +50
black: 0
YELLOWS
cyan: -49
magenta: +14
yellow: +55
black: 0
GREENS
cyan: +100
magenta: 0
yellow: -59
black: 0
CYANS
cyan: +56
magenta: 0
yellow: -44
black: 0
BLUES
cyan: +62
magenta: 0
yellow: -41
black: 0
MAGENTAS
cyan: 0
magenta: +12
yellow: -39
black: 0
WHITES
cyan: 0
magenta: 0
yellow: -33
black: -13
NEUTRALS
cyan: +23
magenta: 0
yellow: -4
black: 0
BLACKS
cyan: 0
magenta: 0
yellow: 0
black: 0

VARIATIONS
RICH + COOL

WARM + COOL

RICH + WARM (70% opacity)

RICH layer duplicated, set to soft light

WARM layer duplicated, set to soft light

COOL layer duplicated, set to soft light

PLEASE NOTE: Selective color is not the all to end all coloring tool. Sometimes it's easier to just use variations, hue/saturation, a fill layer, or curves. It's all going to depend on what you're trying to do. Some of these colors are a little extreme. Don't be afraid to mess with the opacities and have fun and make it your own!
But, for those of you who find selective color to be a mystery, I hope this helped!