Tutorial #5: Lewis(/Hathaway) - two variations
I was bored, I wrote a tutorial.
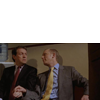
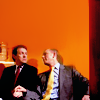
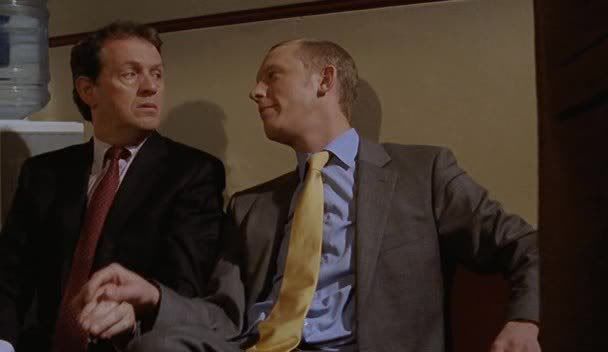
Going from
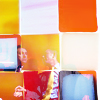
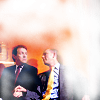
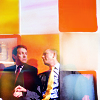
to
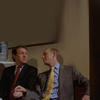
or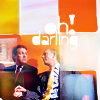
Made in PS CS2. Translatable if you ignore the tiny Selective Colouring layer. Difficulty is about medium imo.
part one
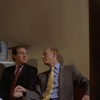
1. Starting out with this picture of lovely DI Lewis and his partner DS Hathaway from series one finale. Aren't they adorable? Like mentioned in my previous tutorials, I prefer working on 100x100 pixel, but if you prefer to work on a bigger image, then feel free to do so.
Start smudging the upper area to create the background. Additionally you can use a brush to add more colours in (which is usually also quicker and easier than using the smudge tool).
+
=
Merge all layers.
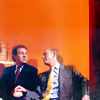
2. Copy the new background layer twice. Set the first copy to Soft Light, the second one to Screen to lighten up the image and make the colours deeper and brighter.
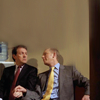
I don't like the colour of the background, so I decided to lighten it up. Using a soft round brush using an orange-y colour (#ff6600), I painted the wall behind the two men (it does not have to be perfect). Set the layer to soft light. Merge everything.

>>
3. Now we're going to lighten the picture even more. Duplicate the new background and set it to Soft Light. Then add this Curve (leave it Normal) and a Levels layer.
Levels (RGB)
16 ; 1,09 ; 227
Merge all layers.
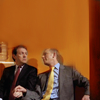
4. I now added a variety of Adjustments Layers to bring out the colours in a different way. First, add this Curve (set to Normal Mode). Then up the Saturation (Hue/Saturation) by +13. Add a Colour Balance layer to darken the colours a bit.
Midtones
+19 ; +12 ; +25
Now a Selective Colouring layer, to make the faces less red and the background to pop some more.
Red: +9 ; -5 ; -10 ; +6
Neutral: 0 ; 0 ; 0 ; -14
Black: 0 ; 0 ; 0 ; +6
Finally, put another Curve on top (on Normal) and merge the layers. Then go to Filter - Blur - Surface Blur to even out the background a bit more. I used the settings: 21 and 17.
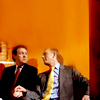
5. Now add some round brushes for the background to make it look more texturised. I used this one by inxsomniax in white and light blue and set them all to Screen. Add a Brightness/Contrast layer (-4 ; +10).
Add whatever you want on the icon, texture, brush, text and you're done! Also sharpen if you need to.
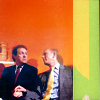
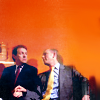
result:
Now onto the texture work aka
part two
a. Smudge the black border on the right, because it will be in the way for the texture since it's black.
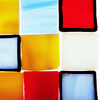
Then I added this texture by icons_are_hot. Set it to Lighten.
+
=
b. Obviously, the texture is too overpowering. Instead of erasing parts on the texture (which works too), I decided to copy my icon and put it on top. Then I erased parts around Lewis and Hathaway, using the brush from number 5. Leave parts that have to be visible, erase what you don't want to see. Copy this layer twice, the first one stays on Normal, the second set to Soft Light.
>>
c. Add some text or leave it like it is, and you're done. I added a Beatles lyric, I thought would fit the scene, because my boys were mistaken for a couple :)
Result:
PSD here (please comment if taking)
Thanks for reading! I would love to see your results :)
If you like what you see, please consider watching this community.
Going from
to
or
Made in PS CS2. Translatable if you ignore the tiny Selective Colouring layer. Difficulty is about medium imo.
part one
1. Starting out with this picture of lovely DI Lewis and his partner DS Hathaway from series one finale. Aren't they adorable? Like mentioned in my previous tutorials, I prefer working on 100x100 pixel, but if you prefer to work on a bigger image, then feel free to do so.
Start smudging the upper area to create the background. Additionally you can use a brush to add more colours in (which is usually also quicker and easier than using the smudge tool).
+
=
Merge all layers.
2. Copy the new background layer twice. Set the first copy to Soft Light, the second one to Screen to lighten up the image and make the colours deeper and brighter.
I don't like the colour of the background, so I decided to lighten it up. Using a soft round brush using an orange-y colour (#ff6600), I painted the wall behind the two men (it does not have to be perfect). Set the layer to soft light. Merge everything.
>>
3. Now we're going to lighten the picture even more. Duplicate the new background and set it to Soft Light. Then add this Curve (leave it Normal) and a Levels layer.
Levels (RGB)
16 ; 1,09 ; 227
Merge all layers.
4. I now added a variety of Adjustments Layers to bring out the colours in a different way. First, add this Curve (set to Normal Mode). Then up the Saturation (Hue/Saturation) by +13. Add a Colour Balance layer to darken the colours a bit.
Midtones
+19 ; +12 ; +25
Now a Selective Colouring layer, to make the faces less red and the background to pop some more.
Red: +9 ; -5 ; -10 ; +6
Neutral: 0 ; 0 ; 0 ; -14
Black: 0 ; 0 ; 0 ; +6
Finally, put another Curve on top (on Normal) and merge the layers. Then go to Filter - Blur - Surface Blur to even out the background a bit more. I used the settings: 21 and 17.
5. Now add some round brushes for the background to make it look more texturised. I used this one by inxsomniax in white and light blue and set them all to Screen. Add a Brightness/Contrast layer (-4 ; +10).
Add whatever you want on the icon, texture, brush, text and you're done! Also sharpen if you need to.
result:
Now onto the texture work aka
part two
a. Smudge the black border on the right, because it will be in the way for the texture since it's black.
Then I added this texture by icons_are_hot. Set it to Lighten.
+
=
b. Obviously, the texture is too overpowering. Instead of erasing parts on the texture (which works too), I decided to copy my icon and put it on top. Then I erased parts around Lewis and Hathaway, using the brush from number 5. Leave parts that have to be visible, erase what you don't want to see. Copy this layer twice, the first one stays on Normal, the second set to Soft Light.
>>
c. Add some text or leave it like it is, and you're done. I added a Beatles lyric, I thought would fit the scene, because my boys were mistaken for a couple :)
Result:
PSD here (please comment if taking)
Thanks for reading! I would love to see your results :)
If you like what you see, please consider watching this community.