Tutorial | Animated Icon #001
Uhm, oooookay, I have no idea if I can explain this right. I still tweak here and there to get the icon right and I'm not an expert on animated icons. Just so that you know. It's my very first tutorial for an animated icon and it's image heavy.
Oh and I work with Photoshop CS and ImageReady.
How to make
(I made a .zip of the screencaps. You can use them while you work your way through the tutorial to follow every step - DW Animation Screencaps)
Step 01
To make an animation you have to make screencaps from the scene. I work with Windows Media Player Classic. I cap the scene frame by frame. That way you will get a lot of caps but at the same time you can better decide which caps you're going to use. It's a little bit of work but it pays off. For me anyway.
In the end it's your decision which frames you cap.
Step 02
Choose the caps you want. But remember: the less layers, the better cause it will keep the size of you icon small. I decided to go with 17 caps.
Open them all in ImageReady.
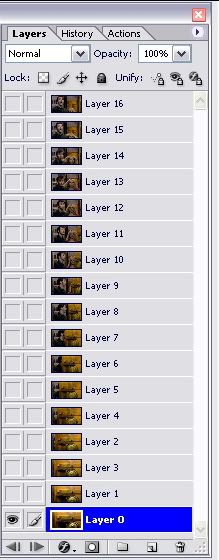
Now drag each cap, one by one, over your very first screencap. Keep them in order of you icon will look wacko.
You palette should look now like this
Step 03
I wanted the animation to be between the borders of 77words's icon texture
To get the right size I did the following on the texture:
- Use the Rectangular Marquee Tool
and make a selection between the borders
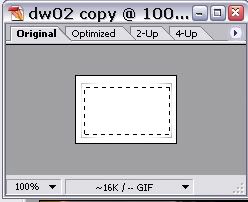
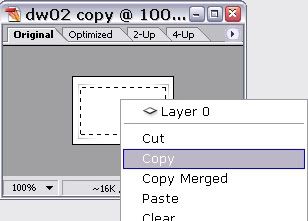
- Right-click on the seclection and select Copy
- Press Ctrl+N. In the new window you see now the size of you selection. Memorize these numbers!!!
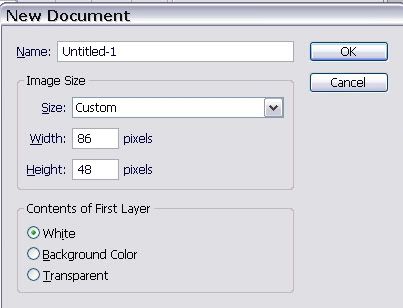
- Click on Cancel to close the window (we don't need that anymore. It was just a help to get the size ^-^)
- Now click on the Crop Tool
and enter the numbers you just memorized

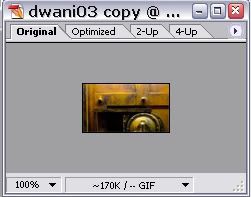
- Go to your image and use the Crop Tool
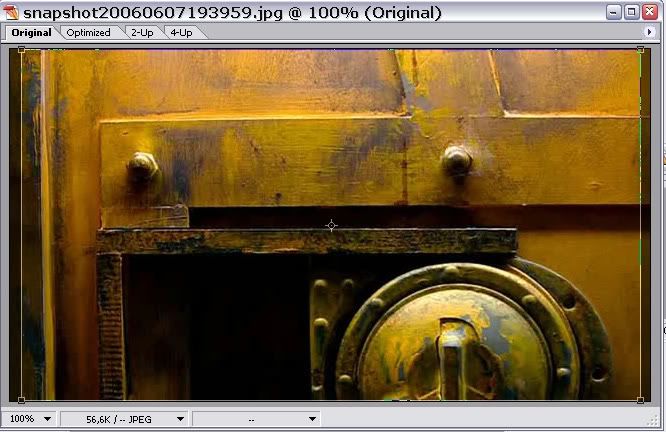
->
This is how I do it. A little workloaded but it works.
Step 04
Now take the texture
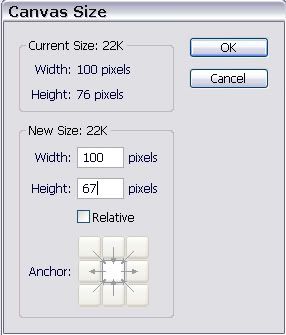
and look at the size of it. It's 100x67.
Go back to your icon and go to Image -> Canvas Size
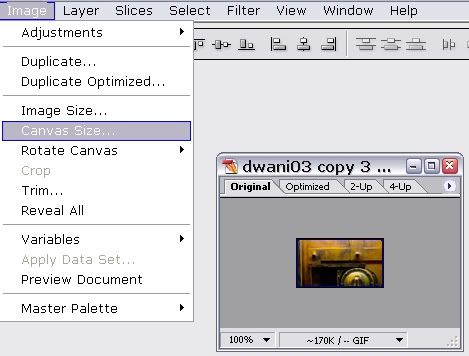
In the new window
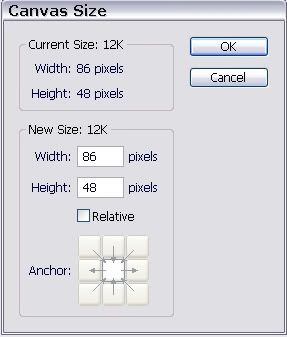
enter now the numbers from the texture
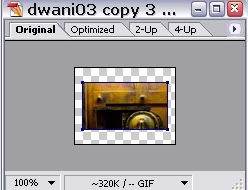
And the result should be like this
Step 05
Now use the Move Tool
and drag the texture in the icon-canvas over all layers.
You layer palette should look like this

Ouch, kinda hides the animation... go to your layer palette and drag the texture layer down, under the very first image layer

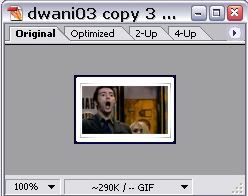
Much better
Step 06
Now go to Window -> Animation to open the animation window. From now on we will be working with the Animation Window and the Layer Palette.
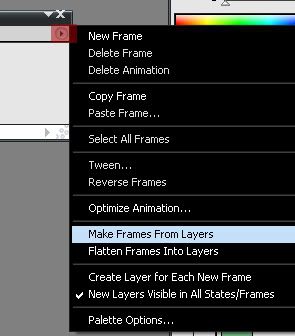
Edit: There's an easier way (thanks to endor_phine) to get frames from layers:
Click at the little arrow at the animation window and there choose 'make frames from layers'
/Edit
The way I did it for this tutorial is this one:
For your first frame, make sure you selected the texture layer and the first image layer in your layer palette
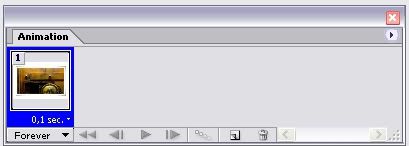
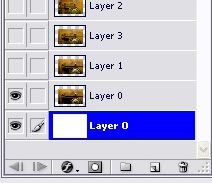
To make a new frame, click on
and a new frame will appear
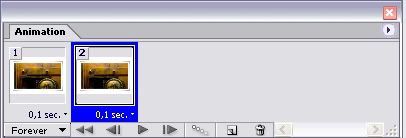
You see that it is the same as frame 1. To get the second image, go to you layer pallette and select the second image (deselect the first image)
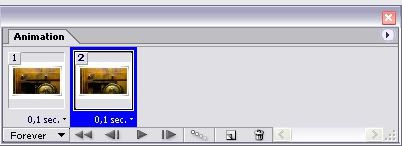
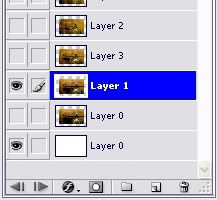
Now repeat these steps for each layer you've got until you have 17 frames

If you now click
your animation will be your mini-movie
It's a little, a very little too fast for my liking. That's why I changed on every frame the delay time
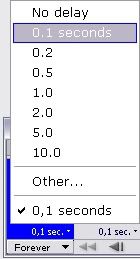
from 0 sec to 0.1 sec
Step 07
I wanted to have some very original text at the end of the animation *grins*
I dublicated the very last frame

and deselected the image in the layerpalette. That way I only have the texture
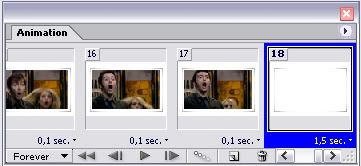
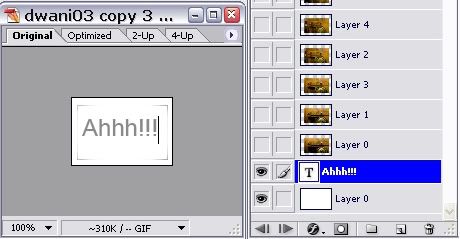
Now, with the texture layer in you palette selected, go to your icon and type your words.
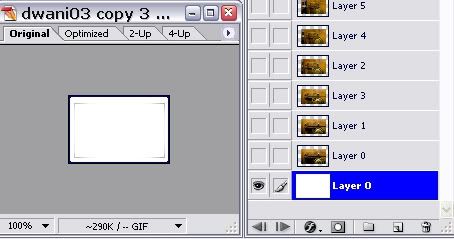
->
In your animation window, the new frame will now look like this
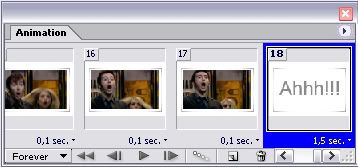
I changed the time delay to 1,5 sec.
Step 08
Go to Window -> Optimize. This window will allow you to change the size of your icon. In you icon window click on 2-Up

I always start with the settings you see above. You see that the setting is too big for LJ standard (40K)
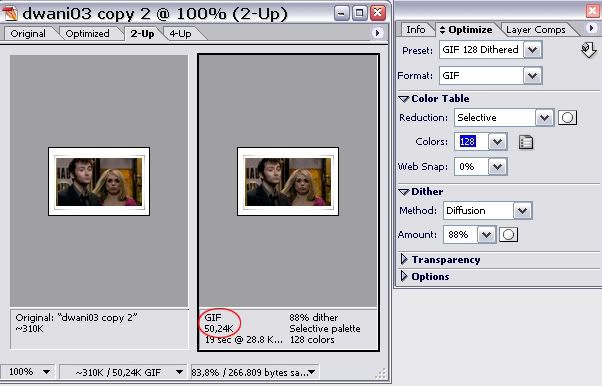
Now play with the number of the Colors in the Optimize window
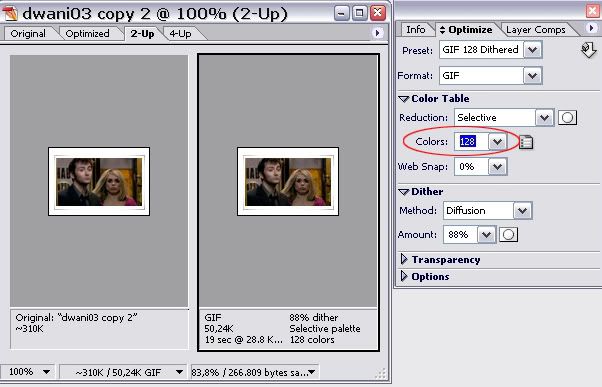
I was too lazy to go in small step and choose 64 right away. It's pure luck that it was the best number!
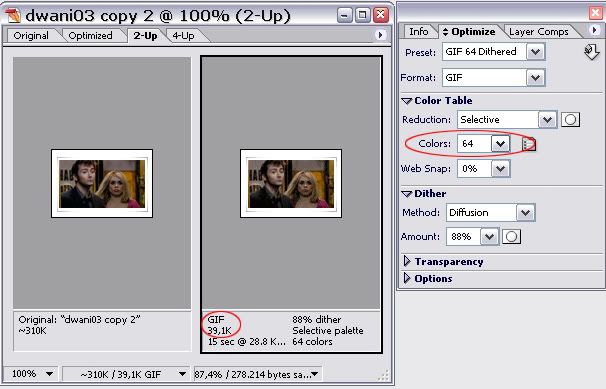
Go to File and select Save Optimized As. It's important that you choose that one. Otherwise your icon won't fit the LJ standard!

that's it! You just made your very own mini-movie icon *throws confetti*
I know, it's not the best tutorial but I hope it helped you at least a little bit ;)
Any question are to be thrown at my door
Oh and I work with Photoshop CS and ImageReady.
How to make
(I made a .zip of the screencaps. You can use them while you work your way through the tutorial to follow every step - DW Animation Screencaps)
Step 01
To make an animation you have to make screencaps from the scene. I work with Windows Media Player Classic. I cap the scene frame by frame. That way you will get a lot of caps but at the same time you can better decide which caps you're going to use. It's a little bit of work but it pays off. For me anyway.
In the end it's your decision which frames you cap.
Step 02
Choose the caps you want. But remember: the less layers, the better cause it will keep the size of you icon small. I decided to go with 17 caps.
Open them all in ImageReady.
Now drag each cap, one by one, over your very first screencap. Keep them in order of you icon will look wacko.
You palette should look now like this

Step 03
I wanted the animation to be between the borders of 77words's icon texture

To get the right size I did the following on the texture:
- Use the Rectangular Marquee Tool

and make a selection between the borders

- Right-click on the seclection and select Copy

- Press Ctrl+N. In the new window you see now the size of you selection. Memorize these numbers!!!

- Click on Cancel to close the window (we don't need that anymore. It was just a help to get the size ^-^)
- Now click on the Crop Tool

and enter the numbers you just memorized

- Go to your image and use the Crop Tool

->

This is how I do it. A little workloaded but it works.
Step 04
Now take the texture

and look at the size of it. It's 100x67.
Go back to your icon and go to Image -> Canvas Size

In the new window

enter now the numbers from the texture

And the result should be like this

Step 05
Now use the Move Tool

and drag the texture in the icon-canvas over all layers.
You layer palette should look like this

Ouch, kinda hides the animation... go to your layer palette and drag the texture layer down, under the very first image layer

Much better

Step 06
Now go to Window -> Animation to open the animation window. From now on we will be working with the Animation Window and the Layer Palette.
Edit: There's an easier way (thanks to endor_phine) to get frames from layers:
Click at the little arrow at the animation window and there choose 'make frames from layers'

/Edit
The way I did it for this tutorial is this one:
For your first frame, make sure you selected the texture layer and the first image layer in your layer palette


To make a new frame, click on

and a new frame will appear

You see that it is the same as frame 1. To get the second image, go to you layer pallette and select the second image (deselect the first image)


Now repeat these steps for each layer you've got until you have 17 frames

If you now click

your animation will be your mini-movie

It's a little, a very little too fast for my liking. That's why I changed on every frame the delay time

from 0 sec to 0.1 sec
Step 07
I wanted to have some very original text at the end of the animation *grins*
I dublicated the very last frame

and deselected the image in the layerpalette. That way I only have the texture

Now, with the texture layer in you palette selected, go to your icon and type your words.

->

In your animation window, the new frame will now look like this

I changed the time delay to 1,5 sec.
Step 08
Go to Window -> Optimize. This window will allow you to change the size of your icon. In you icon window click on 2-Up

I always start with the settings you see above. You see that the setting is too big for LJ standard (40K)

Now play with the number of the Colors in the Optimize window

I was too lazy to go in small step and choose 64 right away. It's pure luck that it was the best number!

Go to File and select Save Optimized As. It's important that you choose that one. Otherwise your icon won't fit the LJ standard!
that's it! You just made your very own mini-movie icon *throws confetti*
I know, it's not the best tutorial but I hope it helped you at least a little bit ;)
Any question are to be thrown at my door