Super Double manga coloring tutorial
Coloring Tutorial
Level: Easy/Moderate
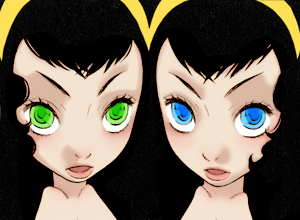
This tutorial was made on Adobe Photoshop CS2 but it should be translatable to all other Photoshop versions and probably Gimp, but not sure about Paint Shop Pro. This coloring is pretty simple and blocky because I wanted it to be kind of cell style coloring.
Before coloring:
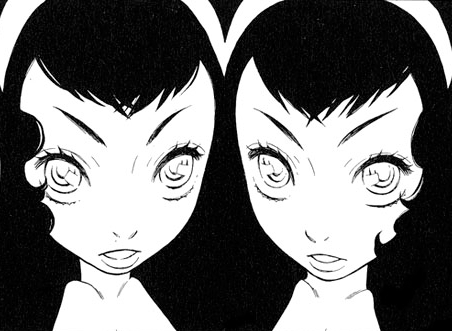
The base. You can crop and adjust yourself, or you can just grab whatever and go with it. About cleaning and leveling, I didn't do any of that for this particular base but if you want to learn I suggest level's coloring tutorial here.
Step 1:
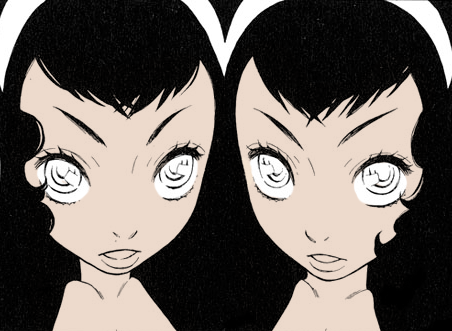
Create a new layer and set it to multiply. Fill in the skin with any shade of skin tone you'd like with the paint brush tool and erase away the areas you don't want that color.
Step 2 and 3:
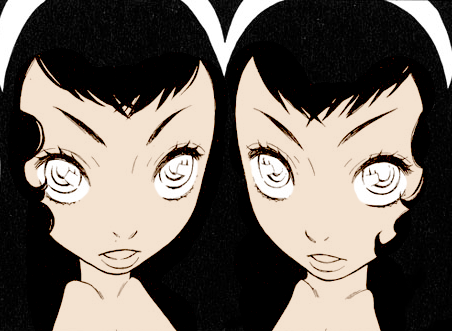
Next to make it less flat and look more like "skin", duplicate the skin layer twice, set one to color burn and the other to soft light.
Step 4:
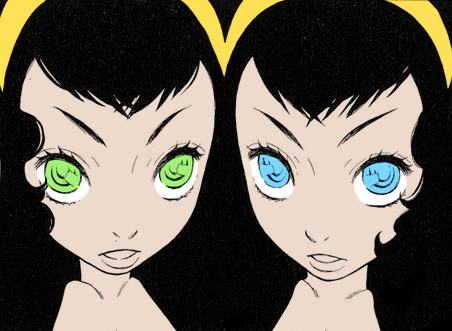
Color in the eyes and hair band. This time I set the hair band to multiply, and the eyes to hard light for a brighter color.
Step 5a:
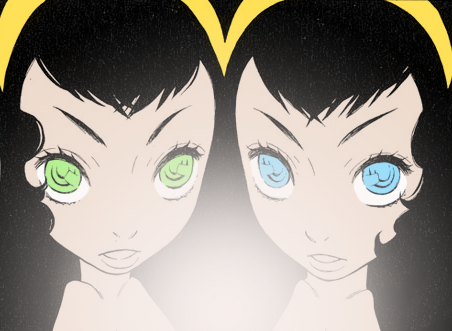
Now that all the flats have been laid down, it's time to move on to the shadows. Decide on where your light source is coming from. Sometimes it's helpful to have an actual light source in the image. I created a layer for where I want the light to be, coming between and below the two faces.
Step 5b and c:
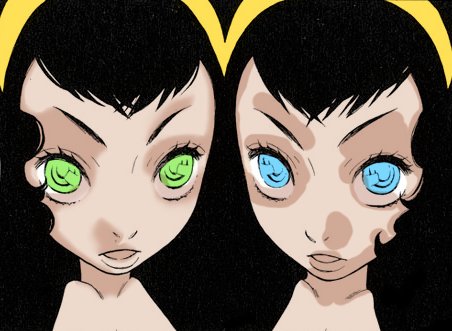
Choose a color for the shadows. Whatever color will do depending on how you want the final image to look like. Lay it down with the paint brush tool like it looks on the right. Then use the eraser tool to shape the shadows like on the left. I like setting the hardness to "0" and lowering the opacity to give the shadows a soft feel.
TIME OUT!
Next, let's learn about selecting! I find the load selection, and the reselect options very helpful.
1. For load selection, go to the layer you want to select.
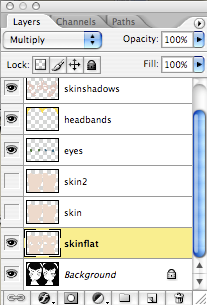
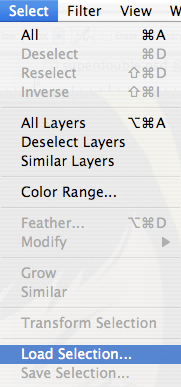
2. Go to select --> load selection.
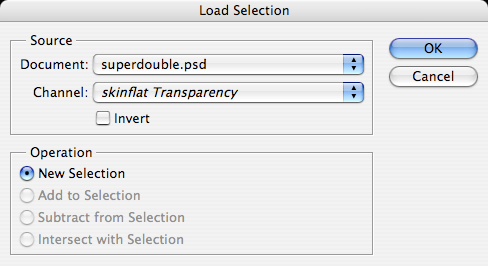
3. This dialogue box will pop up, just push ok.
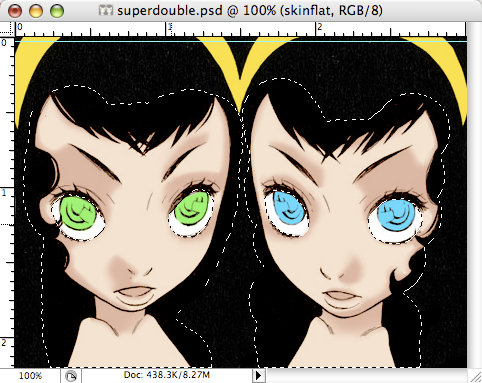
4. Now in that layer, the parts that you colored (this time is the skin), will be selected. You can you use this tool to color inside the lines, so to speak.
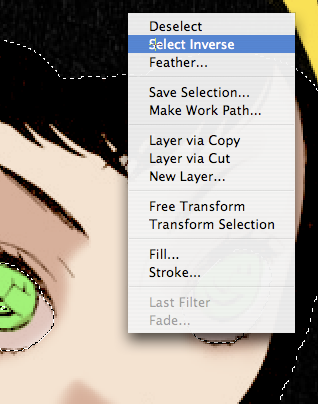
5. The other option is to select inverse and deleting the coloring outside of where you want it.
6. If you are continually using that same selection, you can reselect just by going to Select --> Reselect, pushing the keyboard shortcut depending on your platform.
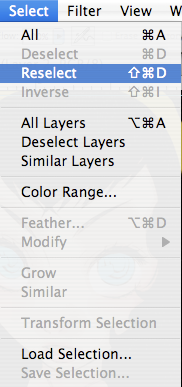
Now I went though all that to show you how to get rid of that overlapping bits in the eyes. XD;;;
Step 6 through whatever:
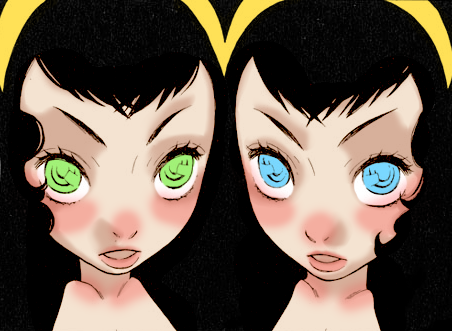
Next is all the pinks in the skin. Color in the lips, of course, and some in the cheeks, nose, and collar bones. Yeah, they look like clowns now but just erase some parts and mess with the opacity like with the shadows.
Select the areas where you don't want the pink, like in the Time Out part, and just push delete.
Copy the eye layers and color, erase or do whatever to make it look however you want. I also copied the original eye layer and set it to screen and put it under the hard light layer.
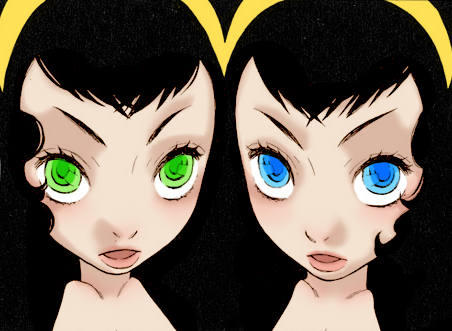
So there you have it! If you see any mistakes or are confused about anything, please tell me. :D
Level: Easy/Moderate

This tutorial was made on Adobe Photoshop CS2 but it should be translatable to all other Photoshop versions and probably Gimp, but not sure about Paint Shop Pro. This coloring is pretty simple and blocky because I wanted it to be kind of cell style coloring.
Before coloring:

The base. You can crop and adjust yourself, or you can just grab whatever and go with it. About cleaning and leveling, I didn't do any of that for this particular base but if you want to learn I suggest level's coloring tutorial here.
Step 1:

Create a new layer and set it to multiply. Fill in the skin with any shade of skin tone you'd like with the paint brush tool and erase away the areas you don't want that color.
Step 2 and 3:

Next to make it less flat and look more like "skin", duplicate the skin layer twice, set one to color burn and the other to soft light.
Step 4:

Color in the eyes and hair band. This time I set the hair band to multiply, and the eyes to hard light for a brighter color.
Step 5a:

Now that all the flats have been laid down, it's time to move on to the shadows. Decide on where your light source is coming from. Sometimes it's helpful to have an actual light source in the image. I created a layer for where I want the light to be, coming between and below the two faces.
Step 5b and c:

Choose a color for the shadows. Whatever color will do depending on how you want the final image to look like. Lay it down with the paint brush tool like it looks on the right. Then use the eraser tool to shape the shadows like on the left. I like setting the hardness to "0" and lowering the opacity to give the shadows a soft feel.
TIME OUT!
Next, let's learn about selecting! I find the load selection, and the reselect options very helpful.
1. For load selection, go to the layer you want to select.

2. Go to select --> load selection.

3. This dialogue box will pop up, just push ok.

4. Now in that layer, the parts that you colored (this time is the skin), will be selected. You can you use this tool to color inside the lines, so to speak.

5. The other option is to select inverse and deleting the coloring outside of where you want it.

6. If you are continually using that same selection, you can reselect just by going to Select --> Reselect, pushing the keyboard shortcut depending on your platform.

Now I went though all that to show you how to get rid of that overlapping bits in the eyes. XD;;;
Step 6 through whatever:

Next is all the pinks in the skin. Color in the lips, of course, and some in the cheeks, nose, and collar bones. Yeah, they look like clowns now but just erase some parts and mess with the opacity like with the shadows.
Select the areas where you don't want the pink, like in the Time Out part, and just push delete.
Copy the eye layers and color, erase or do whatever to make it look however you want. I also copied the original eye layer and set it to screen and put it under the hard light layer.

So there you have it! If you see any mistakes or are confused about anything, please tell me. :D