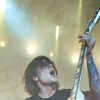
tutorial: frank iero
Requested by xcyanidexsunx
>
Made using photoshop CS2.
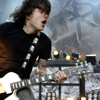
Prepare your base. If it's dark, duplicate and set to screen (you can always go back and do this step after you see the result).
We'll start by adding some color to the image and making it a bit blue.
Layer>new adjustment layer>selective color:
R: -20 10 25 0
Y: 55 -5 -40 20
N: 15 5 -2 5
B: 10 0 0 1
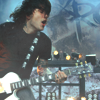
Now I want to add more blue to the bright part of the image, again using SC.
Layer>new adjustment layer>selective color:
R: -20 0 10 10
Y: 50 -10 -20 0
W: 100 0 0 0
N: -5 -5 -5 5
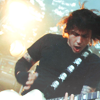
I want to make the colors more vivid, so I'm adding saturation.
Layer>new adjustment layer>hue/saturation:
Master sat: 20
Now the blue looks fine, but I want to add some red.
Layer>new adjustment layer>curves:
RGB: 91/82
131/129
Move the bottom left point>0/30
R: move the bottom left point>0/11
B: 109/96
Move the bottom left point>8/0
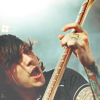
Now I added this texture by innocent-lexys and set it to lighten, opacity: 30%.
PSD (comment if taking, not password protected anymore).
>
Made using photoshop CS2.
Prepare your base. If it's dark, duplicate and set to screen (you can always go back and do this step after you see the result).
We'll start by adding some color to the image and making it a bit blue.
Layer>new adjustment layer>selective color:
R: -20 10 25 0
Y: 55 -5 -40 20
N: 15 5 -2 5
B: 10 0 0 1
Now I want to add more blue to the bright part of the image, again using SC.
Layer>new adjustment layer>selective color:
R: -20 0 10 10
Y: 50 -10 -20 0
W: 100 0 0 0
N: -5 -5 -5 5
I want to make the colors more vivid, so I'm adding saturation.
Layer>new adjustment layer>hue/saturation:
Master sat: 20
Now the blue looks fine, but I want to add some red.
Layer>new adjustment layer>curves:
RGB: 91/82
131/129
Move the bottom left point>0/30
R: move the bottom left point>0/11
B: 109/96
Move the bottom left point>8/0
Now I added this texture by innocent-lexys and set it to lighten, opacity: 30%.
PSD (comment if taking, not password protected anymore).