Icon tutorial #01
Because paperjetpilot asked for a tutorial. This is my first time writing a tutorial, so I hope it's easy to understand ♥ This is only meant to be a guide, so please don't follow it step by step, but use some of your own creative juices as well :D
Done in Photoshop 7.0, but it should be translatable for other programs ^^
How to go from:

to
First of all, I cropped the base out of an image I found at Aethereality.
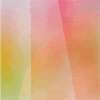
01. I took this texture from wonderland__ and set it to Overlay at 67% opacity.
»
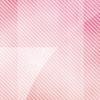
02. Next, I added this texture, also from wonderland__, and set it to Soft Light at 100% opacity.
»
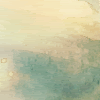
03. After that, I set this texture by rainharbour to Color Burn at 100% opacity. I didn't really like how it turned out, so I played around with the the Hue/Saturation settings until I liked it (I made it cyan/purple colorish instead).
»
»
04. Then I added this texture, again by wonderland__, and set it to Soft Light at 100% opacity.

»
05. I then used this texture from gsd82 and set it to Color Burn at 23% opacity.

»
06. Now the icon looks pretty orange, so to change that, I duplicated the base and set that to Soft Light at 100% opacity, and then desaturated the base itself.

»
07. Next, I took this light texture by ianthinae, rotated it 90 degrees counter clockwise and flipped it vertically. I set it to Screen at 61% opacity.

»
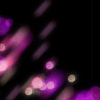
08. Then I added this texture, also by ianthinae and set it to Screen at 100% opacity.
»
09. After that, I duplicated the texture from step 7 and rotated it 90 degrees counter clockwise. I left the blend mode on Screen, but changed the opacity to 100%.

»
10. Lastly, I added a border and voila, the icon is done :D
If you found this tutorial helpful, please let me know ♥ I hope it was easy to follow and I'd love to see your icons if you made any with this tutorial ^^
Done in Photoshop 7.0, but it should be translatable for other programs ^^
How to go from:

to

First of all, I cropped the base out of an image I found at Aethereality.
01. I took this texture from wonderland__ and set it to Overlay at 67% opacity.

»

02. Next, I added this texture, also from wonderland__, and set it to Soft Light at 100% opacity.

»

03. After that, I set this texture by rainharbour to Color Burn at 100% opacity. I didn't really like how it turned out, so I played around with the the Hue/Saturation settings until I liked it (I made it cyan/purple colorish instead).

»

»

04. Then I added this texture, again by wonderland__, and set it to Soft Light at 100% opacity.

»

05. I then used this texture from gsd82 and set it to Color Burn at 23% opacity.

»

06. Now the icon looks pretty orange, so to change that, I duplicated the base and set that to Soft Light at 100% opacity, and then desaturated the base itself.

»

07. Next, I took this light texture by ianthinae, rotated it 90 degrees counter clockwise and flipped it vertically. I set it to Screen at 61% opacity.

»

08. Then I added this texture, also by ianthinae and set it to Screen at 100% opacity.

»

09. After that, I duplicated the texture from step 7 and rotated it 90 degrees counter clockwise. I left the blend mode on Screen, but changed the opacity to 100%.

»

10. Lastly, I added a border and voila, the icon is done :D
If you found this tutorial helpful, please let me know ♥ I hope it was easy to follow and I'd love to see your icons if you made any with this tutorial ^^