Icon tutorial #02
A new tutorial, requested by soifon, who wanted to know how I made my colored manga icons.
Done in Photoshop 7.0, but it should be translatable for other programs ^^
Note: I usually color my icons before I crop them, because I find it easier to color images that way, but since I don't have it in the original size, let's just pretend I colored it after I cropped the base :P
How to go from:
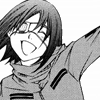
to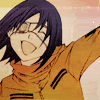
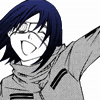
01. I started out by creating a new layer and set it to Multiply. Then I used the Polygonal Lasso Tool to go round Akito's hair and filled it with a blue color (#343C8A).

»
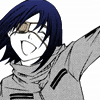
02. Next, I colored Akito's eyepatch with a light brown color (#C3B39B) on a new layer and set that to Multiply as well.

»
03. On a new layer set to Multiply, I colored his mouth with a light brown/reddish color (#DFC2A4). The same goes for his face - a new layer set to Multiply, and I filled it with a peach color (#F0E2D3).

»
»
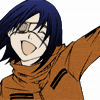
04. Lastly, I colored Akito's jacket with an orange color (#EE8A39) and also set that to Multiply.

»
Now we're done with the coloring part, but it looks a bit boring, so let's spice it up a bit.
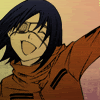
05. I took this texture from rosalen_knight and set it to Multiply at 100% opacity.

»
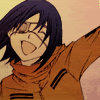
06. Now it looks pretty dark, so I used this texture from unmasked_icons and set it to Soft Light at 100% opacity.

»
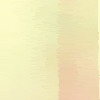
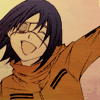
07. Next, I took this texture also by unmasked_icons and set it to Soft Light at 30% opacity.
»
08. To finish it off, I used this texture from 77words and set it to Overlay at 100% opacity.
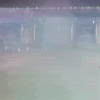
»
Basically, after coloring the icon, you can add whatever you want; textures, brushes words etc. Play around with the blend modes and opacity to get various outcomes, unlike me who always uses Soft Light. ^^
Done in Photoshop 7.0, but it should be translatable for other programs ^^
Note: I usually color my icons before I crop them, because I find it easier to color images that way, but since I don't have it in the original size, let's just pretend I colored it after I cropped the base :P
How to go from:

to

01. I started out by creating a new layer and set it to Multiply. Then I used the Polygonal Lasso Tool to go round Akito's hair and filled it with a blue color (#343C8A).

»

02. Next, I colored Akito's eyepatch with a light brown color (#C3B39B) on a new layer and set that to Multiply as well.

»

03. On a new layer set to Multiply, I colored his mouth with a light brown/reddish color (#DFC2A4). The same goes for his face - a new layer set to Multiply, and I filled it with a peach color (#F0E2D3).

»

»

04. Lastly, I colored Akito's jacket with an orange color (#EE8A39) and also set that to Multiply.

»

Now we're done with the coloring part, but it looks a bit boring, so let's spice it up a bit.
05. I took this texture from rosalen_knight and set it to Multiply at 100% opacity.

»

06. Now it looks pretty dark, so I used this texture from unmasked_icons and set it to Soft Light at 100% opacity.

»

07. Next, I took this texture also by unmasked_icons and set it to Soft Light at 30% opacity.

»

08. To finish it off, I used this texture from 77words and set it to Overlay at 100% opacity.

»

Basically, after coloring the icon, you can add whatever you want; textures, brushes words etc. Play around with the blend modes and opacity to get various outcomes, unlike me who always uses Soft Light. ^^