Water Animation and Blue-Green Coloring
A two in one tutorial. ^_^
-->
or
Using Photoshop CS2 (practically same as 7) and ImageReady. Requires basic knowledge of how to use both Photoshop and ImageReady.
Alright, so we start with our base, cropped from this lovely picture of Fai from Tsubasa Reservoir Chronicle. The picture is from Clow-Legacy.
Soo... take the cropped base, duplicate it and desaturate it. Set the desaturated layer to Normal at 40%

-->
Next, add this light texture on top and set to Soft Light at 100%. I erased a bit of mine because it was brightening Fai's body too much. We're going to come back to this layer later for the animated icon effect, so don't forget about it. ;)

-->
Now we go to the curves layer. I found these curves ages ago, so forgive me if I don't remember exactly where. So, here are you curves settings. No RGB setting.
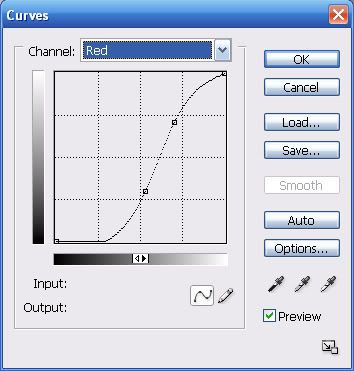
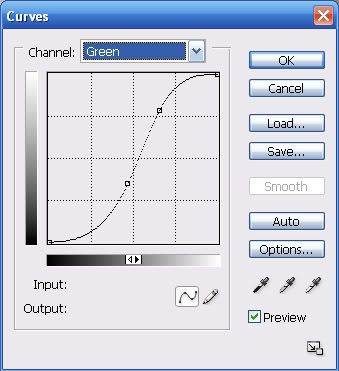
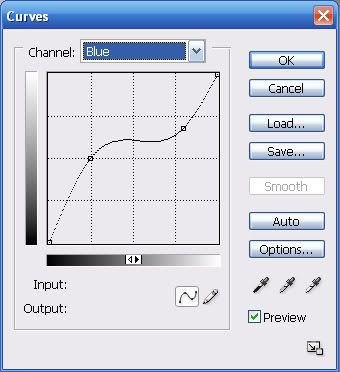
Now we've got...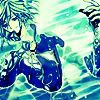
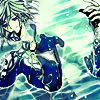
Ow, mine eyes! The brightens kills them. We should fix that. How about... taking your base (yes, this one, not the desaturated one) duplicated it and pull it to the top. Then we set that layer to Saturation at 100%.

-->
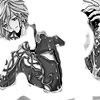
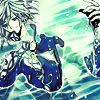
The water is nice now, but Fai is starting to look funky. So duplicate your desaturated layer from way down, pull it up, and set it at Screen at 30%. Now you can erase any parts that got too bright. Here's what I did:
-->
Now just one more part till we're done with the first bit! Make a new layer and set it to Color at 100%. Now you can use a white or black paintbrush to go over any bits that you would like to be desaturated.
Here is the part where I added the text. Mine was set to font type Sylfaen, size 12.5, and color #1c2d56. To get the scattered letters look, you just mess with the font baseline. If you don't know where that is, it can be found on your text window here.

And ta da! Here are my layers, in case your confused!
Now for the animated part. Remember that soft light layer? (using this texture) Well, scroll back down to that layer and duplicate it. DO NOT DRAG IT TO THE TOP LAYER. Keep it under the curves layer.
Now is the time where you are going to make your animation layers. How I make an animation is first I make all of my frames in Photoshop, save them as JPEGs, and then paste them into a separate ImageReady file. I don't know how other people do it, just use whatever method works for you.
So now you're going to make your 3 frames. All that you have to do to get the wavey-colors look is mess with the opacity of the soft light layer. I went up by 20's until I got to 60%. Here, maybe this will help explain:
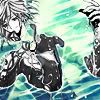
First frame: soft light layer set to 0%

Second frame: soft light layer set to 20%
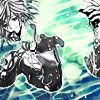
Third frame: soft light layer set to 40%

Fourth frame: Soft light layer set to 60%
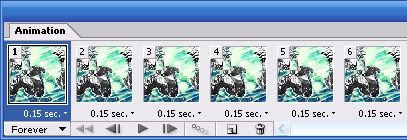
Now that you've got all the frames, you just need to paste them all into ImageReady and decide how long you want each frame to play. I chose .15 seconds for each.
One more thing! You may want to duplicate the 3rd and 2nd frame and put them after the 4th frame, so that your animationg flows smoothly from frame 1 in a loop. Here are my frames:

And you're done! Sorry if this tutorial made no sense, I'm not really that great at simplifying things. '-_-

-->

or

Using Photoshop CS2 (practically same as 7) and ImageReady. Requires basic knowledge of how to use both Photoshop and ImageReady.
Alright, so we start with our base, cropped from this lovely picture of Fai from Tsubasa Reservoir Chronicle. The picture is from Clow-Legacy.
Soo... take the cropped base, duplicate it and desaturate it. Set the desaturated layer to Normal at 40%

-->

Next, add this light texture on top and set to Soft Light at 100%. I erased a bit of mine because it was brightening Fai's body too much. We're going to come back to this layer later for the animated icon effect, so don't forget about it. ;)

-->

Now we go to the curves layer. I found these curves ages ago, so forgive me if I don't remember exactly where. So, here are you curves settings. No RGB setting.


Now we've got...

Ow, mine eyes! The brightens kills them. We should fix that. How about... taking your base (yes, this one, not the desaturated one) duplicated it and pull it to the top. Then we set that layer to Saturation at 100%.

-->

The water is nice now, but Fai is starting to look funky. So duplicate your desaturated layer from way down, pull it up, and set it at Screen at 30%. Now you can erase any parts that got too bright. Here's what I did:

-->

Now just one more part till we're done with the first bit! Make a new layer and set it to Color at 100%. Now you can use a white or black paintbrush to go over any bits that you would like to be desaturated.
Here is the part where I added the text. Mine was set to font type Sylfaen, size 12.5, and color #1c2d56. To get the scattered letters look, you just mess with the font baseline. If you don't know where that is, it can be found on your text window here.

And ta da! Here are my layers, in case your confused!
Now for the animated part. Remember that soft light layer? (using this texture) Well, scroll back down to that layer and duplicate it. DO NOT DRAG IT TO THE TOP LAYER. Keep it under the curves layer.
Now is the time where you are going to make your animation layers. How I make an animation is first I make all of my frames in Photoshop, save them as JPEGs, and then paste them into a separate ImageReady file. I don't know how other people do it, just use whatever method works for you.
So now you're going to make your 3 frames. All that you have to do to get the wavey-colors look is mess with the opacity of the soft light layer. I went up by 20's until I got to 60%. Here, maybe this will help explain:

First frame: soft light layer set to 0%

Second frame: soft light layer set to 20%

Third frame: soft light layer set to 40%

Fourth frame: Soft light layer set to 60%
Now that you've got all the frames, you just need to paste them all into ImageReady and decide how long you want each frame to play. I chose .15 seconds for each.
One more thing! You may want to duplicate the 3rd and 2nd frame and put them after the 4th frame, so that your animationg flows smoothly from frame 1 in a loop. Here are my frames:


And you're done! Sorry if this tutorial made no sense, I'm not really that great at simplifying things. '-_-