tutorial #1
go from

to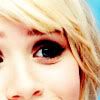
OR
using Adobe Photoshop but can be easily translated into other programs.
NOTE: the best type of picture to use is one that is HI-RES & has good lighting.
credit for picture (ashley olsen); autorocket.
crop your picture to 100x100 pixels to fit LJ standards.

i left it alone (no sharpening).
i duplicated the background layer and set to screen. i did it once, but make sure its not too dark or too bright.

Created a new layer and fill it with #6ca1e9 and set to soft light

=
Create a new layer and fill it with #efa1ac, set to soft light, opacity and fill to 75%

=
create a new layer and fill it with #c7e4f4, set to color burn

=
create a new layer and fill it with #f3ebe0, set to color burn, opacity and fill to 75%

=
flatten image.
duplicate the background layer and set to color burn. duplicate the color burn layer and set opacity and fill to 50%

you can stop here if you want.
duplicate the background layer and desaturate. set opacity and fill to 70& (adjust to personal liking). make sure this layer is BENEATH the color burn layers.
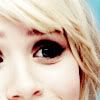
the next step is unnecessary, but i thought i would brighten it up a teensy bit.
duplicate background layer and set to soft light. opacity and fill to 50%. set to the top of all your layers.

and voila! remember, adjustments are needed to suit the picture and be creative =D
icons using same tutorial w/ and w/out adjustments:




to

OR

using Adobe Photoshop but can be easily translated into other programs.
NOTE: the best type of picture to use is one that is HI-RES & has good lighting.
credit for picture (ashley olsen); autorocket.
crop your picture to 100x100 pixels to fit LJ standards.

i left it alone (no sharpening).
i duplicated the background layer and set to screen. i did it once, but make sure its not too dark or too bright.

Created a new layer and fill it with #6ca1e9 and set to soft light

=

Create a new layer and fill it with #efa1ac, set to soft light, opacity and fill to 75%

=

create a new layer and fill it with #c7e4f4, set to color burn

=

create a new layer and fill it with #f3ebe0, set to color burn, opacity and fill to 75%

=

flatten image.
duplicate the background layer and set to color burn. duplicate the color burn layer and set opacity and fill to 50%

you can stop here if you want.
duplicate the background layer and desaturate. set opacity and fill to 70& (adjust to personal liking). make sure this layer is BENEATH the color burn layers.

the next step is unnecessary, but i thought i would brighten it up a teensy bit.
duplicate background layer and set to soft light. opacity and fill to 50%. set to the top of all your layers.

and voila! remember, adjustments are needed to suit the picture and be creative =D
icons using same tutorial w/ and w/out adjustments:


