And hee, you actually picked two that I made tweaking tutorials.
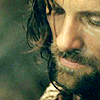
#48 is based on this tutorial. Additionally to the steps there, I first run the auto correct options of PS on the base (Auto Levels, Auto Contrast, Auto Color) before following the tutorial. I also changed the Multiply layer to Color Burn and set it at 15%. Then I added a Selective Color Layer to get rid of the too much red (because red tree barks just don't look natural at all). I only changed the Reds, upping Cyan (+30%) and Yellow (+12%) and decreased Magenta (-1%) and Black (-2%). Method was Absolute. I then merged all layers onto a new layer (Select All - Edit - Copy Merge, then Edit - Paste), because I thought it would look better with a large black border, but I wanted to keep all that was in the icon. I then added this texture by discolore on Color Burn 42%. Then, I added a scan by _sinelinea, black with a grey retangle, resized it to icon size and set it to Multiply. Went back to the merged layer and resized it so that everything was visible
( ... )
This was a fun post to see... I've seen the idea before, and have had thoughts of doing it with my friend but anyway I think you guys did an awesome job with it! It's really neat to see the similarities and yet differences that you guys have. :)
From you, I saved 2, 6, 14, 24, 25, 28-30, 32, 34, 39-46, and 48.
From Sinister Morgue, I saved 14, 21, 24, 28-30, 32, 34, 39-46, and 48.
Comments 36
Really good work!!
May I ask for a tutorial of 13,16 or 48 (all by mesnica)? :)
Reply
And hee, you actually picked two that I made tweaking tutorials.
#48 is based on this tutorial.
Additionally to the steps there, I first run the auto correct options of PS on the base (Auto Levels, Auto Contrast, Auto Color) before following the tutorial. I also changed the Multiply layer to Color Burn and set it at 15%. Then I added a Selective Color Layer to get rid of the too much red (because red tree barks just don't look natural at all). I only changed the Reds, upping Cyan (+30%) and Yellow (+12%) and decreased Magenta (-1%) and Black (-2%). Method was Absolute. I then merged all layers onto a new layer (Select All - Edit - Copy Merge, then Edit - Paste), because I thought it would look better with a large black border, but I wanted to keep all that was in the icon. I then added this texture by discolore on Color Burn 42%. Then, I added a scan by _sinelinea, black with a grey retangle, resized it to icon size and set it to Multiply. Went back to the merged layer and resized it so that everything was visible ( ... )
Reply
I'll try the tutorials, maybe today, thanks! :)
Reply
Reply
From you, I saved 2, 6, 14, 24, 25, 28-30, 32, 34, 39-46, and 48.
From Sinister Morgue, I saved 14, 21, 24, 28-30, 32, 34, 39-46, and 48.
Merry Christmas!
Reply
thanky ♥
Reply
Reply
Leave a comment