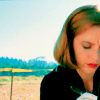
tutorial #1

-->

with Adobe Photoshop CS2
step one
duplicate the base (do this as many times as necessary)
set to screen

-->

step two
new adjustment layer --> hue/saturation
H: 0
S: +40
L: 0

-->

step three
new adjustment layer --> selective coloring
reds
c: -100
y: +100
neutrals
c: +100
m: -17
y: -43
new adjustment layer --> selective coloring
reds
m: +17
y: -26
yellows
r: +17
m: -28
y: -54

-->

step four
new layer #bbe6c4
set to colorburn

-->

step five
new adjustment layer --> color balance
midtones
+17 -16 +14
shadows
-13 +08 -12
highlights
+05 -09 +18
check "preserved luminosity"

-->

step six
new layer
this texture by me
set to multiply @ 25%

-->

step seven
new layer #00c8ec
set to soft light @ 20%

-->

step eight (optional)
new layer #e7e7e7
set to color burn @ 30%

-->

other icons using this technique:


like what you see? friend this community :]