Another...hole in the head.
Don't ask, have no idea where the title came from (i think it's from Nickelback's song lol). After a new day at school i thought i should post a new tutorial cause i think this one is better than the other one (which was my first one). Here it goes...again.
i went from this to this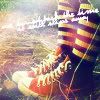
Step 1: Get your image, resize it to 100X100, duplicate it and set it to screen 80%.
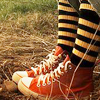
STEP 2: Duplicate the base again, bring it to the top and set it to soft light 100%
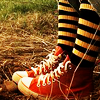
STEP 3:Create a new layer, fill it with #0b0136 and set it to exclusion 80%.
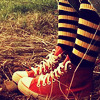
STEP 4:Creat another new layer and this time fill it with #f6b3d4 and set it to overlay 30%
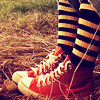
STEP 5:Duplicate your base image (the one u started from, bring it to the top and set the layer to soft light 60% and the saturation (CTR+U) at +60.
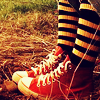
STEP 6:Go to Layer>New Adjustment Layer>Color Balance and i used these values:
Shadows: -100, +16, 0
Midtones:-27, -16, +30
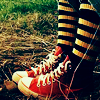
STEP 7:Duplicate your base image again, bring it to the top,set it to screen 40%, desaturate it (SHIFT+CTRL+U), go to Filter>Blur>Gaussin Blur and set it to 1.5
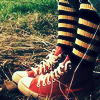
STEP 8:Go to Layer>New Adjustment Layer>Selective color. I used this values:
Reds: -100, 0, +100, 0
Cyans:-100, -73, -16, +26
Blues:0, +100, -100, 0
Neutrals:+21, -16, +19, 0
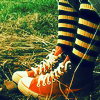
STEP 9:Make a new layer, fill it again with #0b0136 and set it to exclusion 30%.
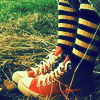
STEP 10:I used this texture:

and set it to screen 70%.
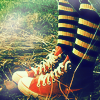
STEP 11: (optional) I used this texture:

and set it to screen 90%. I erased the parts that were covering the feet cause i don't think they looked ok.
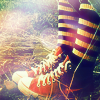
STEP 12: I used this text brush:
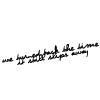
and this is the result:

Hope it wasn't boring, too big or something. The steps with the textures are optional, i just liked how they worked out ^_^
Again i must say the textures and the text brush were NOT made by me but i have them for a long time and i dunno who to credit. I suppose that as long as i don't say they're mine there's no prob.
See ya
xxx
i went from this to this

Step 1: Get your image, resize it to 100X100, duplicate it and set it to screen 80%.

STEP 2: Duplicate the base again, bring it to the top and set it to soft light 100%

STEP 3:Create a new layer, fill it with #0b0136 and set it to exclusion 80%.

STEP 4:Creat another new layer and this time fill it with #f6b3d4 and set it to overlay 30%

STEP 5:Duplicate your base image (the one u started from, bring it to the top and set the layer to soft light 60% and the saturation (CTR+U) at +60.

STEP 6:Go to Layer>New Adjustment Layer>Color Balance and i used these values:
Shadows: -100, +16, 0
Midtones:-27, -16, +30

STEP 7:Duplicate your base image again, bring it to the top,set it to screen 40%, desaturate it (SHIFT+CTRL+U), go to Filter>Blur>Gaussin Blur and set it to 1.5

STEP 8:Go to Layer>New Adjustment Layer>Selective color. I used this values:
Reds: -100, 0, +100, 0
Cyans:-100, -73, -16, +26
Blues:0, +100, -100, 0
Neutrals:+21, -16, +19, 0

STEP 9:Make a new layer, fill it again with #0b0136 and set it to exclusion 30%.

STEP 10:I used this texture:

and set it to screen 70%.

STEP 11: (optional) I used this texture:

and set it to screen 90%. I erased the parts that were covering the feet cause i don't think they looked ok.

STEP 12: I used this text brush:

and this is the result:

Hope it wasn't boring, too big or something. The steps with the textures are optional, i just liked how they worked out ^_^
Again i must say the textures and the text brush were NOT made by me but i have them for a long time and i dunno who to credit. I suppose that as long as i don't say they're mine there's no prob.
See ya
xxx