Entry VIII: Getting it DONE!
Well my darlins it's time to start getting boned.....the corset I mean, not myself, that comes later. (he he)
Okay perverted joke aside, lets start by hand basting the lining to the outer fabric. This is important so that you ensure when you're stitching yu have the panels lined up. If you don't you'll get stretch lines, so this is a VERY IMPORTANT step. It's going to take you about half an hour, but it's worth it in the end. I did it in a bright yellow thread so I had an easier time pulling it out later
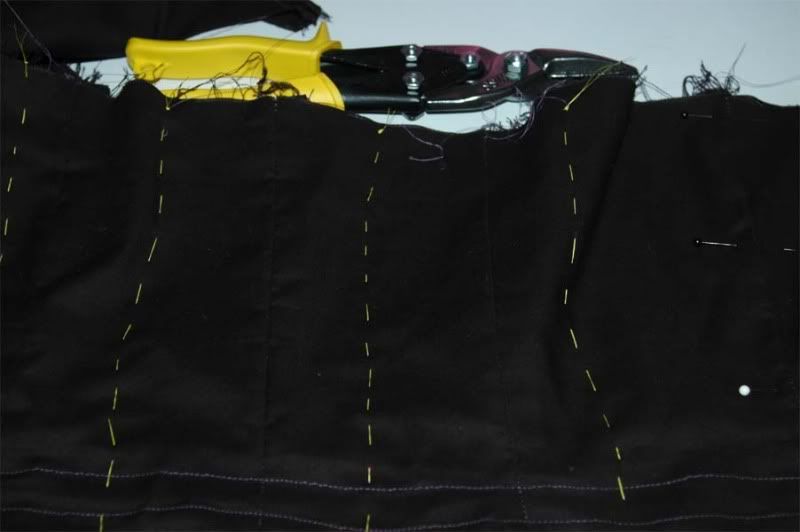
Next step we sew the on seam boning channels. You'll want to stitch your boning channels RIGHT BEHIND the seam line. Why not on it? Think about it, if you sew right on the seam line you put strain on the seams themselves, this will lead to breakage. Stitch you're first line and then stitch the second line 5'8 (for 1/2 inch mind you) inch away. I marked mine on the lining for precaution Work from front to back.
As Always check to make sure the boning goes through the channel for each one. It's always good to have at least 4 REALLY long bones as support for lacing (for the second fitting ) and for when you’re testing channels. I have 4 long pre cut ones from a previous project.
I advise leaving the baste stitches in until you've stitched ALL the boning channels you plan to have unless one is in the way of a channel.
Now comes the fun part, measuring the bones for each channel. For myself I removed the boning channels, since I'm only going to maybe ad one or more bones. I was held in pretty well without having any bones at all, so I will see how it goes with this one. You guys will def. know if it dies because of it.
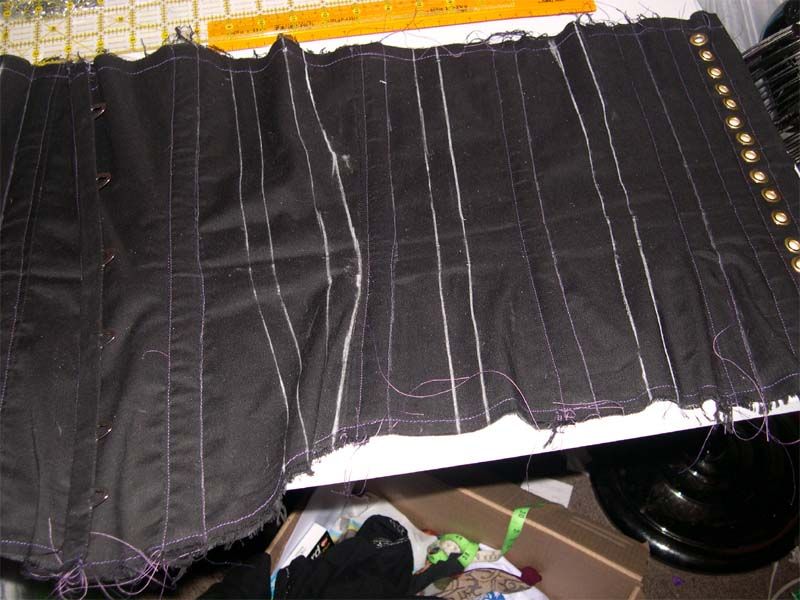
First, you're going to want to sew a small seam line 3/8 " away from the edge of the bottom. Why? To hold the bones in while you try it on after measuring and putting them in. This will also be you're guide for bias tape later.
Start from the front and measure how long the bones need to be. A lot of people will say cut the two the same, but for me I've noticed one is a TAD larger than the other by 1/4 an inch, however you want them as close to size as possible. Leave about 3/8 an inch from the edge for the top. I do suggest leaving a SMALL amount o wiggle room because you don't want you bones trying to pop out due to that good ol thing called physics and pressure.
Also, when you start cutting the boning, place the tips on as you go so you can take them into account for measurements.
So I'm not going to even try to explain how I tipped the bones I did. I did however learn from someone who posted on deviant art, so I'm going to link to her and hope she can teach you better than I can.
http://taeliac.deviantart.com/art/Tutorial-Tipping-Corset-Bones-80292109
So the first time I put my bones in I didn't put enough in and had to check to see these were the results...
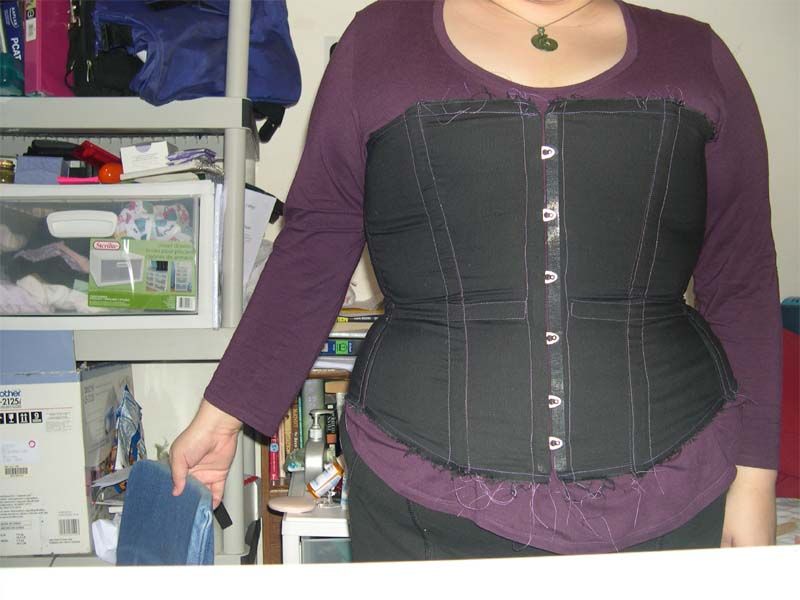
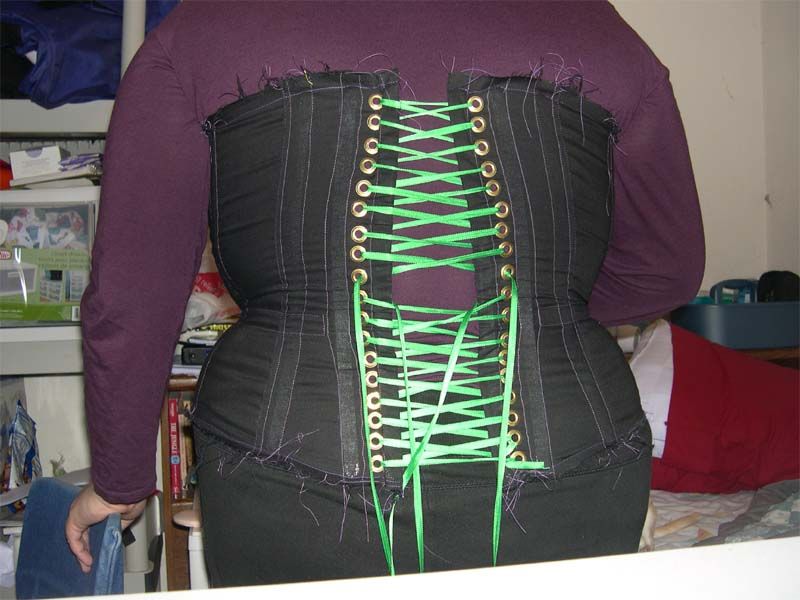
not the best...we can do better than that! As you guys can see there is wrinkling everywhere that will not go away unless we bone it some more!
Once you are sure that you have enough bones in, it's time to have some fun stitching bias tape in. So first, unfold it, iron it completely flat and pin pieces to the top and bottom of each part, one edge at a time. The bis tape I used for thi was "extra wide" I feel it's better to have more bias tape than less, you can always trim and handstitch. You’re going to want to pin it right side against the outer shell of the corset. The reason is to have a nice clean fold over. Make sure to iron out the entire thing this is a VERY important thing to do.
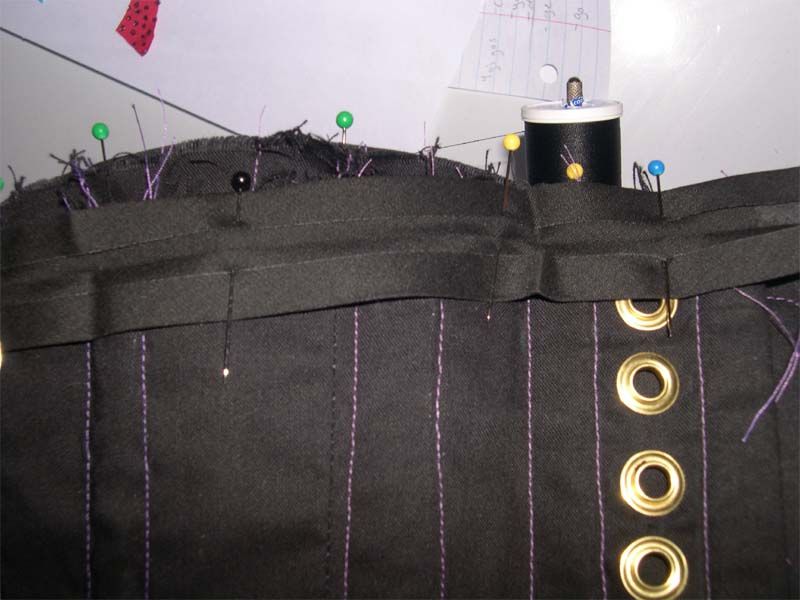
(keep in mind it looks like I didn't pin it right but that's another part of the corset in back)
Now key thing to keep in mind is that BONES MAY SLIDE AROUND. in this you can break some needles. So the best thing is to do is stitch up to each bone and then hand crank the machine for the area right about each bone. This way you save on needles...because lets face it, they may not cost a ton, but it's a pain in the ass and frustrating to break one. Stitch 3/8 from each end.
after you've stitched the one side, flip it over an fold he ends in. stitch 1/8" away from the edge. You can also hand stitch this if you like.
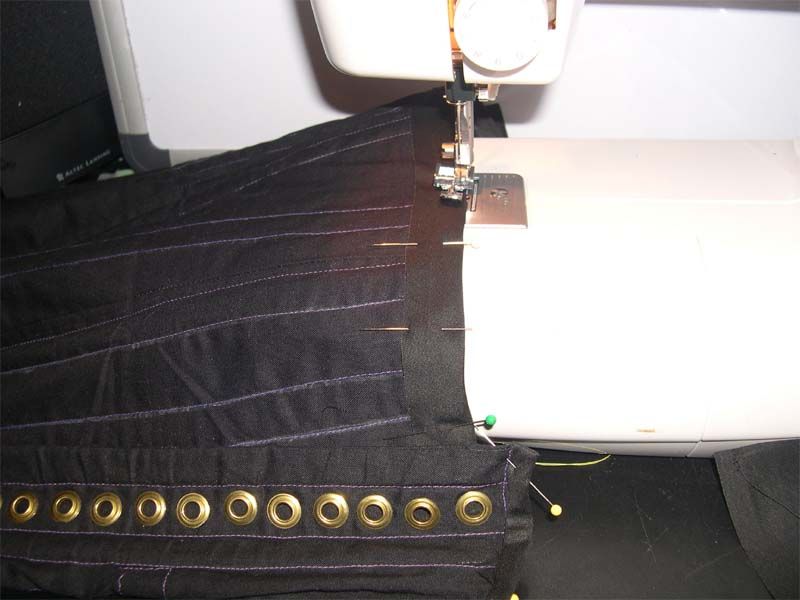
Now it's important to trim your bias tape. I've left some past the 1/8" for safety sake.
For the ends, I found a really great instruction video from a woman who did her ends really well, and I copied this exactly.
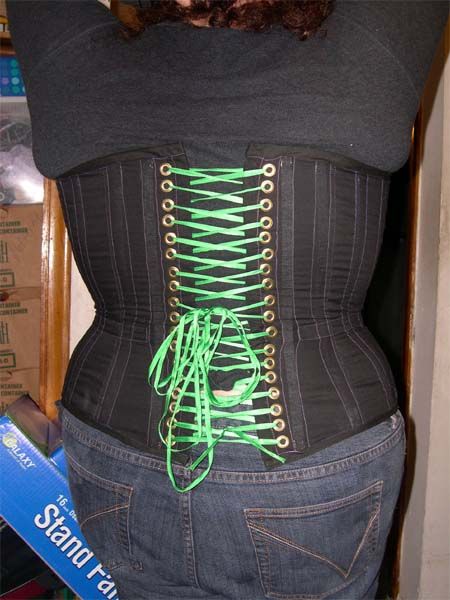
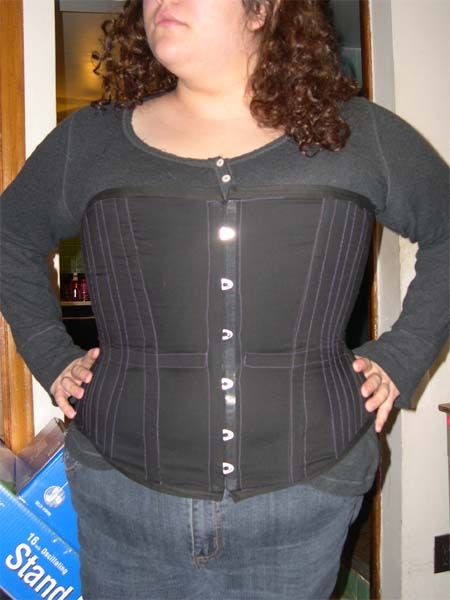
And so ladies and gentleman....the FINISHED RESULT!
Things I learned along the way
And there you have it folks....my first corset, every painfull screw up and triumph.
I'm going on a two week hiatus because I'm going to be sewing some little kid spider costumes for a theater I sew for up north in Wisconsin, while also sewing my present to my sweetheart. June 17th is our anniversary of three years (plus two of friendship ontop of that) I'm making a corset out of that brocade fabric I showed before. Me in it is going to be his surprise. I will let you know how it goes and of course...take contruction pictures of it for anything I find nifty to work with
Okay perverted joke aside, lets start by hand basting the lining to the outer fabric. This is important so that you ensure when you're stitching yu have the panels lined up. If you don't you'll get stretch lines, so this is a VERY IMPORTANT step. It's going to take you about half an hour, but it's worth it in the end. I did it in a bright yellow thread so I had an easier time pulling it out later

Next step we sew the on seam boning channels. You'll want to stitch your boning channels RIGHT BEHIND the seam line. Why not on it? Think about it, if you sew right on the seam line you put strain on the seams themselves, this will lead to breakage. Stitch you're first line and then stitch the second line 5'8 (for 1/2 inch mind you) inch away. I marked mine on the lining for precaution Work from front to back.
As Always check to make sure the boning goes through the channel for each one. It's always good to have at least 4 REALLY long bones as support for lacing (for the second fitting ) and for when you’re testing channels. I have 4 long pre cut ones from a previous project.
I advise leaving the baste stitches in until you've stitched ALL the boning channels you plan to have unless one is in the way of a channel.

Now comes the fun part, measuring the bones for each channel. For myself I removed the boning channels, since I'm only going to maybe ad one or more bones. I was held in pretty well without having any bones at all, so I will see how it goes with this one. You guys will def. know if it dies because of it.

First, you're going to want to sew a small seam line 3/8 " away from the edge of the bottom. Why? To hold the bones in while you try it on after measuring and putting them in. This will also be you're guide for bias tape later.
Start from the front and measure how long the bones need to be. A lot of people will say cut the two the same, but for me I've noticed one is a TAD larger than the other by 1/4 an inch, however you want them as close to size as possible. Leave about 3/8 an inch from the edge for the top. I do suggest leaving a SMALL amount o wiggle room because you don't want you bones trying to pop out due to that good ol thing called physics and pressure.
Also, when you start cutting the boning, place the tips on as you go so you can take them into account for measurements.
So I'm not going to even try to explain how I tipped the bones I did. I did however learn from someone who posted on deviant art, so I'm going to link to her and hope she can teach you better than I can.
http://taeliac.deviantart.com/art/Tutorial-Tipping-Corset-Bones-80292109
So the first time I put my bones in I didn't put enough in and had to check to see these were the results...


not the best...we can do better than that! As you guys can see there is wrinkling everywhere that will not go away unless we bone it some more!
Once you are sure that you have enough bones in, it's time to have some fun stitching bias tape in. So first, unfold it, iron it completely flat and pin pieces to the top and bottom of each part, one edge at a time. The bis tape I used for thi was "extra wide" I feel it's better to have more bias tape than less, you can always trim and handstitch. You’re going to want to pin it right side against the outer shell of the corset. The reason is to have a nice clean fold over. Make sure to iron out the entire thing this is a VERY important thing to do.

(keep in mind it looks like I didn't pin it right but that's another part of the corset in back)
Now key thing to keep in mind is that BONES MAY SLIDE AROUND. in this you can break some needles. So the best thing is to do is stitch up to each bone and then hand crank the machine for the area right about each bone. This way you save on needles...because lets face it, they may not cost a ton, but it's a pain in the ass and frustrating to break one. Stitch 3/8 from each end.
after you've stitched the one side, flip it over an fold he ends in. stitch 1/8" away from the edge. You can also hand stitch this if you like.

Now it's important to trim your bias tape. I've left some past the 1/8" for safety sake.
For the ends, I found a really great instruction video from a woman who did her ends really well, and I copied this exactly.
And so ladies and gentleman....the FINISHED RESULT!


Things I learned along the way
- Even an seasoned seamstress will stab herself BADLY with needle in her lifetime (god that hurt...it hit bone)
- Dogs make great sewing companions....my dogs love the sound of the machine they tend to curl up while I sew...or roll around in their beds while I'm not looking....
- grommets are not fun to hand hammer but I'm not able to afford a machine for some time. I did however notice that the #0 puckered the fabric a bit more than I cared for, so I'm getting into using size #00
- Ribbon works just fine for lacing if you cannot afford laces, as do shoelaces.
- Never underestimate the power of a slightly tighter orset, it may just fix the need to have to alter the corset. I had it at 3 inch gap and realized I could bring it down to 1 inch. YOWZA!
- I learned that I feel sexy in a corset, and it does wonders for my back.
And there you have it folks....my first corset, every painfull screw up and triumph.
I'm going on a two week hiatus because I'm going to be sewing some little kid spider costumes for a theater I sew for up north in Wisconsin, while also sewing my present to my sweetheart. June 17th is our anniversary of three years (plus two of friendship ontop of that) I'm making a corset out of that brocade fabric I showed before. Me in it is going to be his surprise. I will let you know how it goes and of course...take contruction pictures of it for anything I find nifty to work with