tuto 12:love baby mione
Finally, the last one tuto on "coming soon list"!!
It's been a long time since the friend who requested them, sorry, again@__@
Starting murmur:
I am soo excited that OotP and the HP7 will be realsed soon!! I've heared some news that there will be many r/hr scenesXD I am really excited about it^__^
Don't talk too much this time, let's see what I can give you today^__^
We will go from
to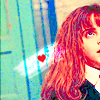
or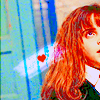
Request by badobsessions
made in PSCS
15 steps
with 2 SC laysers
Rules and Notes:

If you like this tuto, please comment, cause your comment is my biggest power~~

Please DO NOT USE THE SAME BASE AS MINE! If you really want to do this, at least give me a comment, please~

If you like my works, you are really welcome to friend me^__^

request a tutorial? here, please (REOPEN NOW. The details please go check the tuto request enrty.)

ATTENTION PLEASE:all the color images I provided here are just for reference. The reason why, please go check here.
Other similar icons(coloring)


Results
Steps

1. pick your icon base. Here I choose a mione base of HP:SS by cokeandmint.
TIP:pick a pic with green or blue color. And if the main role(like mione) has a brown hair, you can get the best result^__^
ATTENTION PLEASE:please do not use the same pic/base as mine. I found some people learned the tuto, used the same pic/base as mine, and the most incredible thing is I've never seen them at my journal! Please, pick any pic you like, and trying to "playing" the tuto, ok?

2. duplicate the base TWICE. Set the first one to Screen with Opacity 39%. Set the second one to Soft Light with Opacity 39%.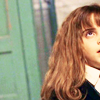
3. create a Selective Color layer:
Reds(-10, 0, 100, 0)
Yellows(100, 0 , -55, 0)
Neutrals(0, 0, -11, 0)
Set the layer to Screen.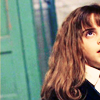
4. create a new layer, fill it with #98C9F6. Set it to Color Burn with Opacity 51%
5. create a Hue/Saturation layer:Master(0, 57, 0)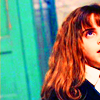
6. create a Color Balance layer:Midtones(-28, 0, 21)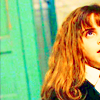
7. create a new layer, fill it with #FEF85F. Set it to Soft Light.
8. create a Selective Color layer:
Reds(-100, 100, 100, 100)
Yellows(100, 49 , -37, 0)
Cyans(100, 100, -100, 100)
Neutrals(34, 19, -45, 0)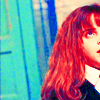
9. create a Hue/Saturation layer:
Reds(0, 7, 0)
Magentas(0, 9, 0)
10. create a Color Balance layer:Midtones(-14, 20, -31)
11. create a Curves layer:
Green(one node:184, 187)
Blue(one node:178, 137)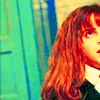
12. create a Curves layer, again:
RGB(two nodes:181, 167 and 62, 71)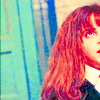
13. create a new layer, fill it with #FD9CFA. Set it to Soft Light.
you can stop here, cause the coloring of the first result is finished. Or you can add some brushes, text, texture etc. whatever you like.
Here I create a new layer, then use a brush named "Spatter 27 pixels" in #FFFFFF, drag a line, and set this layer to Overlay. And I also add a little red heart brush. Follow the steps below to get the result 2:
14. create a Color Balance layer:
Shadows(12, 21, -58)
Highlights(0, 0, 39)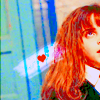
15. create a Channel Mixer layer:
Red(98, 0, -6)
Green(2, 94, -6)
Blue(-4, 8, 96)
oooh~ we finally finish it!!!XDD
PS. Here I also duplicate the base once, and Sharpen it once.
It's been a long time since the friend who requested them, sorry, again@__@
Starting murmur:
I am soo excited that OotP and the HP7 will be realsed soon!! I've heared some news that there will be many r/hr scenesXD I am really excited about it^__^
Don't talk too much this time, let's see what I can give you today^__^
We will go from

to

or

Request by badobsessions
made in PSCS
15 steps
with 2 SC laysers
Rules and Notes:

If you like this tuto, please comment, cause your comment is my biggest power~~

Please DO NOT USE THE SAME BASE AS MINE! If you really want to do this, at least give me a comment, please~

If you like my works, you are really welcome to friend me^__^

request a tutorial? here, please (REOPEN NOW. The details please go check the tuto request enrty.)

ATTENTION PLEASE:all the color images I provided here are just for reference. The reason why, please go check here.
Other similar icons(coloring)


Results
Steps

1. pick your icon base. Here I choose a mione base of HP:SS by cokeandmint.
TIP:pick a pic with green or blue color. And if the main role(like mione) has a brown hair, you can get the best result^__^
ATTENTION PLEASE:please do not use the same pic/base as mine. I found some people learned the tuto, used the same pic/base as mine, and the most incredible thing is I've never seen them at my journal! Please, pick any pic you like, and trying to "playing" the tuto, ok?

2. duplicate the base TWICE. Set the first one to Screen with Opacity 39%. Set the second one to Soft Light with Opacity 39%.

3. create a Selective Color layer:
Reds(-10, 0, 100, 0)
Yellows(100, 0 , -55, 0)
Neutrals(0, 0, -11, 0)
Set the layer to Screen.

4. create a new layer, fill it with #98C9F6. Set it to Color Burn with Opacity 51%

5. create a Hue/Saturation layer:Master(0, 57, 0)

6. create a Color Balance layer:Midtones(-28, 0, 21)

7. create a new layer, fill it with #FEF85F. Set it to Soft Light.

8. create a Selective Color layer:
Reds(-100, 100, 100, 100)
Yellows(100, 49 , -37, 0)
Cyans(100, 100, -100, 100)
Neutrals(34, 19, -45, 0)

9. create a Hue/Saturation layer:
Reds(0, 7, 0)
Magentas(0, 9, 0)

10. create a Color Balance layer:Midtones(-14, 20, -31)

11. create a Curves layer:
Green(one node:184, 187)
Blue(one node:178, 137)

12. create a Curves layer, again:
RGB(two nodes:181, 167 and 62, 71)

13. create a new layer, fill it with #FD9CFA. Set it to Soft Light.

you can stop here, cause the coloring of the first result is finished. Or you can add some brushes, text, texture etc. whatever you like.
Here I create a new layer, then use a brush named "Spatter 27 pixels" in #FFFFFF, drag a line, and set this layer to Overlay. And I also add a little red heart brush. Follow the steps below to get the result 2:

14. create a Color Balance layer:
Shadows(12, 21, -58)
Highlights(0, 0, 39)

15. create a Channel Mixer layer:
Red(98, 0, -6)
Green(2, 94, -6)
Blue(-4, 8, 96)

oooh~ we finally finish it!!!XDD
PS. Here I also duplicate the base once, and Sharpen it once.