tutorial 5:crop "mione"
take a few days rest, and now I want to write a new tuto for lelymarques 's request^__^
today, we will go from

to

or
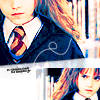
steps 4-8 credit to this tuto by garfreak
original picture took from wizard_icontest
and there is one thing you should know, I am still learning and trying my coloring skill, so, the graphics I've made would be a little complicated, and when I write the graphics' tutos, they would be complicated, too. If you don't mind complicated steps, then, welcome to learn it^__^
made in PSCS
Rules and Notes:
1. If you like this tuto, please comment, cause your comment is my power~~
2. If you like my works, you are really welcome to friend me^__^
3. request a tutorial? here, please
other similar icons(style or coloring):
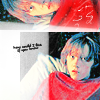
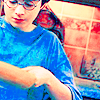
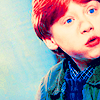
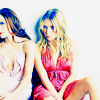
Results
Steps

1. pick one of your pictures, and crop it into icon size. Here I pick a HP SS mione's promo photo, took from wizard_icontest
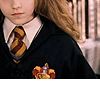
2. duplicate the base once, and Sharpen it once, and move the base up, until mione's eyes disapeer

3. duplicate the base once again, change the layer mode to Soft Light
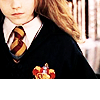
4. create a Slective Color Layer:
Reds (-10, 0 100, 0)
Yellows (100, 0, -55, 0)
Neutrals(0, 0 , -11, 0)
then set it to Screen

5. create a new layer, fill it with #8ECADA, set it to Soft Light, with Opacity 77%
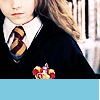
6. create a new layer, fill it with #98C9F6, set it to Color Burn, with Opacity 51%

7. create a Hue/Saturation Layer:Master(0, 57, 0)
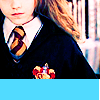
8. create a Color Balance Layer:(-28, 0 ,21)

9. create a Color Balance Layer:(-100, -13 ,6)
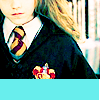
10. create a new layer, fill it with #FEF85F, set it to Soft Light

11. create a Slective Color Layer:
Reds (-100, 100, 100, 100)
Yellows (100, 50, -37, 0)
Neutrals(35, 20, -45, 0)

12. create a Hue/Saturation Layer:
Reds (0, 7, 0)
Magentas (0, 9 ,0)

13. create a Color Balance Layer:(-14, 20, -31)

14. create a new layer, fill it with #FD9CFA, set it to Soft Light

15. create a Curves Layer:
Green(one node:184, 187)
Blue(one node:178, 137)
TIP:What is the PS Curves "node"? And how to change it? (please see the TIP 1)

16. create a Color Balance Layer:(28, 14, 50)

17. create a Slective Color Layer:
Cyans (55, -24, -62, -2)
Blues (15, -10, 0, 0)
Whites(0, 55, 13, 0)
Blacks(0, 0, -15, 0)
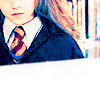
18. drag this texture(made by lovelamp, and transform by me) to top, and set it to Screen

19. duplicate your base once again, drag it to top, and set it to Color Burn, with Opacity 16%

20. finally, you can finish it, or you can add some texture, brushes, text...whatever you like, it's all up to you^__^
here I add this texture by lovelamp(believe me, on the top left of the window, there IS a image, save it~), and add a tiny text brush, then transform my base and paste it to top