Bold/Dark Animation Coloring With Gradients
Go from 
to
.
This tutorial was created with Photoshop CS but it will translate into Paintshop Pro.
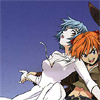
I started out with an image of Rei and Asuka from Neon Genesis Evangelion. After choosing my crop and resizing it to 100x100, I sharpened it by going to Filter > Sharpen > Sharpen. I then went to Edit > Fade Sharpen and set it to about 40%.
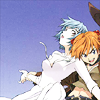
To lighten it up a bit, I duplicated the base and set the copy to Screen, 100% opacity.

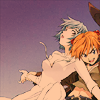
Now to add a bit of color, I added a gradient and set it to Multiply, 100%.
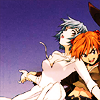
To get back more of the original color, I duplicated the base again and set it to Hard Light, 100% opacity.

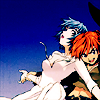
To make the colors bolder and darker, I added another gradient and set it to Color Burn, 100% opacity. (In PSP, use Burn instead of Color Burn.)
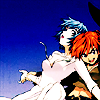
For a final bit of contrast I took another copy of the base and set the layer to Hard Light, 100% opacity.

For the text, I wanted something a bit Western, so I chose Wide Latin 8 pt, #000000, and 50 tracking for "Wanted" and Wide Latin 5 pt, #000000, and 50 tracking for "Dead or Alive".
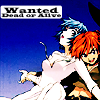
To finish off the icon (and make the text readable) I went to the Shape tool, selected Rounded Rectangle (Radius of 2 px and Anti-aliased selected) and created a rectangle just a little bit larger than the text.

to

.
This tutorial was created with Photoshop CS but it will translate into Paintshop Pro.

I started out with an image of Rei and Asuka from Neon Genesis Evangelion. After choosing my crop and resizing it to 100x100, I sharpened it by going to Filter > Sharpen > Sharpen. I then went to Edit > Fade Sharpen and set it to about 40%.

To lighten it up a bit, I duplicated the base and set the copy to Screen, 100% opacity.


Now to add a bit of color, I added a gradient and set it to Multiply, 100%.

To get back more of the original color, I duplicated the base again and set it to Hard Light, 100% opacity.


To make the colors bolder and darker, I added another gradient and set it to Color Burn, 100% opacity. (In PSP, use Burn instead of Color Burn.)

For a final bit of contrast I took another copy of the base and set the layer to Hard Light, 100% opacity.

For the text, I wanted something a bit Western, so I chose Wide Latin 8 pt, #000000, and 50 tracking for "Wanted" and Wide Latin 5 pt, #000000, and 50 tracking for "Dead or Alive".

To finish off the icon (and make the text readable) I went to the Shape tool, selected Rounded Rectangle (Radius of 2 px and Anti-aliased selected) and created a rectangle just a little bit larger than the text.