//Tutorial//
Random tutorial for you here! Just for fun really :)
How to make:
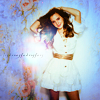
in Photoshop
1. Take this image and resize to "height: 105"
=
(If you want a sharper image: duplicate the base, sharpen the second and set it to about 20%)
2. Make your 100x100 base, paste the resized picture of Emma on and use the Smudge tool to fill in the rest of the icon.
=
3. Layer>> New Adjustment Layer>> Hue/Saturation
Saturation +50
=
4. Set this texture I made to Linear Burn:

=
5: Set this texture by vol4itca to Multiply:
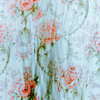
Use a soft eraser brush to roughly erase the texture over Emma.
=
6: Time to bring it to life I think. Go to
Layer>> New Adjustment Layer>> Selective Color
Cyans +100 +100 -100 +44
Whites +10 -35 0 -20
Neutrals -15 0 0 0
Duplicate this layer and set the second to Color
=
7: I always finish an icon by changing the contrast with a Levels Layer.
Layer>> New Adjustment Layer>> Levels- Opacity 65%
RGB 11, 0.90, 230
Red 9, 0.93, 255
=
8: Take these light textures by vol4itca and set to screen:
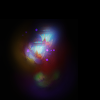
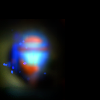
Take this text brush I made and set to Linear Burn:
=
The end! Hope you liked the tutorial and I hope it made sense! :D
How to make:
in Photoshop
1. Take this image and resize to "height: 105"
=

(If you want a sharper image: duplicate the base, sharpen the second and set it to about 20%)
2. Make your 100x100 base, paste the resized picture of Emma on and use the Smudge tool to fill in the rest of the icon.
=

3. Layer>> New Adjustment Layer>> Hue/Saturation
Saturation +50
=

4. Set this texture I made to Linear Burn:

=

5: Set this texture by vol4itca to Multiply:

Use a soft eraser brush to roughly erase the texture over Emma.
=

6: Time to bring it to life I think. Go to
Layer>> New Adjustment Layer>> Selective Color
Cyans +100 +100 -100 +44
Whites +10 -35 0 -20
Neutrals -15 0 0 0
Duplicate this layer and set the second to Color
=

7: I always finish an icon by changing the contrast with a Levels Layer.
Layer>> New Adjustment Layer>> Levels- Opacity 65%
RGB 11, 0.90, 230
Red 9, 0.93, 255
=

8: Take these light textures by vol4itca and set to screen:


Take this text brush I made and set to Linear Burn:

=
The end! Hope you liked the tutorial and I hope it made sense! :D