Tutorial for my cake hat.
A bunch of people were asking me how I did the cake hat, so I figured Id make a tutorial.
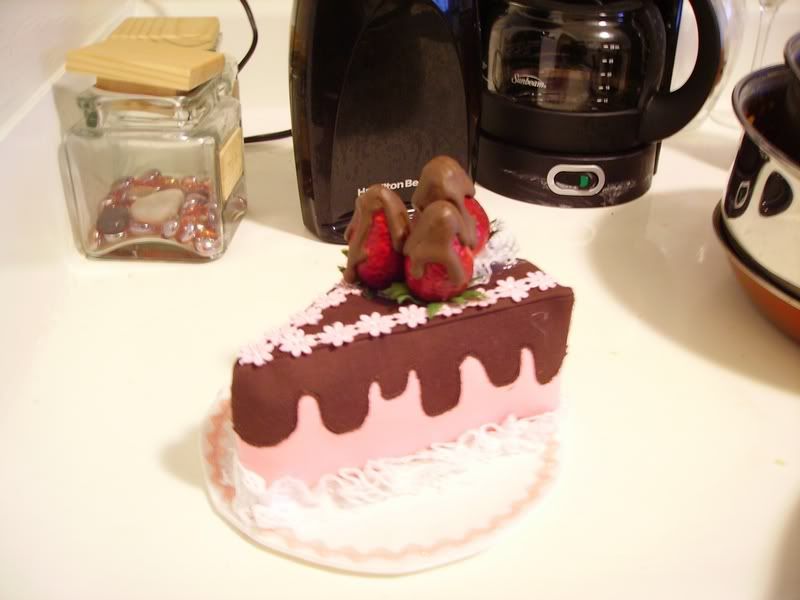
This is what you should end up with:
Cake Hat Tutorial:
Materials:
1. Three fake strawberries. (You can find them at a craft store)
2. Hot glue gun (with glue in it of course)
3. Brown Acrylic paint.
4. Clear nail polish
5. 1 ft of Brown felt (Always get the thin kind of felt, Not the ultra thick stuff)
6. 1 ft of pink felt
7. 1 ft of white felt
8. 1 yd of craft iron on interfacing (the thickest and stiffest you can find)
9. Lace trimming (any kind will do but make sure it looks like icing. And some soft Cluny lace.
10. Cotton balls
First you’ll need to warm up your hot glue gun. You’re going to do the strawberries first so they can dry while you are making the rest of the cake.
Once the glue is ready, drizzle it over the tip of the strawberry. While you’re drizzling, make sure you make it look like its dripping down the strawberry. You have to “draw” the globs coming down the side. Set it aside and repeat on the next two strawberries.
Let them dry in a cool place for about an hour. (Just to make sure they “set”)
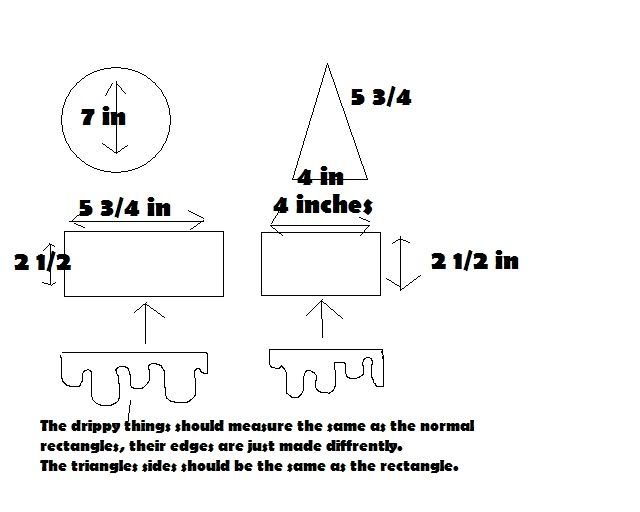
Next you’ll need to cut your fabric. Add a seam allowance to my pattern.
Cut out all the pieces including the interfacing. Do not add seam allowance to interfacing. The interfacing should be slightly smaller than the fabric piece.
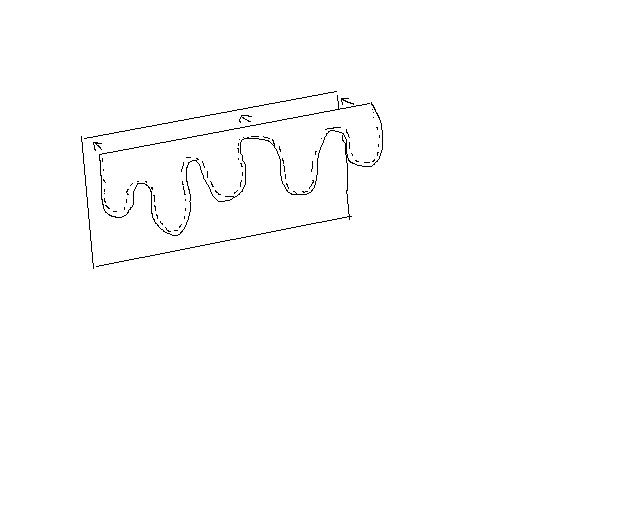
Sew the “chocolate drip” (the brown felt) onto the solid sides of the cake, at the bottom of the dripping line leave the top open.
Next, iron on the interfacing to the back of the fabric, and then repeat this with the other two sides.
Sew the sides together to form an isosceles triangle.
Iron the interfacing onto the back of the brown felt triangle. Stitch on any trimming you want on the top of the “cake” to this piece now. Sew it onto the sides.

Iron the interfacing onto the “plate” sides. Then sew it together right sides facing in. Flip it right side out and sew together the opening. Sew whatever trimming you want on the plate now.
Turn over your “cake” and stuff it with the cotton balls. (The trick here, is to make it stiff on the inside so it wont collapse but not puffy)
Tuck in the ends of the “cake” and hand stitch it to the “plate”. Cover your hand stitches by sewing gathered Cluny lace to the bottom of the cake.
Now, if it’s been an hour, you can check the glue on the strawberries for being done. If it’s completely dry, start painting it with the brown acrylic paint. Allow the acrylic paint to dry all the way. (You can put it by a fan to help it dry)
Gather some more Cluny lace and make it into a circle. Then glue it to the top of the cake. Let the glue dry a bit. Then Glue the strawberries to the top of the lace. (It should look like the strawberries are sitting on top of whipped cream)
Wait until you are SURE that the acrylic pain to totally dry before you glaze it with clear nail polish. But once you are sure, you can go ahead and do the glazing. Glaze the WHOLE strawberry. Not just the chocolate. This will make it look more realistic.
Now, you have to figure out sometime how you’re going to attach it to your head. I chose to use ribbon and so I sewed two ribbons to the sides of the “plate” and tied it around my head. But you can also glue on a barrette, or sew in loops to use hairpins. Its really up to you.
I hope you like my tutorial!
You can modify this any way you want but this is basically how I did it.