Tutorial 2: Sailor Moon
I felt like making another Tutorial. This one is of Kunzite from Sailor Moon. It's very, very simple and good for beginners.

-->
I use PSP 7 but this is easily translatable.
1. This particular technique works best with something that is mostly light colored, but with dark definition lines. So basically, things that look good under higher contrast. With that in mind, find your base and crop it to your liking. Then resize it.
Here's mine:

2. He looks kinda... faint. So! I duplicated the layer and set it to Multiply. I still have that icky box thing in the corner, so I created a new layer and set it to Normal. Then I eyedropped the background color and colored over the box to make it go away.
Here's mine:

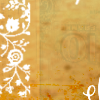
3. Now, to give it some color. I used a texture by immoral or gender (I forgot which) set to Multiply 100 to give it a bit of orange and brown. Then I duplicated the base and put it on top, setting it to Hard Light.
-->
4. I took a tiny text brush made by __wonderland and pasted it as a new image. After eyedropping a grayish color from the Kunzite image, I created a new layer (set to Screen) over the tinytext and filled it with the color. Then I pasted that resulting image over Kunzite and set it to Multiply 100. I decided it wasn't dark enough, and duplicated it (setting it to 30). Then I erased the stuff I didn't want (you can do the erasing after you add text if you prefer).
I did the exact same thing with a swirl brush by 77words, only it was set to 18 and not duplicated.
+
-->
5. Now for the finishing touches. I typed "kunzite" in Ringbearer size 10 font (#92727B) and rotated it 90 degrees. I thought it was too dark, so I set the text to Normal 82. I gave it a basic 3pt white border (I didn't set it to antialias) and then I used a 1pt solid line box (#DFCBD0) on top of that. And you're done!

If you have any questions or comments, feel free to ask away. And if you make anything, I'd love to see it. :D

-->

I use PSP 7 but this is easily translatable.
1. This particular technique works best with something that is mostly light colored, but with dark definition lines. So basically, things that look good under higher contrast. With that in mind, find your base and crop it to your liking. Then resize it.
Here's mine:

2. He looks kinda... faint. So! I duplicated the layer and set it to Multiply. I still have that icky box thing in the corner, so I created a new layer and set it to Normal. Then I eyedropped the background color and colored over the box to make it go away.
Here's mine:

3. Now, to give it some color. I used a texture by immoral or gender (I forgot which) set to Multiply 100 to give it a bit of orange and brown. Then I duplicated the base and put it on top, setting it to Hard Light.

-->

4. I took a tiny text brush made by __wonderland and pasted it as a new image. After eyedropping a grayish color from the Kunzite image, I created a new layer (set to Screen) over the tinytext and filled it with the color. Then I pasted that resulting image over Kunzite and set it to Multiply 100. I decided it wasn't dark enough, and duplicated it (setting it to 30). Then I erased the stuff I didn't want (you can do the erasing after you add text if you prefer).
I did the exact same thing with a swirl brush by 77words, only it was set to 18 and not duplicated.

+

-->

5. Now for the finishing touches. I typed "kunzite" in Ringbearer size 10 font (#92727B) and rotated it 90 degrees. I thought it was too dark, so I set the text to Normal 82. I gave it a basic 3pt white border (I didn't set it to antialias) and then I used a 1pt solid line box (#DFCBD0) on top of that. And you're done!

If you have any questions or comments, feel free to ask away. And if you make anything, I'd love to see it. :D