kotono: step 9
This step looks rather lame, really. But it gets its own post just because it involves caulk. And that takes a while to dry! Also. I have an "oops!" to report. :/

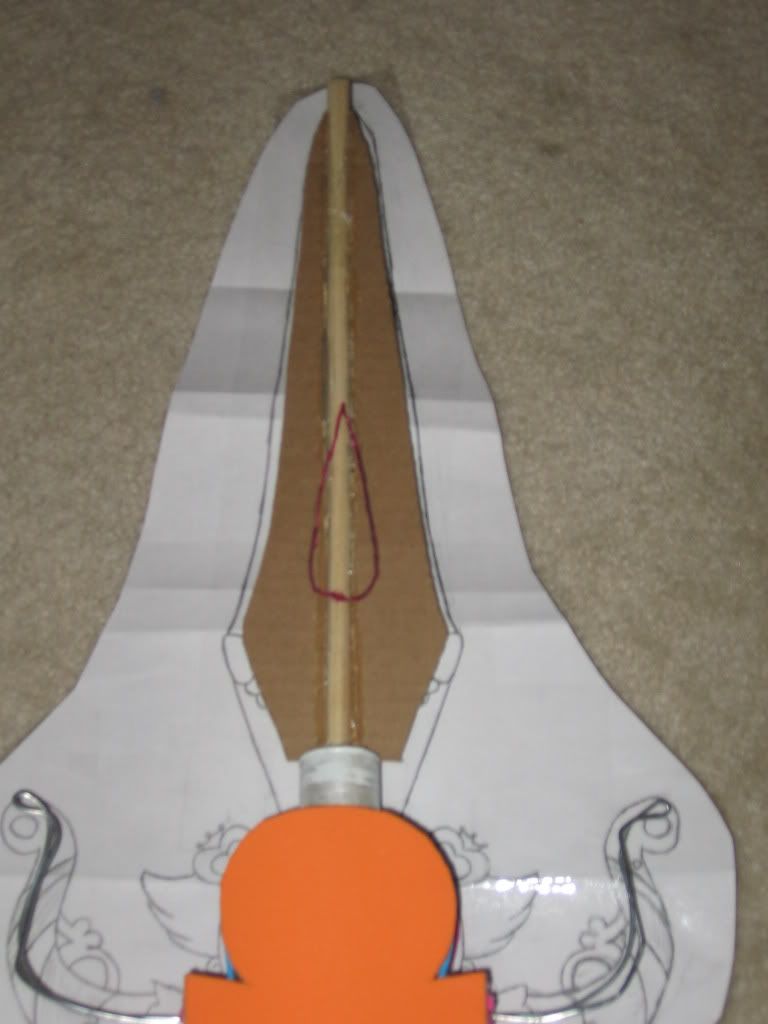
as always, line up sword on blue print for reference. with a pencil (I darkened it in sharpie for the sake of pictures), sketch a tear drop shape around where the sword blade is meant to be thicker. At this point, I'm not concerned with the layered pieces and the curly cues. Just the blade itself. Repeat on the other side. Try to mirror it as best you can.

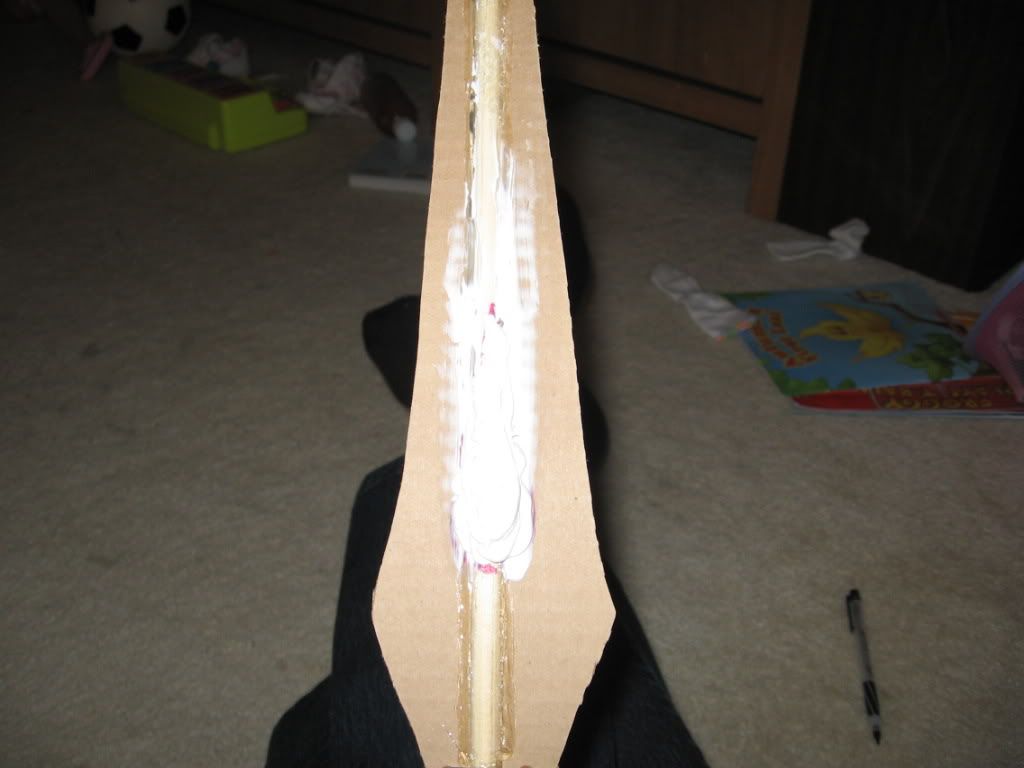
Fill in the teardrop shape with caulk. Really cake the stuff on. It doesn't even need to be smooth because this will all be covered up anyway. This is just to help make a sturdier base for later down the road.

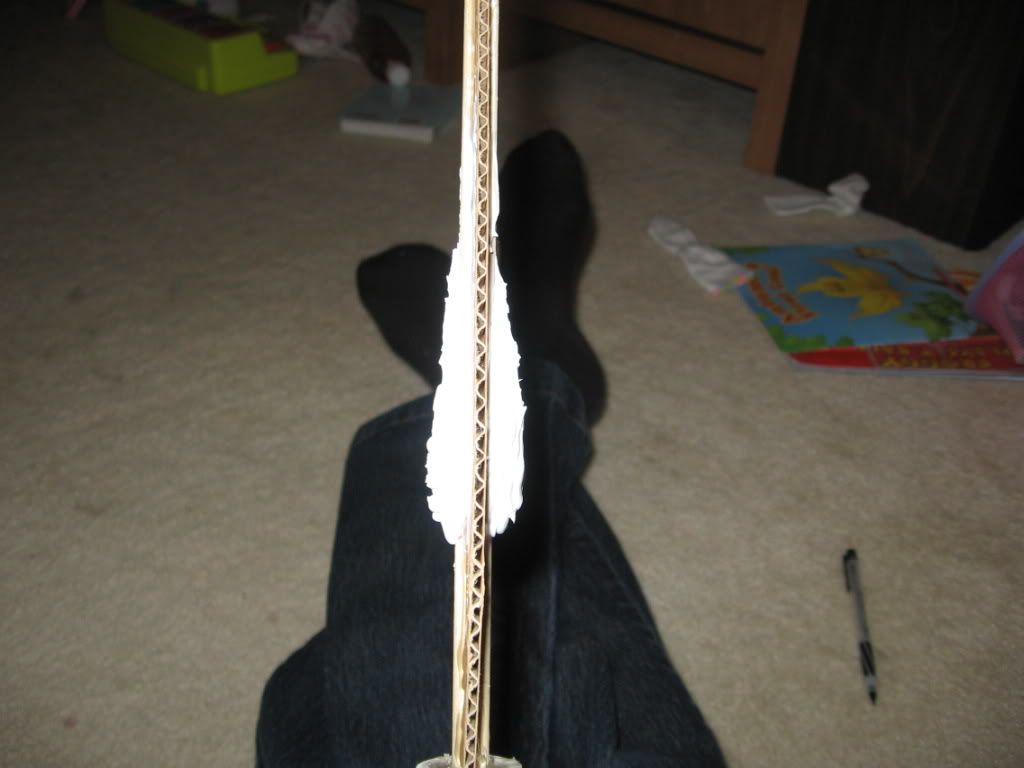
Here's a profile shot (ideally, you'd want to let this stuff dry overnight, but I used a hair drier on cool setting. plus, the painter's caulk that I have tends to start drying before I'm done smoothing it out anyway! LOL). Notice how it tapers towards the tip of the teardrop. At the very least, you want that sort of shape going on. You can have it lumpy as heck, but as long as you have that general shape, you'll be fine.
Repeat on the other side.
and now for that "oops!"
uhh...you know those pointy bits that stick out under the wire? I'm going to have to hack those off! >.>;; All the foam is going to be covered with model magic in the end and if I do that on top of what I have now it's going to end up being waaaaaaaaay too thick for that piece. So...I think I'm going to have to very carefully go back and drill some holes and run some wire through or something. :\ Wish me luck. I think I'm going to really need it on that one. YIKES!
so hopefully, for those who are using this as a tutorial, you were smart and are actually reading all this through BEFORE YOU START!!!!! Rather than work, read, work, read, etc. Because right about now, I expect you'll start to want to type up a nastygram or something.
come on people. THIS IS A PROTOTYPE, FOR CRYIN OUT LOUD!!!! *sigh*
Proceed to Step 10

as always, line up sword on blue print for reference. with a pencil (I darkened it in sharpie for the sake of pictures), sketch a tear drop shape around where the sword blade is meant to be thicker. At this point, I'm not concerned with the layered pieces and the curly cues. Just the blade itself. Repeat on the other side. Try to mirror it as best you can.

Fill in the teardrop shape with caulk. Really cake the stuff on. It doesn't even need to be smooth because this will all be covered up anyway. This is just to help make a sturdier base for later down the road.

Here's a profile shot (ideally, you'd want to let this stuff dry overnight, but I used a hair drier on cool setting. plus, the painter's caulk that I have tends to start drying before I'm done smoothing it out anyway! LOL). Notice how it tapers towards the tip of the teardrop. At the very least, you want that sort of shape going on. You can have it lumpy as heck, but as long as you have that general shape, you'll be fine.
Repeat on the other side.
and now for that "oops!"
uhh...you know those pointy bits that stick out under the wire? I'm going to have to hack those off! >.>;; All the foam is going to be covered with model magic in the end and if I do that on top of what I have now it's going to end up being waaaaaaaaay too thick for that piece. So...I think I'm going to have to very carefully go back and drill some holes and run some wire through or something. :\ Wish me luck. I think I'm going to really need it on that one. YIKES!
so hopefully, for those who are using this as a tutorial, you were smart and are actually reading all this through BEFORE YOU START!!!!! Rather than work, read, work, read, etc. Because right about now, I expect you'll start to want to type up a nastygram or something.
come on people. THIS IS A PROTOTYPE, FOR CRYIN OUT LOUD!!!! *sigh*
Proceed to Step 10