Making Good Cartoon Icons- Tutorial 6// Mine Is An Evil Laugh
From 
to
in just five steps!
Difficulty: Medium
Transferability: Transferable to anything with colour balance, channel mixer, and hue/saturation.
STEP ONE
As usual, we need a base image. For this tutorial, we'll be using a screenshot of Konata from Lucky☆Star. Here is the base;
Prep, etc etc.
STEP TWO
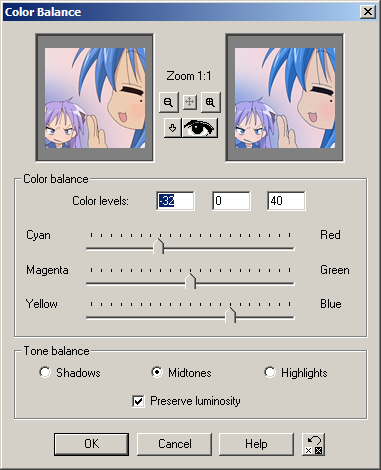
Colour balance layer! (Layers > New Adjustment Layers)
See the settings here
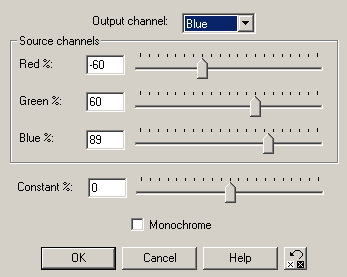
STEP THREE
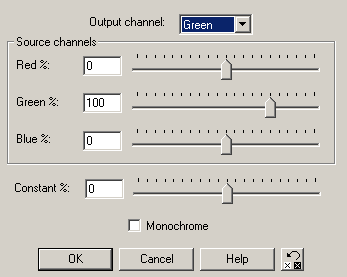
Channel mixer layer! (same as above)
See the settings for red, green, and blue
STEP FOUR
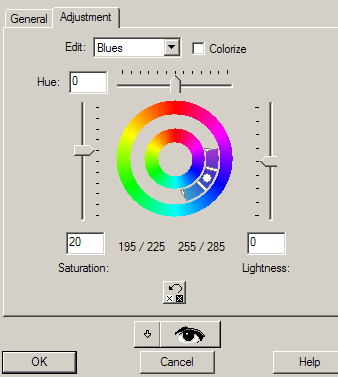
Now we're going to bump up the saturation of the blues only by isolating the colours! Go to Layes > New Adjustment Layers, and choose Hue/Saturation/Lightness. There should be a drop-down box that lets you choose what you want to edit. CHOOSE BLUE ONLY, and put in the appropriate number. Experiment!
STEP FIVE
Colouring is done! Now add brushes, text, and water.
.PSD DOWNLOAD!
to
in just five steps!
Difficulty: Medium
Transferability: Transferable to anything with colour balance, channel mixer, and hue/saturation.
STEP ONE
As usual, we need a base image. For this tutorial, we'll be using a screenshot of Konata from Lucky☆Star. Here is the base;
Prep, etc etc.
STEP TWO
Colour balance layer! (Layers > New Adjustment Layers)
See the settings here
STEP THREE
Channel mixer layer! (same as above)
See the settings for red, green, and blue
STEP FOUR
Now we're going to bump up the saturation of the blues only by isolating the colours! Go to Layes > New Adjustment Layers, and choose Hue/Saturation/Lightness. There should be a drop-down box that lets you choose what you want to edit. CHOOSE BLUE ONLY, and put in the appropriate number. Experiment!
STEP FIVE
Colouring is done! Now add brushes, text, and water.
.PSD DOWNLOAD!