Tutorial
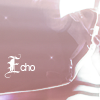
Take this base layer and take it into photoshop. Duplicate it (ctrl+J), and go to Images > Adjustments > Channel Mixer. Check 'Monochrome' and hit OK. Set that layer to Overlay.

Take the gradient to the left and set it to Hue at 45% opacity.

Next, take the gradient to the left, paste it into a new layer above everything else, and set it to Pin Light at 75% opacity.
Now, to add text. Here, I used the font 'Broken Planewing' (found here), 24 pt, for the E, and Arial, 12 pt, for the rest.
Now for something to make that text stand out just a little more. Using the image at the right, I place it under the gradients, blending set to multiply.
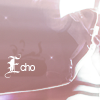
Now, placing the texture on the left between the two base image layers, blended with Pin Light, we get the final result :]
textbox = meleada
texture = _promenadeicons