Chrono tutorial
Difficulty: Easy
# of layers: 9
Photoshop CS2. Compatible with older versions

this to this
First I crop my image to fit a 100x100.
Now that my image is the desired size I duplicate the layer and use desaturate (shift+ctrl+u). Now I have something that looks like this.

I duplicate this layer, and set the new layer to soft light.

Next, I go back to layer 1 and make it my top layer and set it to overlay

I then make another duplicate of layer 1 and set it to soft light then reduce opacity to 30%.

Next I create a new layer and fill it with this color, #000315 using the paint bucket. Then I set it to exclusion and change the opacity to 70%. This is what I get,

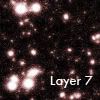
Next, I use this pre made light texture and set it to lighten. I move it around until it’s to my liking.


It’s gradient time! Using this gradient I set it to overlay and change the opacity to 84%.

To finish it off I use a simple black half border. (Note: To add visual interest I used a text brush)

, And WALA! It’s finished. ^_^
I hope this was of some help.
# of layers: 9
Photoshop CS2. Compatible with older versions

this to this

First I crop my image to fit a 100x100.

Now that my image is the desired size I duplicate the layer and use desaturate (shift+ctrl+u). Now I have something that looks like this.

I duplicate this layer, and set the new layer to soft light.

Next, I go back to layer 1 and make it my top layer and set it to overlay

I then make another duplicate of layer 1 and set it to soft light then reduce opacity to 30%.


Next I create a new layer and fill it with this color, #000315 using the paint bucket. Then I set it to exclusion and change the opacity to 70%. This is what I get,


Next, I use this pre made light texture and set it to lighten. I move it around until it’s to my liking.


It’s gradient time! Using this gradient I set it to overlay and change the opacity to 84%.


To finish it off I use a simple black half border. (Note: To add visual interest I used a text brush)

, And WALA! It’s finished. ^_^
I hope this was of some help.