Tutorial #2 - Christina Aguilera
Go from this: 
to this:
Tutorial made using PS7.
1. Once you’ve cropped and reduce the size of your icon to 100x100pixels, take your base, duplicate it and set to screen 25%.

-
2. Created a new Selective Color layer.
Reds
Cyan: -100
Magenta: 0
Yellow: 100
Black: 0
Yellows
Cyan: -100
Magenta: 0
Yellow: 0
Black: 0
Neutrals
Cyan: 20
Magenta: 0
Yellow: 0
Black: 0

-
3. Flatten.
4. Go to Image - Adjustments - Variations - More Red(click only once).

-
5. Copy the base(CTRL+A - CTRL+C - CTRL+D) and then paste it(CTRL+V).
6. Move the layer to the side so it over laps the background layer, reduce opacity to 44% and erase anything that overlaps Christina(background).

-
7. Flatten.
8. Take this texture by Of-The-Sky and use the blur tool to make it a little softer.

-
9. Apply the texture and set it to multiply 100%.

-
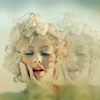
10. Now, select the background layer and go to variations(make sure you reset it by clicking Original first) - Lighter(click twice) and More Cyan(click twice).

-
11. Flatten.
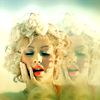
12. Go to Image - Adjustments - Brightness/Contrast
Brightness: +16
Contrast: +35

-
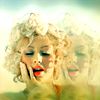
13. Image - Adjustments - Hue/Saturation
Hue: 0
Saturation: 10

-
14. Add this texture by lovelamp and set it to screen 100%.

-
Flatten and you're done. :)
If you have any questions feel free to ask.

to this:

Tutorial made using PS7.
1. Once you’ve cropped and reduce the size of your icon to 100x100pixels, take your base, duplicate it and set to screen 25%.

-

2. Created a new Selective Color layer.
Reds
Cyan: -100
Magenta: 0
Yellow: 100
Black: 0
Yellows
Cyan: -100
Magenta: 0
Yellow: 0
Black: 0
Neutrals
Cyan: 20
Magenta: 0
Yellow: 0
Black: 0

-

3. Flatten.
4. Go to Image - Adjustments - Variations - More Red(click only once).

-

5. Copy the base(CTRL+A - CTRL+C - CTRL+D) and then paste it(CTRL+V).
6. Move the layer to the side so it over laps the background layer, reduce opacity to 44% and erase anything that overlaps Christina(background).

-

7. Flatten.
8. Take this texture by Of-The-Sky and use the blur tool to make it a little softer.

-

9. Apply the texture and set it to multiply 100%.

-

10. Now, select the background layer and go to variations(make sure you reset it by clicking Original first) - Lighter(click twice) and More Cyan(click twice).

-

11. Flatten.
12. Go to Image - Adjustments - Brightness/Contrast
Brightness: +16
Contrast: +35

-

13. Image - Adjustments - Hue/Saturation
Hue: 0
Saturation: 10

-

14. Add this texture by lovelamp and set it to screen 100%.

-

Flatten and you're done. :)
If you have any questions feel free to ask.