Cloud Tutorial :0
Yayayay.. another tutoriallllllllll :00
Another tutorial :0 For PSCS2.
[1]
Start with your base. Im using this one of Cloud X)
[2]
Sharpen, if needed.
[3]
Duplicate your base layer, desaturate it (ctrl+shft+u), and set it to Screen at fifty (50) percent.
[4]
Merge layers. Duplicate your base three (3) times and inverse (ctrl+I) the colors on the first duplicated layer. Then, set it to Screen at fifty (50) percent opacity. Now, set the second and third duplicated layers to Hard Light, at 100 percent. Desaturate the top hardlight layer.
[5] Now, i took this texture
that i made from my base, and set it to Lighten, and 100 percent opacity.
[6]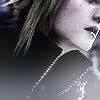
Looks like this, now.
[7]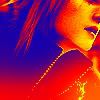
Now go Layer >> New Adjustment layer >> Gradient map. Select the Blue, Red, Yellow gradient from the list. Click Ok. Set the gradient map layer to Soft Light, at 50 percent.
[8]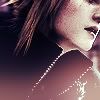
Looks like this :0
[9] Now, heres the confusing part. Make a new layer, then stamp visible (ctrl+alt+shft+E). Select all (ctrl+a) and copy it (ctrl+c). Now, enter Quick Mask mode (Q), and paste (ctrl+v) your image. You should see that your image looks red now. Press Q again to exit quick mask mode. Now, there should be a selection. Make a new layer, and fill that selection with dcb07f. Inverse the selection (ctrl+shft+I) and make a new layer. fill with 234f80. Set both layers to Soft Light, at 100 opacity.
[10]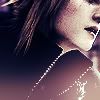
Nowwww, You're Done! X)
Another tutorial :0 For PSCS2.
[1]

Start with your base. Im using this one of Cloud X)
[2]

Sharpen, if needed.
[3]

Duplicate your base layer, desaturate it (ctrl+shft+u), and set it to Screen at fifty (50) percent.
[4]

Merge layers. Duplicate your base three (3) times and inverse (ctrl+I) the colors on the first duplicated layer. Then, set it to Screen at fifty (50) percent opacity. Now, set the second and third duplicated layers to Hard Light, at 100 percent. Desaturate the top hardlight layer.
[5] Now, i took this texture

that i made from my base, and set it to Lighten, and 100 percent opacity.
[6]

Looks like this, now.
[7]

Now go Layer >> New Adjustment layer >> Gradient map. Select the Blue, Red, Yellow gradient from the list. Click Ok. Set the gradient map layer to Soft Light, at 50 percent.
[8]

Looks like this :0
[9] Now, heres the confusing part. Make a new layer, then stamp visible (ctrl+alt+shft+E). Select all (ctrl+a) and copy it (ctrl+c). Now, enter Quick Mask mode (Q), and paste (ctrl+v) your image. You should see that your image looks red now. Press Q again to exit quick mask mode. Now, there should be a selection. Make a new layer, and fill that selection with dcb07f. Inverse the selection (ctrl+shft+I) and make a new layer. fill with 234f80. Set both layers to Soft Light, at 100 opacity.
[10]

Nowwww, You're Done! X)