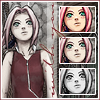
Icon Tutorial No. 5: Sakura
Tutorial time! This tutorial was requested by 
moonnkeh, who asked so nicely I couldn't refuse. Easy peasy in 10 steps. Enjoy!
Level: Easy
Program: Adobe Photoshop 7.0
Go from this to this:
1. Start with this picture and crop it at 96x96 px so that there's at least half an icon's worth of space next to Sakura.
(Helpful Hint No. 1: Preset your measurements (Where Can I Do This?)
You should see something like this:
2. Duplicate the layer (CTRL A>>CTRL C>>CTRL V) and sharpen the layer (FILTER>>SHARPEN>>SHARPEN). Set this layer at 75% opacity.
You should see something like this:
3. Create a new layer and fill it with #000000. Set this layer to HUE at 75% opacity.
You should see something like this:
4. Use the rectangle marquee tool (top left of the tool bar) and select a rectangle around Sakura's face (remember to select either the first or second layer, not the layer you just made). Make sure the selected area is small enough so you can fit at least three rectangles on the side. Copy and paste this selcted area (CTRL C>>CTRL V). Move this layer on top.
You should see something like this:
5. Duplicate this area two more times (CTRL A>>CTRL C>> CTRL V), then start moving them to the side, one on top of another. Make sure each of these are spaced equally apart, leaving room on the top, bottom, and right side.
(Helpful Hint No. 2: Zoom in to about 300-400% so it's easier to move the layers accordingly.)
You should see something like this:
6. Change blending options on each of the three new layers and put a 1 px white (#FFFFFF) stroke around each rectangle.
You should see something like this:
7. Create a new layer, and using this brush by moi, paint over Sakura's face in the middle in #000000. Set this layer to HUE at 50%. Create another layer and using the same brush, paint over the bottom face in #000000. Set this new layer to HUE at 100%.
You should see something like this:
8. Rotate this entire icon (IMAGE>>ROTATE>>ROTATE CW) and then make a long, flat rectangle across the middle of the icon in #FFFFFF. You will overlap a lot of Sakura's arm--this is normal. Set this layer to 50% opacity.
You should see something like this:
9. Type in the words 'with you' in Carpenter ICG, size 26, in #6F1821 on top of the rectangle. Change blending options to OUTER GLOW at 100%.
You should see something like this:
10. Rotate the icon back (IMAGE>>ROTATE>>ROTATE CCW) and save this icon as a .png. Make a new 100x100 px document with a white background, open your just saved document, and paste it onto the new document. It should be perfectly centered so don't move it. Use this border brush by me in #6F1821 to finish everything. All done!
Your finished result looks like this:
_________
Was this tutorial helpful? Confusing? Too hard? Feedback would be wonderful!
[x] Like what you see? FRIEND
wicked_avis to stay updated on fresh tutorials, icons, textures, and more!

moonnkeh, who asked so nicely I couldn't refuse. Easy peasy in 10 steps. Enjoy!
Level: Easy
Program: Adobe Photoshop 7.0
Go from this to this:

1. Start with this picture and crop it at 96x96 px so that there's at least half an icon's worth of space next to Sakura.
(Helpful Hint No. 1: Preset your measurements (Where Can I Do This?)
You should see something like this:

2. Duplicate the layer (CTRL A>>CTRL C>>CTRL V) and sharpen the layer (FILTER>>SHARPEN>>SHARPEN). Set this layer at 75% opacity.
You should see something like this:

3. Create a new layer and fill it with #000000. Set this layer to HUE at 75% opacity.
You should see something like this:

4. Use the rectangle marquee tool (top left of the tool bar) and select a rectangle around Sakura's face (remember to select either the first or second layer, not the layer you just made). Make sure the selected area is small enough so you can fit at least three rectangles on the side. Copy and paste this selcted area (CTRL C>>CTRL V). Move this layer on top.
You should see something like this:

5. Duplicate this area two more times (CTRL A>>CTRL C>> CTRL V), then start moving them to the side, one on top of another. Make sure each of these are spaced equally apart, leaving room on the top, bottom, and right side.
(Helpful Hint No. 2: Zoom in to about 300-400% so it's easier to move the layers accordingly.)
You should see something like this:

6. Change blending options on each of the three new layers and put a 1 px white (#FFFFFF) stroke around each rectangle.
You should see something like this:

7. Create a new layer, and using this brush by moi, paint over Sakura's face in the middle in #000000. Set this layer to HUE at 50%. Create another layer and using the same brush, paint over the bottom face in #000000. Set this new layer to HUE at 100%.
You should see something like this:

8. Rotate this entire icon (IMAGE>>ROTATE>>ROTATE CW) and then make a long, flat rectangle across the middle of the icon in #FFFFFF. You will overlap a lot of Sakura's arm--this is normal. Set this layer to 50% opacity.
You should see something like this:

9. Type in the words 'with you' in Carpenter ICG, size 26, in #6F1821 on top of the rectangle. Change blending options to OUTER GLOW at 100%.
You should see something like this:

10. Rotate the icon back (IMAGE>>ROTATE>>ROTATE CCW) and save this icon as a .png. Make a new 100x100 px document with a white background, open your just saved document, and paste it onto the new document. It should be perfectly centered so don't move it. Use this border brush by me in #6F1821 to finish everything. All done!
Your finished result looks like this:

_________
Was this tutorial helpful? Confusing? Too hard? Feedback would be wonderful!
[x] Like what you see? FRIEND

wicked_avis to stay updated on fresh tutorials, icons, textures, and more!