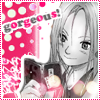
Icon Tutoral No. 12: Sakura #2
(Early Christmas Present, hahaha) Requested by 
moonnkeh and granted (as always!). 8 steps, simply nice icon!
Level: Easy
Program: Adobe Photoshop 7.0
Go from this to this:
1. Start with this base and crop it at 96x96, with the focus on Sakura.
(Helpful Hint No. 1: Preset your measurements (Where Can I Do This?))
You should have something like this:
2. Open this texture by
luthien_black--we're using it as a base. Resize it (IMAGE>>IMAGE SIZE) at 96x96. Then take your cropped Sakura picture and paste it on top of the base (CTRL A>>CTRL C>>CTRL V).
Your layer bar should look like this:
3. Magnify your project to 400%. Take the 9 pt round eraser in your Default Palate and start erasing any part of the second layer without Sakura on it. When you're done, change the blending options so you have a 3 pt stroke in #FFFFFF. (After you stroke the layer, you might see spots of white--they are areas you missed. Simply erase those.)
You should have something like this:
4. Make a new layer. Use this brush by moi and paint one stroke near Sakura's head in #FF0D75. (The brush is simply a word brush--cooper, pt 12. You can make your own by: 1)opening a new document, 2)typing in a word of your choice in #000000, 3)rotating as you may (IMAGE>>ROTATE>>ARBITRARY--mine is set at CCW, 15 degrees, 4) making it a brush by EDIT>>DEFINE BRUSH.) Put a 2 pt stroke around it.
You should have something like this:
5. Make a new layer and fill it with #000000. Set this layer to HUE, 100% opacity. Then take out your eraser tool again (9 pt), and erase everything around Sakura and the text.
You should have something like this:
6. Change brushes so now you're using a 6 pt one. Erase the Hued part of every other letter, starting on the 'o'.
You should have something like this:
7. Use this light texture by
ianthinae and set it on SCREEN, 100% opacity. Erase the light dot that's obscurring the text brush.
You should have something like this:
8. Save your icon as a png. Then open up a new 100x100 document. Reopen your icon and paste it on top of the document (CTRL A>>CTRL C>>CTRL V). Use this dotted border brush by moi in #FF0D75. Viola! All done!
Your finished product should look like this:
_________
Was this tutorial helpful? Confusing? Too hard? Feedback would be wonderful!
[x] Like what you see? FRIEND
wicked_avis to stay updated on fresh tutorials, textures, brushes, and icons!

moonnkeh and granted (as always!). 8 steps, simply nice icon!
Level: Easy
Program: Adobe Photoshop 7.0
Go from this to this:

1. Start with this base and crop it at 96x96, with the focus on Sakura.
(Helpful Hint No. 1: Preset your measurements (Where Can I Do This?))
You should have something like this:

2. Open this texture by

luthien_black--we're using it as a base. Resize it (IMAGE>>IMAGE SIZE) at 96x96. Then take your cropped Sakura picture and paste it on top of the base (CTRL A>>CTRL C>>CTRL V).
Your layer bar should look like this:

3. Magnify your project to 400%. Take the 9 pt round eraser in your Default Palate and start erasing any part of the second layer without Sakura on it. When you're done, change the blending options so you have a 3 pt stroke in #FFFFFF. (After you stroke the layer, you might see spots of white--they are areas you missed. Simply erase those.)
You should have something like this:

4. Make a new layer. Use this brush by moi and paint one stroke near Sakura's head in #FF0D75. (The brush is simply a word brush--cooper, pt 12. You can make your own by: 1)opening a new document, 2)typing in a word of your choice in #000000, 3)rotating as you may (IMAGE>>ROTATE>>ARBITRARY--mine is set at CCW, 15 degrees, 4) making it a brush by EDIT>>DEFINE BRUSH.) Put a 2 pt stroke around it.
You should have something like this:

5. Make a new layer and fill it with #000000. Set this layer to HUE, 100% opacity. Then take out your eraser tool again (9 pt), and erase everything around Sakura and the text.
You should have something like this:

6. Change brushes so now you're using a 6 pt one. Erase the Hued part of every other letter, starting on the 'o'.
You should have something like this:

7. Use this light texture by

ianthinae and set it on SCREEN, 100% opacity. Erase the light dot that's obscurring the text brush.
You should have something like this:

8. Save your icon as a png. Then open up a new 100x100 document. Reopen your icon and paste it on top of the document (CTRL A>>CTRL C>>CTRL V). Use this dotted border brush by moi in #FF0D75. Viola! All done!
Your finished product should look like this:

_________
Was this tutorial helpful? Confusing? Too hard? Feedback would be wonderful!
[x] Like what you see? FRIEND

wicked_avis to stay updated on fresh tutorials, textures, brushes, and icons!