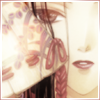
Icon Tutorial No. 13: Arashi
Simple as pie icon icon in 5 steps. Enjoy!
Level: Easy
Program: Adobe Photoshop 7.0
Go from this to this:

1. Start with this gorgeous picture of Arashi and crop it at 96x96 px so it's focued on half her face and the fan.
You should see something like this:

2. Duplicate the layer (CTRL A>>CTRL C>>CTRL V) and FILTER>>GAUSSIAN BLUR it at 7.5 radius. Set this layer to OVERLAY at 100%.
You should see something like this:

3. Create a new layer and fill it with #FFFFFF. Set this layer to HUE at 50%.
You should see something like this:

4. Open up this texture by
iiokua and set it on top at SCREEN 100%.
You should see something like this:

5. Save your icon as a .png. Then open up a blank 100x100 px document. Reopen your just saved icon and paste it on top (CTRL A>>CTRL C>>CTRL V). Use this corner border brush by me in #B15E57. Viola! All done!
Your finished product should look like this:

_________
Was this tutorial helpful? Confusing? Too hard? Feedback would be wonderful!
[x] Like what you see? FRIEND

wicked_avis to stay updated on fresh tutorials, textures, brushes, and icons!