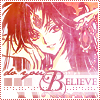
Icon Tutorial No. 18: Ashura
Tutorial requested by
kahena and granted as a thank you gift. 8 steps for the Second Place winner of
clampchorus Week 43 (Lyrical).
Level: Easy
Program: Adobe Photoshop 7.0
Go from this to this:
This tutorial works well on bases that have clearly defined features and characters (that is, their eyes, hair, etc. should be lined in a dark color). Light bases might become washed out by the texture we're using.
1. Start with this picture of Tsubasa!Ashura and crop it at 96x96 px so that the focus is largely on her face.
You should see something like this:
2. Duplicate the first layer (CTRL A>>CTRL C>>CTRL V) and sharpen it by going to FILTER>>SHARPEN>>SHARPEN. Set this layer to 75% opacity.
You should see something like this:
3. Using the rectangle shape tool, make a large rectangle across the bottom in #FFFFFF. Set this layer to 65% opacity and change the blending option so there's a 75% outer glow.
You should see something like this:
4. Make another rectangle on top of the first rectangle tool, thinner so that the first rectangle shows. Try to make the open area the same amount on top and bottom. Set this rectangle to 85% opacity.
You should see something like this:
5. Text! There will be three different steps: 1) Type "do you" in 12 pt JaneAusten, #000000, and move it so it lines up with the smaller rectangle. Change blending options so there's a 2pt #FFFFFF stroke. 2) Type "B" in 30pt Mutlu, #000000, and place it square in the middle of the icon. 3) Type "elieve" in 9 pt Castellar, #000000, and place it next to the "B".
You should see something like this:
6. Create a new layer and use this (slightly edited) brush by
cardcaptur in #000000 so that the boxes cover a little bit of the "do you" text.
You should see something like this:
7. Use this texture by
_iconographer and set it on the very top. Change the layer options to SCREEN at 100% opacity.
You should see something like this:
8. Save your icon as a .png and open up a blank 100x100 document. Reopen your icon and paste it onto the blank document. Add this dotted border by me in #BF2D27 and there you have it! A complete icon!
Your finished product should look like this:
_________
Was this tutorial helpful? Confusing? Too hard? Feedback would be wonderful!
[x] Like what you see? FRIEND
wicked_avis to stay updated on fresh tutorials, textures, brushes, and icons!
kahena and granted as a thank you gift. 8 steps for the Second Place winner of
clampchorus Week 43 (Lyrical).
Level: Easy
Program: Adobe Photoshop 7.0
Go from this to this:

This tutorial works well on bases that have clearly defined features and characters (that is, their eyes, hair, etc. should be lined in a dark color). Light bases might become washed out by the texture we're using.
1. Start with this picture of Tsubasa!Ashura and crop it at 96x96 px so that the focus is largely on her face.
You should see something like this:

2. Duplicate the first layer (CTRL A>>CTRL C>>CTRL V) and sharpen it by going to FILTER>>SHARPEN>>SHARPEN. Set this layer to 75% opacity.
You should see something like this:

3. Using the rectangle shape tool, make a large rectangle across the bottom in #FFFFFF. Set this layer to 65% opacity and change the blending option so there's a 75% outer glow.
You should see something like this:

4. Make another rectangle on top of the first rectangle tool, thinner so that the first rectangle shows. Try to make the open area the same amount on top and bottom. Set this rectangle to 85% opacity.
You should see something like this:

5. Text! There will be three different steps: 1) Type "do you" in 12 pt JaneAusten, #000000, and move it so it lines up with the smaller rectangle. Change blending options so there's a 2pt #FFFFFF stroke. 2) Type "B" in 30pt Mutlu, #000000, and place it square in the middle of the icon. 3) Type "elieve" in 9 pt Castellar, #000000, and place it next to the "B".
You should see something like this:

6. Create a new layer and use this (slightly edited) brush by
cardcaptur in #000000 so that the boxes cover a little bit of the "do you" text.
You should see something like this:

7. Use this texture by
_iconographer and set it on the very top. Change the layer options to SCREEN at 100% opacity.
You should see something like this:

8. Save your icon as a .png and open up a blank 100x100 document. Reopen your icon and paste it onto the blank document. Add this dotted border by me in #BF2D27 and there you have it! A complete icon!
Your finished product should look like this:

_________
Was this tutorial helpful? Confusing? Too hard? Feedback would be wonderful!
[x] Like what you see? FRIEND

wicked_avis to stay updated on fresh tutorials, textures, brushes, and icons!