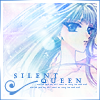
Icon Tutorial No. 27: Umi
Icon tutorial requested by
ilusionaryheart. Granted as a thank you gift (however belatedly!!). Easy peasy icon that won Third Place Week 124 at
clamp_icontest. SEVEN STEPS!
Level: Easy
Program: Adobe Photoshop 7.0
Go from this to this:
This tutorial works best with pictures that are well defined. Anything blurry might turn out hazy.
01. Start with this picture and crop it at 94x94 px so that Umi's the focus.
You should see something like this:
02. Duplicate the layer (CTRL A>>CTRL C>>CTRL V) and sharpen the new layer by going to FILTER>>SHARPEN>>SHARPEN. Set this layer to 75%, or to whatever makes your image look sharpest with becoming pixelated.
You should see something like this:
03. Open this texture by
anais_dirge and set it on top at SCREEN 100% by going to CTRL A>>CTRL C>>CTRL V. (TIP: if the texture you're choosing to use is a pastel, your image won't show up as well. Make the texture darker by duplicating it and setting it on top at MULTIPLY. Merge the two layers (CTRL+SHIFT+E) and then paste it onto your base. That way you'll still have the great color and be able to see the character of focus! --repeat MULTIPLY if necessary--)
You should see something like this:
04. Open up this light texture by
ianthinae and set it on top at SCREEN 100%. I wanted the prominate light dots a little more visible, so I moved them slightly to the right.
You should see something like this:
05. Text time! "s i l e n t" and "q u e e n" typed out in Castellar, 6-pt, strong, #196ACB. Shift them so the second word follows below the first. I wanted the letters to stand out more, so I changed blending options so there's a 75% OUTERGLOW on both.
You should see something like this:
06. Create a new layer and use this brush by Amethystia in #196ACB below the text. Shift the words if necessary.
You should see something like this:
07. Merge all the layers by going to CTRL+SHIFT+E. Then open a brand new 100x100 px document and paste your icon onto it. Use this brush by me in #196ACB, save, and you're done!
Your finished product should look like this:
_________
Was this tutorial helpful? Confusing? Too hard? Feedback would be wonderful!
[x] Like what you see? FRIEND
wicked_avis to stay updated on fresh tutorials, textures, brushes, and icons!
ilusionaryheart. Granted as a thank you gift (however belatedly!!). Easy peasy icon that won Third Place Week 124 at
clamp_icontest. SEVEN STEPS!
Level: Easy
Program: Adobe Photoshop 7.0
Go from this to this:

This tutorial works best with pictures that are well defined. Anything blurry might turn out hazy.
01. Start with this picture and crop it at 94x94 px so that Umi's the focus.
You should see something like this:

02. Duplicate the layer (CTRL A>>CTRL C>>CTRL V) and sharpen the new layer by going to FILTER>>SHARPEN>>SHARPEN. Set this layer to 75%, or to whatever makes your image look sharpest with becoming pixelated.
You should see something like this:

03. Open this texture by
anais_dirge and set it on top at SCREEN 100% by going to CTRL A>>CTRL C>>CTRL V. (TIP: if the texture you're choosing to use is a pastel, your image won't show up as well. Make the texture darker by duplicating it and setting it on top at MULTIPLY. Merge the two layers (CTRL+SHIFT+E) and then paste it onto your base. That way you'll still have the great color and be able to see the character of focus! --repeat MULTIPLY if necessary--)
You should see something like this:

04. Open up this light texture by
ianthinae and set it on top at SCREEN 100%. I wanted the prominate light dots a little more visible, so I moved them slightly to the right.
You should see something like this:

05. Text time! "s i l e n t" and "q u e e n" typed out in Castellar, 6-pt, strong, #196ACB. Shift them so the second word follows below the first. I wanted the letters to stand out more, so I changed blending options so there's a 75% OUTERGLOW on both.
You should see something like this:

06. Create a new layer and use this brush by Amethystia in #196ACB below the text. Shift the words if necessary.
You should see something like this:

07. Merge all the layers by going to CTRL+SHIFT+E. Then open a brand new 100x100 px document and paste your icon onto it. Use this brush by me in #196ACB, save, and you're done!
Your finished product should look like this:

_________
Was this tutorial helpful? Confusing? Too hard? Feedback would be wonderful!
[x] Like what you see? FRIEND

wicked_avis to stay updated on fresh tutorials, textures, brushes, and icons!