Sophia Bush Icon Tutorial
Go from 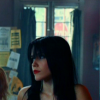
to
Photoshop CS2; NOT translatable
Involves Selective Colouring
This tutorial is helpful for getting rid of the blue in images that seem to have it in abundance, such as this.
One: I took this image of Sophia Bush in the film Stay Alive from S-B.net and cropped the icon to 100x100.

Two: Duplicate the base and set it to Screen at 100% opacity.
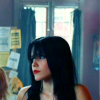
Three: Create a new Selective Colour layer (Layer > New Adjustment Layer > Selecting Colour..) and set it to as follows:
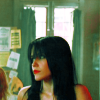
Reds -100,0,0,0
Yellows -100,43,-38,-70
Greens -32,-44,-32,-100
Cyans -43,-3,15,-49
Blues 100,-59,100,0
Magentas -57,-4,1,2
Whites -100,-3,-100,0
Neutrals 0,0,44,0
Four: Create another selective colour layer to bring out the red in the lips.

Reds -58,0,0,0
Five: Now take the smudge tool and smudge out the background, erasing the detail.

Six: Next take this texture by lovelamp and set the layer to screen at 100% opacity. Merge all.
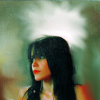
Seven: Now take this texture by ihearttoronto and set the layer to screen at 100% opacity. Now since the whole of the circle is entirely over Sophia's body just move it downwards to make it arch over her, kind of like a rainbow. Once you are happy with your positioning merge all.

Eight: Now go to Layer > New Adjustment Layer > Brightness/Contrast. Set the Brightness to 20 then set the opacity of that to 70%.

Then that's you done! Finis!
You don't have to copy this tutorial exactly. It won't work for every icon. You may need to tweak it for others. Have fun!

to

Photoshop CS2; NOT translatable
Involves Selective Colouring
This tutorial is helpful for getting rid of the blue in images that seem to have it in abundance, such as this.
One: I took this image of Sophia Bush in the film Stay Alive from S-B.net and cropped the icon to 100x100.

Two: Duplicate the base and set it to Screen at 100% opacity.

Three: Create a new Selective Colour layer (Layer > New Adjustment Layer > Selecting Colour..) and set it to as follows:

Reds -100,0,0,0
Yellows -100,43,-38,-70
Greens -32,-44,-32,-100
Cyans -43,-3,15,-49
Blues 100,-59,100,0
Magentas -57,-4,1,2
Whites -100,-3,-100,0
Neutrals 0,0,44,0
Four: Create another selective colour layer to bring out the red in the lips.

Reds -58,0,0,0
Five: Now take the smudge tool and smudge out the background, erasing the detail.

Six: Next take this texture by lovelamp and set the layer to screen at 100% opacity. Merge all.

Seven: Now take this texture by ihearttoronto and set the layer to screen at 100% opacity. Now since the whole of the circle is entirely over Sophia's body just move it downwards to make it arch over her, kind of like a rainbow. Once you are happy with your positioning merge all.

Eight: Now go to Layer > New Adjustment Layer > Brightness/Contrast. Set the Brightness to 20 then set the opacity of that to 70%.

Then that's you done! Finis!
You don't have to copy this tutorial exactly. It won't work for every icon. You may need to tweak it for others. Have fun!