3 Tutorials and 1 psd file
Those are the gifts for people from onlydreamers. I'll post yours soon. Sorry for the delay, it's just too much to do at once. But I should have aeverything ready for you by the end of this week, probably even sooner.
1. Go from
to
2. General tutorial on dark wallpapers
3. Go from this to this
4. PSD FILE -
NOTE: Please use psd files as teaching material, do not treat them as base, do not change them and then claim you made them. Of course if it's for use only and you're not gonna post it anywhere on the internet than i totally don't care and you can do whatever you want with them. But please do not make small changes and post wallpapers as yours.
TUTORIAL NO.1 - If I remember well i based this coloring on one of the tutorials by chaoticfae so there are small changes + the effects i've added
1. We start with this base:
Do whatever you need to with it. If it's dark add a sceen copy of it, sharpen or whatever you want. Mine was fine so I did nothing with it.
2. New adjustment layer-> Selective coloring
REDS: 100, 0, 100, 0
YELLOWS: -100, 0, 100, 0
NEUTRALS: -20, 0, 20, 0
RESULT:
3. Create new layer and fill it with #441b1b. Set the layer to exclusion , opacity 60%
RESULT:
4. Create another layer and fill it with #9b4f05. Set the layer to softlight, opacity 40%
RESULT:
5. That's all with the coloring. Now I've added some text. Font: century 5pt, smooth, av<-> -50
RESULT:
6. Finally the textures. First this one: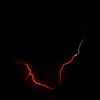
by 22room set to screen,
then this one:
by threeeyespei set to lighten
and in the end this one: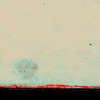
by lookslikerain set to multiply
RESULT:
AND YOU'RE DONE.
TUTORIAL NO.2 - It's a general tutorial on dark wallpapers so expect little screencaps and a lot of boring text:P
1. Prepare your base. Most of my wallpapers are black and the image is rather a small one placed in the middle of the wallie or on one side of it. I just like to have a spare space to see everything clear on my desktop. So you make a new file in the size you need mine is 1280x1024 px and you fill it with black.
2. Choose a picture. You may use as many pictures as you want but in my opinion less is more in this case. I usually use only one sometimes two or three but practically never more. The more pictures you use the smaller they need to be .
3. Prepare your picture. Now you need some fancy coloring for your chosen picture(s). The simple background requires the photography to be eye-catching and interesting. Use vivid colors or the blueish effect that is quite popular on the icons these days.
EXAMPLES OF COLORING I OFTEN USE:



-> looks especially good with screencaps from "Lost"


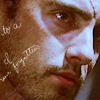

4. When you have your picture ready (I assume you have it as a new file and you haven't already put it on the wallpaper) copy it (merged so you have all the colored layers) and put it on the wallpaper background whereever you want it to be placed.
5. Now to the effects. You don't want a boring wallpaper so you pick a texture to put on top of your picture. It should be something to change a shape of the image. I uually use scans of paper. Than all you need to do is to resize the texture so it fits with your picture, put it on top of the colored image and set it to multiply.
EXAMPLES OF TEXTURES I USE:
by _sinelinea
by caugraphics
by pildas
by sanami276
EXAMPLES OF THE WALLPAPERS:


6. If you don't like the effect of the texture set to multiply you can try something else. You might look for some stock picture of interesting frame cut it out and set on top of your picture like here:


7. Now just decorate your wallpaper. Add some text, some splashes of color (I usually put the red blurb set to screen on top of everything) or some light textures. Stock pictures of lightenings set to screen look really well or spiderwebs. Just keep all the added decorations near your picture it should be all concentrated in one place. I guess the best way is just to go through some pages with wallpapers you like and try to achieve something in the same effect. But don't copy other people style, just look for the inspiration and than make your very own wallie.
TUTORIAL NO.3
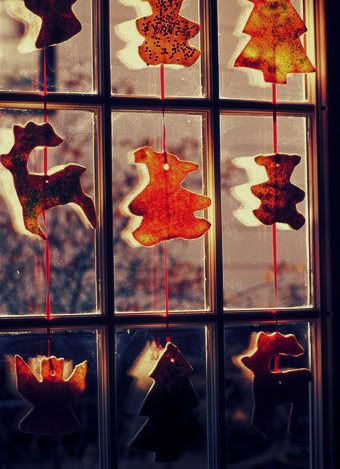
1. We start with this base:
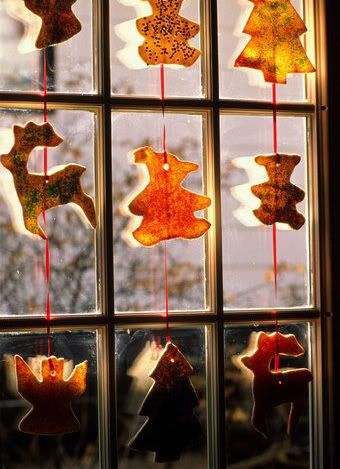
2. New adjustment layer->Curves
RED:
1.input: 80 output: 55
2.input: 170 output: 220
GREEN:
1.input: 65 output: 65
2.input: 173 output: 213
BLUE:
1.input: 0 output: 35
2.input: 250 output: 220
RESULT:
3. Create a new layer and fill it with #ff4e00 set to color, opacity 15%
RESULT:
4. New adjustment layer->Curves
RGB:
1.input: 200 output: 180
RESULT:
5. Create a new layer and fill it with #e9e9e9 set to multiply, opacity 100%
RESULT:
6. New adjustment layer->Selective color
CYANS: 80, 0, -100, 0
NEUTRALS: 25, 10, -25, 10
RESULT:
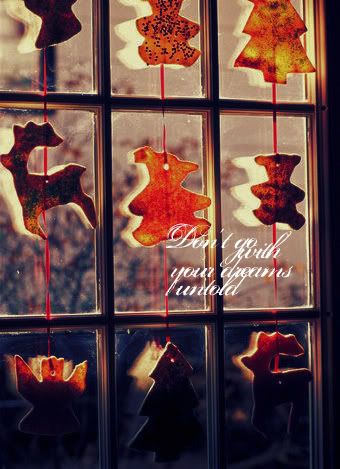
7. Add some text. Font: Porcelain, 30pt, smooth, av<->-50
RESULT:
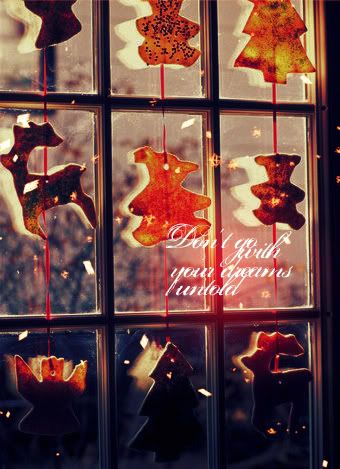
8. Final touches. Add a bright red blurb made with smooth big brush and set it to screen than add some light textures, i used a texture by seldomspeaking
RESULT:
PSD FILE
I know that you were supposed to get two psds but I don't have a psd of Ryan Gosling wallpaper, sorry i thought I had it but i don't. If you want i can post some other psd file for you, but I'm not saving all of the psds so there's no guarantee i have this one as well:P sorry.

1. Go from

to

2. General tutorial on dark wallpapers
3. Go from this to this
4. PSD FILE -

NOTE: Please use psd files as teaching material, do not treat them as base, do not change them and then claim you made them. Of course if it's for use only and you're not gonna post it anywhere on the internet than i totally don't care and you can do whatever you want with them. But please do not make small changes and post wallpapers as yours.
TUTORIAL NO.1 - If I remember well i based this coloring on one of the tutorials by chaoticfae so there are small changes + the effects i've added
1. We start with this base:

Do whatever you need to with it. If it's dark add a sceen copy of it, sharpen or whatever you want. Mine was fine so I did nothing with it.
2. New adjustment layer-> Selective coloring
REDS: 100, 0, 100, 0
YELLOWS: -100, 0, 100, 0
NEUTRALS: -20, 0, 20, 0
RESULT:

3. Create new layer and fill it with #441b1b. Set the layer to exclusion , opacity 60%
RESULT:

4. Create another layer and fill it with #9b4f05. Set the layer to softlight, opacity 40%
RESULT:

5. That's all with the coloring. Now I've added some text. Font: century 5pt, smooth, av<-> -50
RESULT:

6. Finally the textures. First this one:

by 22room set to screen,
then this one:

by threeeyespei set to lighten
and in the end this one:

by lookslikerain set to multiply
RESULT:

AND YOU'RE DONE.
TUTORIAL NO.2 - It's a general tutorial on dark wallpapers so expect little screencaps and a lot of boring text:P
1. Prepare your base. Most of my wallpapers are black and the image is rather a small one placed in the middle of the wallie or on one side of it. I just like to have a spare space to see everything clear on my desktop. So you make a new file in the size you need mine is 1280x1024 px and you fill it with black.
2. Choose a picture. You may use as many pictures as you want but in my opinion less is more in this case. I usually use only one sometimes two or three but practically never more. The more pictures you use the smaller they need to be .
3. Prepare your picture. Now you need some fancy coloring for your chosen picture(s). The simple background requires the photography to be eye-catching and interesting. Use vivid colors or the blueish effect that is quite popular on the icons these days.
EXAMPLES OF COLORING I OFTEN USE:


-> looks especially good with screencaps from "Lost"


4. When you have your picture ready (I assume you have it as a new file and you haven't already put it on the wallpaper) copy it (merged so you have all the colored layers) and put it on the wallpaper background whereever you want it to be placed.
5. Now to the effects. You don't want a boring wallpaper so you pick a texture to put on top of your picture. It should be something to change a shape of the image. I uually use scans of paper. Than all you need to do is to resize the texture so it fits with your picture, put it on top of the colored image and set it to multiply.
EXAMPLES OF TEXTURES I USE:
by _sinelinea
by caugraphics
by pildas
by sanami276
EXAMPLES OF THE WALLPAPERS:


6. If you don't like the effect of the texture set to multiply you can try something else. You might look for some stock picture of interesting frame cut it out and set on top of your picture like here:


7. Now just decorate your wallpaper. Add some text, some splashes of color (I usually put the red blurb set to screen on top of everything) or some light textures. Stock pictures of lightenings set to screen look really well or spiderwebs. Just keep all the added decorations near your picture it should be all concentrated in one place. I guess the best way is just to go through some pages with wallpapers you like and try to achieve something in the same effect. But don't copy other people style, just look for the inspiration and than make your very own wallie.
TUTORIAL NO.3
1. We start with this base:

2. New adjustment layer->Curves
RED:
1.input: 80 output: 55
2.input: 170 output: 220
GREEN:
1.input: 65 output: 65
2.input: 173 output: 213
BLUE:
1.input: 0 output: 35
2.input: 250 output: 220
RESULT:

3. Create a new layer and fill it with #ff4e00 set to color, opacity 15%
RESULT:

4. New adjustment layer->Curves
RGB:
1.input: 200 output: 180
RESULT:

5. Create a new layer and fill it with #e9e9e9 set to multiply, opacity 100%
RESULT:

6. New adjustment layer->Selective color
CYANS: 80, 0, -100, 0
NEUTRALS: 25, 10, -25, 10
RESULT:

7. Add some text. Font: Porcelain, 30pt, smooth, av<->-50
RESULT:

8. Final touches. Add a bright red blurb made with smooth big brush and set it to screen than add some light textures, i used a texture by seldomspeaking
RESULT:

PSD FILE
I know that you were supposed to get two psds but I don't have a psd of Ryan Gosling wallpaper, sorry i thought I had it but i don't. If you want i can post some other psd file for you, but I'm not saving all of the psds so there's no guarantee i have this one as well:P sorry.
