COLORING TUTORIAL
Finally!!, it took me soo long to post it, but here it is, hope you like it!!!
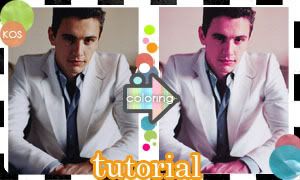
-made with Photoshop CS2
-selective color used

-Take your base ,i used this gorgeous, James Franco shoot HERE *¬* ♥
-duplicate your base ,set as Screen 40% *
-duplicate your base again,se as Softlight 40% *
*depends on your taste and of the image
--go layer>new adjusment layer>selective color
with this settings:
RED
cyans -68
magentas +47
yellows -42
black 0
YELLOWS
cyans -75
magentas -69
yellows -96
black 0
CYANS
cyans +66
magentas -60
yellows 0
black 0
MAGENTAS
cyans -99
magentas +27
yellows -61
black 0
NEUTRALS
cyans -24
magentas -6
yellows -15
black +5
Looks pinky eeeh?? :D
-Make an other Selective color layer, with this settings
-go layer>new adjusment layer>selective color
with this settings:
RED
cyans -36
magentas +100
yellows +13
black +19
YELLOWS
cyans -41
magentas +20
yellows -28
black 0
GREENS
cyans 0
magentas -100
yellows +100
black +18
MAGENTAS
cyans +59
magentas -22
yellows -25
black +10
NEUTRALS
cyans +33
magentas -23
yellows -23
black +3
Set this Selective color layer opacity-24%; More pink, huh??
-Duplicate your FiRST Selective color layer , bring it to the top, and set
the Opacity to 24% (depends on your taste or the image!)
-And your are done!!
TA-DA

-OPTIONAL STEP: you can add a color-fill layer, to smoothen the look or just
for fun :DD; create a new layer above, fill with #fce4c3 set as Soft light 20%.
It's up to you.
what do you think?? Questions?? suggestions? comments??? anything??
you are free to FRiend ME :) <3;
i'm dying to see your results :D
COmments are Love!
Tips/facts:
+Doesn't work with every image,plz try out different images :D ♥
+can change some settings, but do n0t make a lot of changes to them.
+ my RESOURCES PAGE
MY OTHER TUTORIALS [ check them out ;)]
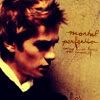

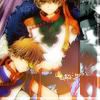

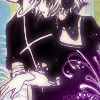

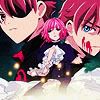
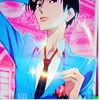
Other icons made with this Tutorial!



-made with Photoshop CS2
-selective color used
-Take your base ,i used this gorgeous, James Franco shoot HERE *¬* ♥
-duplicate your base ,set as Screen 40% *
-duplicate your base again,se as Softlight 40% *
*depends on your taste and of the image
--go layer>new adjusment layer>selective color
with this settings:
RED
cyans -68
magentas +47
yellows -42
black 0
YELLOWS
cyans -75
magentas -69
yellows -96
black 0
CYANS
cyans +66
magentas -60
yellows 0
black 0
MAGENTAS
cyans -99
magentas +27
yellows -61
black 0
NEUTRALS
cyans -24
magentas -6
yellows -15
black +5
Looks pinky eeeh?? :D
-Make an other Selective color layer, with this settings
-go layer>new adjusment layer>selective color
with this settings:
RED
cyans -36
magentas +100
yellows +13
black +19
YELLOWS
cyans -41
magentas +20
yellows -28
black 0
GREENS
cyans 0
magentas -100
yellows +100
black +18
MAGENTAS
cyans +59
magentas -22
yellows -25
black +10
NEUTRALS
cyans +33
magentas -23
yellows -23
black +3
Set this Selective color layer opacity-24%; More pink, huh??
-Duplicate your FiRST Selective color layer , bring it to the top, and set
the Opacity to 24% (depends on your taste or the image!)
-And your are done!!
TA-DA
-OPTIONAL STEP: you can add a color-fill layer, to smoothen the look or just
for fun :DD; create a new layer above, fill with #fce4c3 set as Soft light 20%.
It's up to you.
what do you think?? Questions?? suggestions? comments??? anything??
you are free to FRiend ME :) <3;
i'm dying to see your results :D
COmments are Love!
Tips/facts:
+Doesn't work with every image,plz try out different images :D ♥
+can change some settings, but do n0t make a lot of changes to them.
+ my RESOURCES PAGE
MY OTHER TUTORIALS [ check them out ;)]
Other icons made with this Tutorial!