tut2
Never ask for tutorial suggestions unless you're up for doing ten zillion of them, man. I'm going to do a post linking them over at icon_crack when I'm finished, but for now I'm just posting them here.
blessed_beast asked for a tutorial of an icon similar to this:

(which I made like ten trillion years ago!)
So. Tutorial #2 for this icon: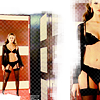
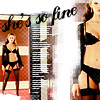
(I use PSP8)
I tried to recreate a similar-ish icon using these caps
http://i2.photobucket.com/albums/y15/zoiciteicons2/tutorial2/phase-one001.jpg
http://i2.photobucket.com/albums/y15/zoiciteicons2/tutorial2/phase-one002.jpg
I cropped the caps to get this:
http://i2.photobucket.com/albums/y15/zoiciteicons2/tutorial2/tutb.png
http://i2.photobucket.com/albums/y15/zoiciteicons2/tutorial2/tuta.png
duplicate each one twice, set one layer to screen and the one on top of that to soft light. Between the layer set to screen and the soft light layer is a light yellow orange-ish layer set to darken. I then merged and resized the two images to 100x100:
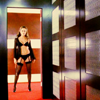
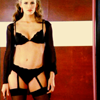
Next I duplicated each base and sharpened them ending up with this:


I then opened a 100x100 white canvase and positioned the two bases, cutting off the bits I didn't want. I ended up with this:

I then started erasing parts of the images. To do this I chose the eraser tool and then in the drop down I chose these brushes (i have no idea who made these. If it was you, please let me know!):

I erased parts of the two images using my brush shaped erasers until I ended up with this:
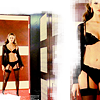
I added this great old brush from saava,

decreased the opacity to 20% and erased the areas that covered sydney.

Finally I added some lame text and a tiny text brush. The text is Landliebe, color: black
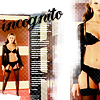

and that's it! pretty easy! If you have any questions on any of the steps, feel free to ask! :D
blessed_beast asked for a tutorial of an icon similar to this:
(which I made like ten trillion years ago!)
So. Tutorial #2 for this icon:
(I use PSP8)
I tried to recreate a similar-ish icon using these caps
http://i2.photobucket.com/albums/y15/zoiciteicons2/tutorial2/phase-one001.jpg
http://i2.photobucket.com/albums/y15/zoiciteicons2/tutorial2/phase-one002.jpg
I cropped the caps to get this:
http://i2.photobucket.com/albums/y15/zoiciteicons2/tutorial2/tutb.png
http://i2.photobucket.com/albums/y15/zoiciteicons2/tutorial2/tuta.png
duplicate each one twice, set one layer to screen and the one on top of that to soft light. Between the layer set to screen and the soft light layer is a light yellow orange-ish layer set to darken. I then merged and resized the two images to 100x100:
Next I duplicated each base and sharpened them ending up with this:
I then opened a 100x100 white canvase and positioned the two bases, cutting off the bits I didn't want. I ended up with this:
I then started erasing parts of the images. To do this I chose the eraser tool and then in the drop down I chose these brushes (i have no idea who made these. If it was you, please let me know!):
I erased parts of the two images using my brush shaped erasers until I ended up with this:
I added this great old brush from saava,
decreased the opacity to 20% and erased the areas that covered sydney.
Finally I added some lame text and a tiny text brush. The text is Landliebe, color: black
and that's it! pretty easy! If you have any questions on any of the steps, feel free to ask! :D