ICON TUTORIAL
At last!! i have some time to post this OLD tutorial!! U__U yeah,
Hope you like it! and try it!! :D
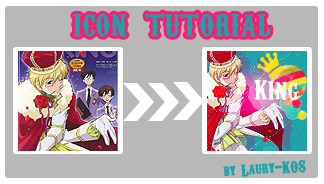
-made with Photoshop CS2
-selective color used
-image heavy(..maybe)
-First of all, took my Tamaki-"king" image, and with out resizing it, yet,
i started to cut the Tamaki figure to place it on the icon base later on.
-To crop the image. You can used, either the "pen tool" or the "layer maks";
for my Tamaki image , i used the "pen tool" for a quick look, you can use as you like :D.
-Create a new image file>new(ctrl+n) , mine is 100x100.
-Fill with #3a9f90
-Paste your cropped image(Tamaki image) ,and resized as you like
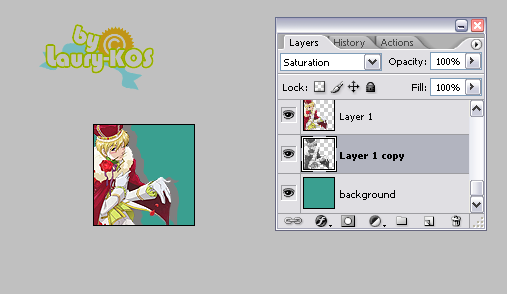
-Duplicate your "tamaki image"
-Look carefully this is the tricky part!. Put your copy layer on the buttom,
then, desarute it, image>adjustments>desaturate(ctrl+shift+u),set as Saturation 100%
-Now ,move a little to the side your Saturation image, to make it look like
a shadow,like this:
-To the coloring.., create a new Selective color layer(layer>new adjustment layer>selective color), with this settings:
RED
cyans -100
magentas +71
yellows +64
black +34
YELLOWS
cyans 0
magentas 0
yellows -60
black 0
NEUTRALS
cyans 0
magentas 0
yellows 0
black +10
BLACKS
cyans 0
magentas 0
yellows 0
black +30
Method: Relative
-An other selective Layer(layer>new adjustment layer>selective color):
RED
cyans -100
magentas 0
yellows +100
black +100
YELLOWS
cyans -7
magentas 0
yellows -25
black 0
MAGENTAS
cyans -100
magentas -55
yellows -11
black 0
NEUTRALS
cyans +100
magentas -25
yellows -80
black +30
Method: Relative
-(optional)I Erased on the "selective color layer mask" some part of Tamaki's
red outfit,cuz i wanted to keep it a bit red:
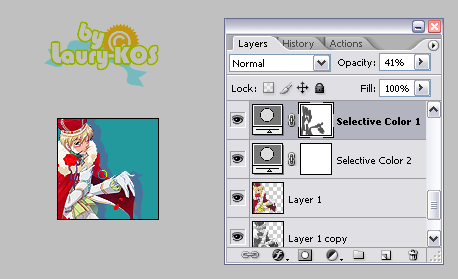
We are done with the coloring!, now lets do the decoration ;D
-With the "ellipthical marquee tool" I cropped some circle shapes from this two textures,
paste them where you like the most.
-Beacuase i dont want the textures colors to be alter ,i put them above the selective color layers.
-To match the textures,i made a little crown shape #f5d609,with the "custom shape tool"(u)
i move it a little bit crtl+t) to fit the texture circle.
-I created a new layer just above my Tamaki image,below the selective color layers!;
made an other little crown #7f7f7f(to match Tamaki's shadow), i move it a little bit (crtl+t) to make like a shadow for the first crown.
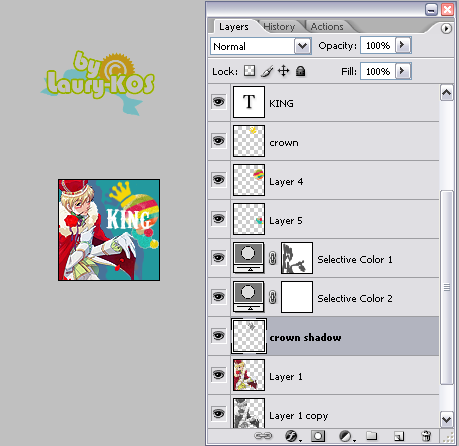
-I added some text above the textures, 'king' with "carnivalee freakshow" font.
-PAste this texture screen 100%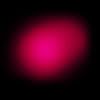
-Paste this other texture,screen 100%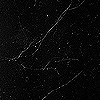
-Add a "hue/saturation" layer, Master saturation +13
-and you are done!! :D Ta-da!
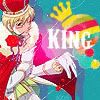
Tips;
Be creative!!,have fun with the textures and shapes,but be careful with the colors! ;D
what do you think?? Questions?? suggestions? comments??? anything??
you are free to FRiend ME :) <3;
i'm dying to see your results :D
COmments are Love!
MY OTHER TUTORIALS [ check them out ;)]


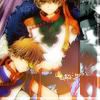
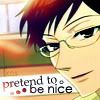


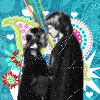
Other icons made with this Tutorial!

Hope you like it! and try it!! :D

-made with Photoshop CS2
-selective color used
-image heavy(..maybe)
-First of all, took my Tamaki-"king" image, and with out resizing it, yet,
i started to cut the Tamaki figure to place it on the icon base later on.
-To crop the image. You can used, either the "pen tool" or the "layer maks";
for my Tamaki image , i used the "pen tool" for a quick look, you can use as you like :D.
-Create a new image file>new(ctrl+n) , mine is 100x100.
-Fill with #3a9f90
-Paste your cropped image(Tamaki image) ,and resized as you like
-Duplicate your "tamaki image"
-Look carefully this is the tricky part!. Put your copy layer on the buttom,
then, desarute it, image>adjustments>desaturate(ctrl+shift+u),set as Saturation 100%
-Now ,move a little to the side your Saturation image, to make it look like
a shadow,like this:

-To the coloring.., create a new Selective color layer(layer>new adjustment layer>selective color), with this settings:
RED
cyans -100
magentas +71
yellows +64
black +34
YELLOWS
cyans 0
magentas 0
yellows -60
black 0
NEUTRALS
cyans 0
magentas 0
yellows 0
black +10
BLACKS
cyans 0
magentas 0
yellows 0
black +30
Method: Relative
-An other selective Layer(layer>new adjustment layer>selective color):
RED
cyans -100
magentas 0
yellows +100
black +100
YELLOWS
cyans -7
magentas 0
yellows -25
black 0
MAGENTAS
cyans -100
magentas -55
yellows -11
black 0
NEUTRALS
cyans +100
magentas -25
yellows -80
black +30
Method: Relative
-(optional)I Erased on the "selective color layer mask" some part of Tamaki's
red outfit,cuz i wanted to keep it a bit red:

We are done with the coloring!, now lets do the decoration ;D
-With the "ellipthical marquee tool" I cropped some circle shapes from this two textures,
paste them where you like the most.
-Beacuase i dont want the textures colors to be alter ,i put them above the selective color layers.
-To match the textures,i made a little crown shape #f5d609,with the "custom shape tool"(u)
i move it a little bit crtl+t) to fit the texture circle.
-I created a new layer just above my Tamaki image,below the selective color layers!;
made an other little crown #7f7f7f(to match Tamaki's shadow), i move it a little bit (crtl+t) to make like a shadow for the first crown.

-I added some text above the textures, 'king' with "carnivalee freakshow" font.
-PAste this texture screen 100%

-Paste this other texture,screen 100%

-Add a "hue/saturation" layer, Master saturation +13
-and you are done!! :D Ta-da!
Tips;
Be creative!!,have fun with the textures and shapes,but be careful with the colors! ;D
what do you think?? Questions?? suggestions? comments??? anything??
you are free to FRiend ME :) <3;
i'm dying to see your results :D
COmments are Love!
MY OTHER TUTORIALS [ check them out ;)]
Other icons made with this Tutorial!